Flashing OpenWrt ubootmod on Zyxel EX5601-t1 (T-56 Odido) (NO SERIAL)
It's relatively safe and easy to flash OpenWrt if you follow the instructions.
Please check your current firmware version and make sure not to connect the WAN cable to prevent it from updating.
New update as of October 2025 on flashing the new firmwares by Odido
- V5.70(ACEA.0)T56C_b10_0122
- V5.70(ACEA.0)T56C_b10_0410
The supervisor password is encrypted in the recent firmwares released by Odido.
If you have a diffferent firmware(older) than you don't have to follow step 1 of his guide as we already know the supervisor password.
@carlicious has found a way to gain root access without the supervisor account.
If your device is running one of the recent firmwares, then follow step 1 of his post. After gaining access to the root password, you can follow my guide to flash ubootmod starting from the section linked below
SSH root@192.168.1.1 and flashing FIP
All firmware versions are possible to be flashed except for:
* V5.70(ACEA.0)T56C_b10_0122
* V5.70(ACEA.0)T56C_b10_0410
This list will grow in the future as Odido will be rolling out new firmware updates to prevent us from being able to flash OpenWrt.
My own device running that firmware got bricked, but it was my fault. It might still be possible to flash OpenWrt on it, but i strongly don't recommend it as you won't be able to recover if it gets bricked.
On all older versions you can recover over the Serial port using mtk_uartboot if it gets bricked.
If you have any questions please don't hesitate to ask them here or you can also send me a pm. They will be answered asap.
This procedure does not include backing up the stock Odido firmware.
This guide below is how you can return to Odido firmware, it also includes all the required files, so you don't have to worry about not making a backup.
DOWNLOAD FILES :
The files are available on the OpenWrt website.
You will need the ubootmod files for EX5601-T0 (except zyxel_ex5601-t0-ubootmod-initramfs-factory.ubi, as it is not needed).
I will also provide them all with a direct download link below. (The download links are for release 24.10.0)
zyxel_ex5601-t0-ubootmod-squashfs-sysupgrade.itb
zyxel_ex5601-t0-ubootmod-preloader.bin
zyxel_ex5601-t0-ubootmod-initramfs-recovery.itb
zyxel_ex5601-t0-ubootmod-bl31-uboot.fip
kmod-mtd-rw_6.6.73.2021.02.28~e8776739-r1_aarch64_cortex-a53.ipk
Important before flashing
Make sure you're connected to LAN2 (1 Gbps LAN port)
You will need to set up a TFTP-server and adjust your network adapter to have a static IPv4-address instead of DHCP
You will need to rename openwrt-24.10.0-mediatek-filogic-zyxel_ex5601-t0-ubootmod-initramfs-recovery.itb to exclude the release version.
IPv4-address 192.168.1.254
Subnet mask 255.255.255.0
Turn off Windows Firewall and make sure the file is renamed to "openwrt-mediatek-filogic-zyxel_ex5601-t0-ubootmod-initramfs-recovery.itb" and is available in the TFTP folder.
In my case its "C:\OpenTFTPServer\openwrt-mediatek-filogic-zyxel_ex5601-t0-ubootmod-initramfs-recovery.itb"

Turn on your router, connect to its LAN2 port, don't connect WAN.
Login
Login with username :
supervisor
Default password for supervisor is :
:Uo1=8mR~`f.t?;MVsfk&e;u!L|;'4
If the password is incorrect, you first have to factory reset your router. You can do this by logging in as admin or holding reset button, don't connect it to WAN

Once you have logged in head over to Maintenance and SP Domain
SP Domain
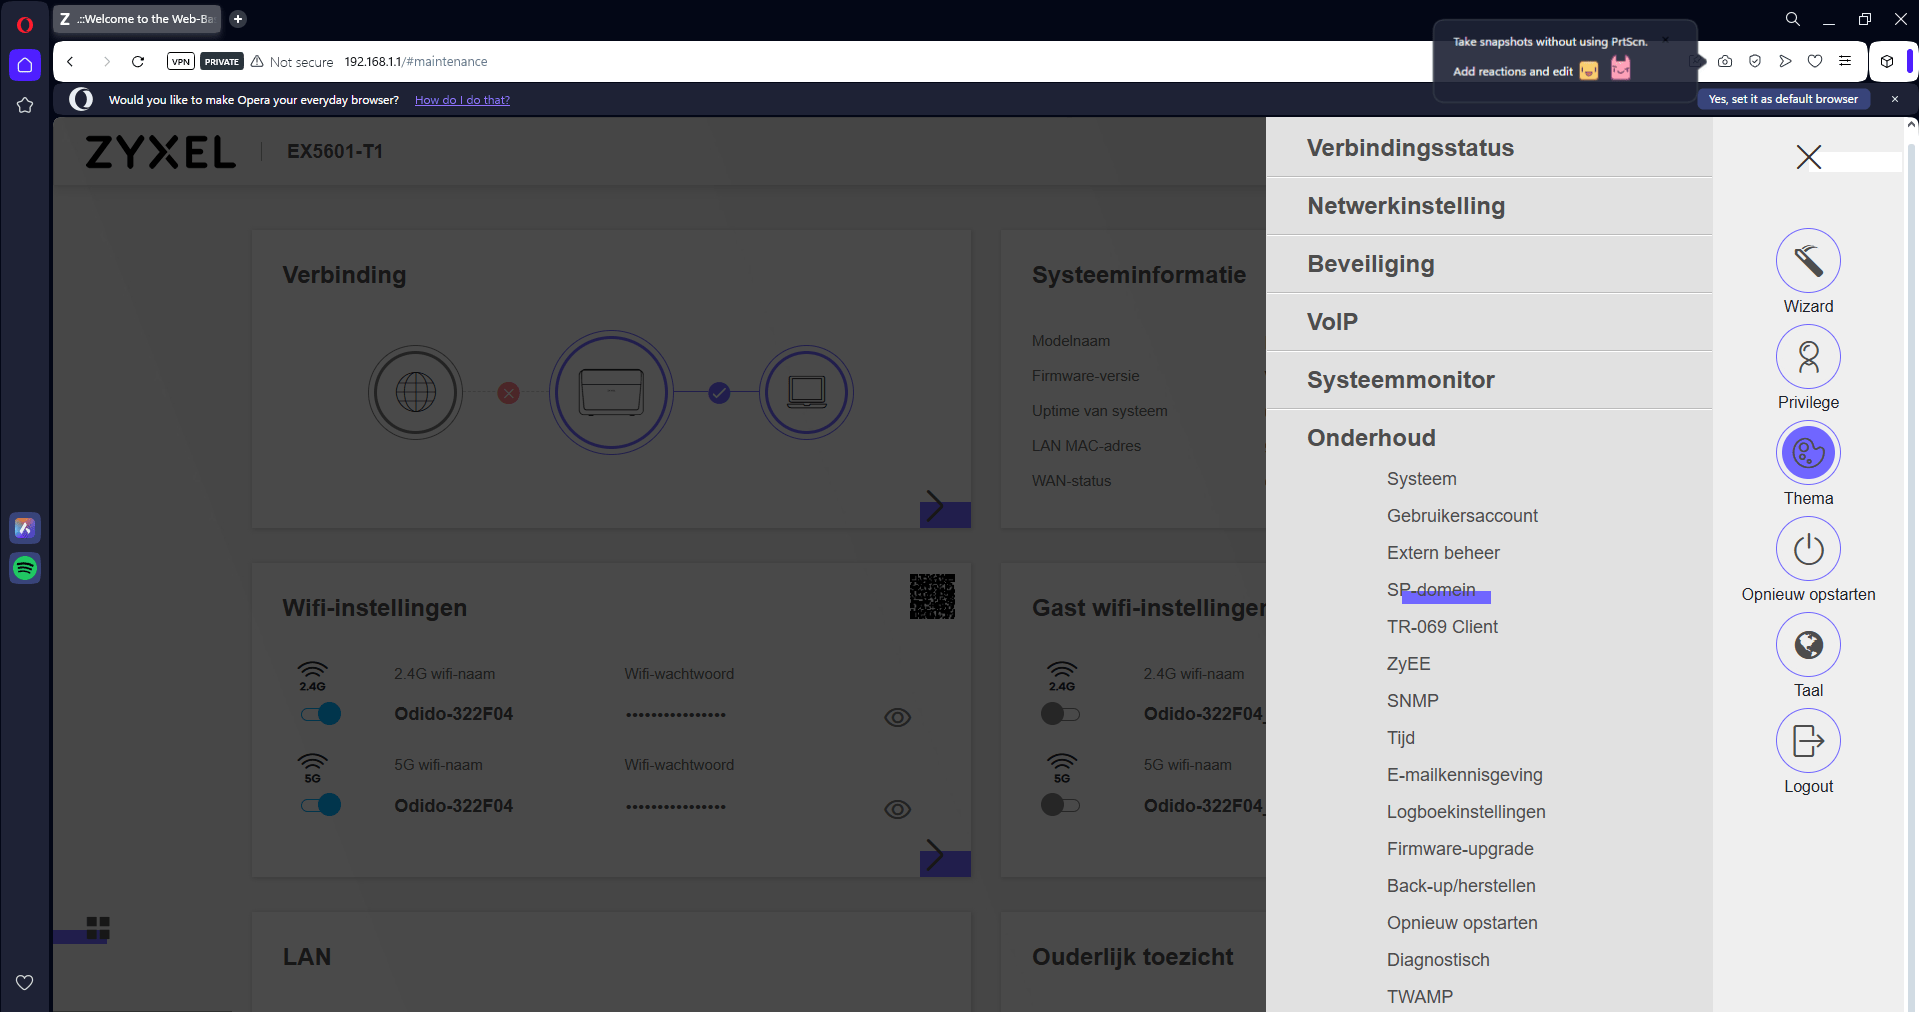
Check everything and apply

In the 2nd tab replace the ip to 192.168.1.0/24

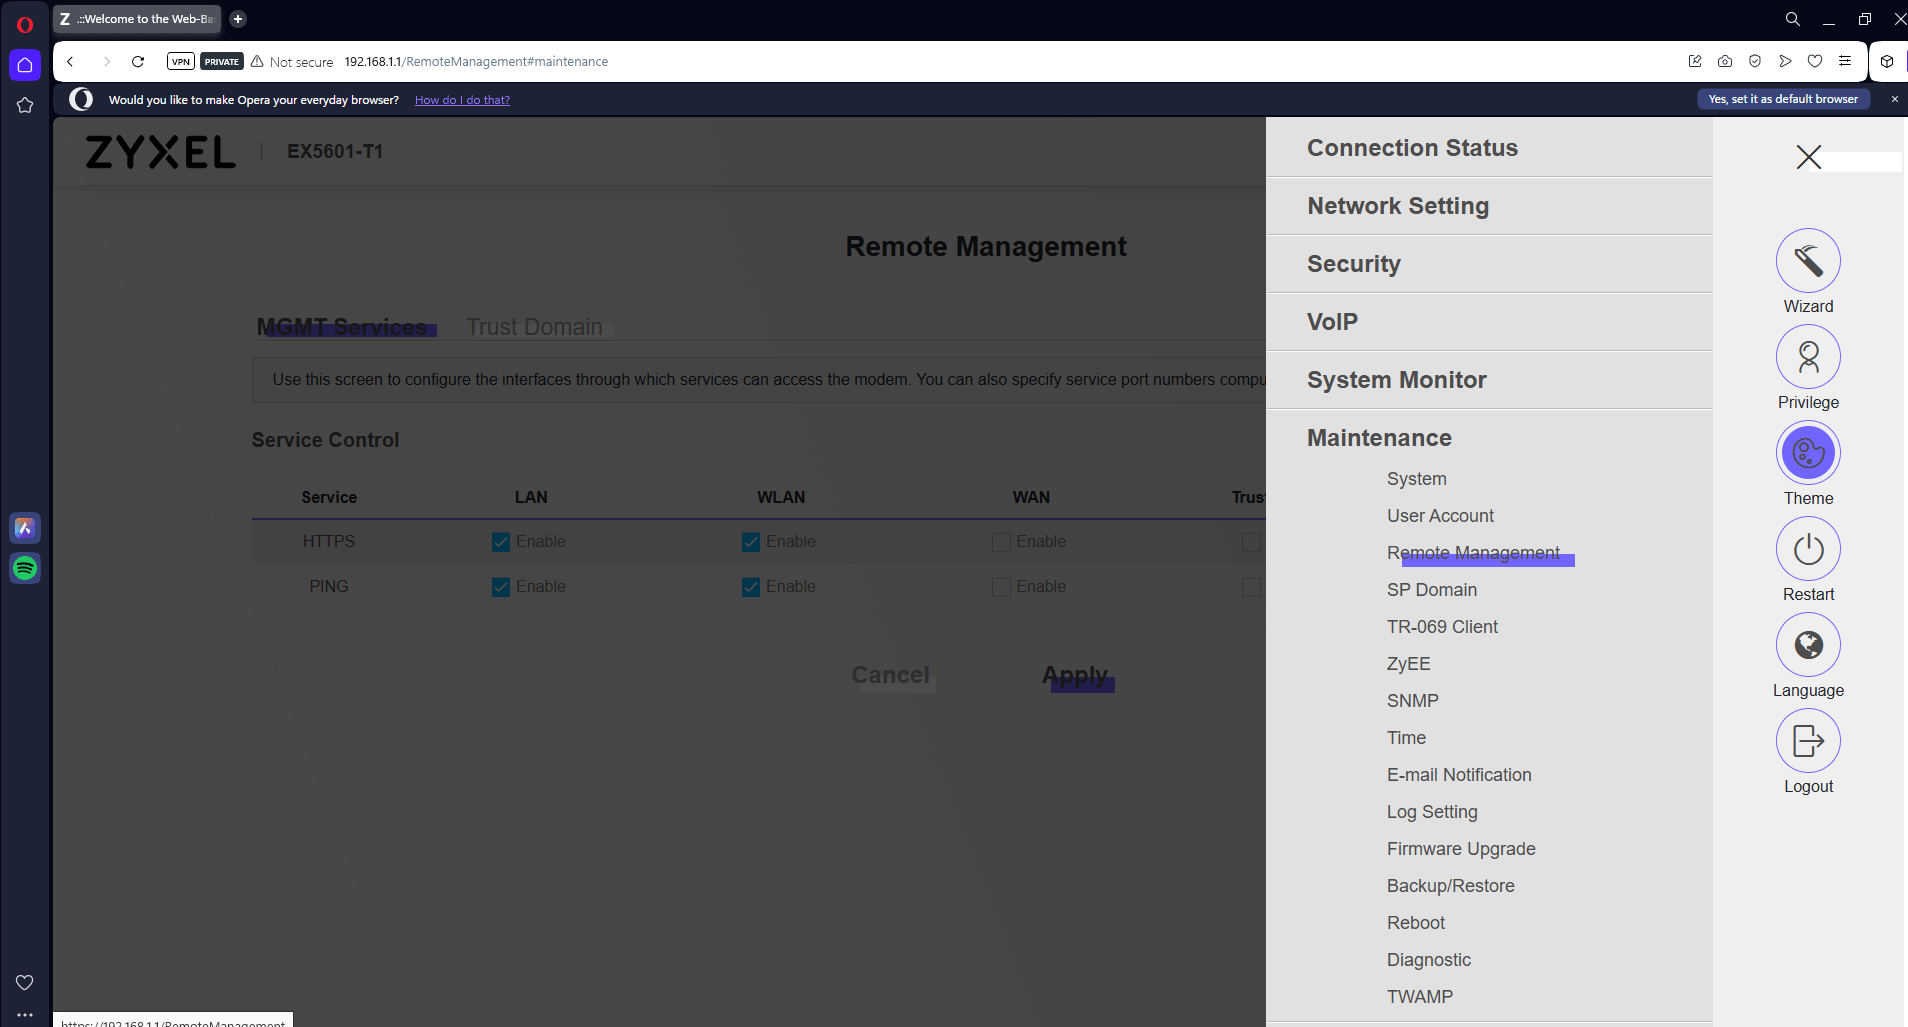
Remote Management
Open the Maintenance tab in the menu and click on Remote Management
Click on F12 to open DevTools or right click with mouse anywhere on page and hit inspect element.

Open the "Sources" tab and on the left side find app.maintenance.js, right click on it and select override content -
(top > 192.168.1.1 > static > js > app.maintenance.js) is the tree

Use CTRL + F to Search for FindAndRemove
At the 1st search result you will find
       fnSuccess: function(t)
      (n.$store.state.guiFlag.ABPY_GUI_Customization || n.$store.state.guiFlag.ACDW_GUI_Customization) && n.findAndRemove(t.Object, "Name", "HTTP"),
      (n.$store.state.guiFlag.ABQA_GUI_Customization || n.$store.state.guiFlag.ABYY_GUI_Customization || n.$store.state.guiFlag.ACBF_GUI_Customization) && n.findAndRemove(t.Object, "Name", "SNMP"),
      n.$store.state.guiFlag.ABPY_GUI_Customization && (n.findAndRemove(t.Object, "Name", "FTP"),
      n.findAndRemove(t.Object, "Name", "TELNET"),
       n.findAndRemove(t.Object, "Name", "SSH"),
        n.findAndRemove(t.Object, "Name", "SNMP")),
        n.$store.state.guiFlag.STARRY_GUI_Customization && n.findAndRemove(t.Object, "Name", "SSH"),
         n.$store.state.guiFlag.ACDW_GUI_Customization && "supervisor" != localStorage.getItem("loginAccount") && (n.findAndRemove(t.Object, "Name", "TELNET"),
          n.findAndRemove(t.Object, "Name", "SSH")),
          n.$store.state.guiFlag.hideFTP && n.findAndRemove(t.Object, "Name", "FTP"),
          n.servicesList = t.Object,
           n.initialChecckBox()
                          },
So basically just remove the names of the protocols here, and leave it blank. For example "HTTP" will be ""
After you have changed it for all of them. Hit CTRL + S to save and you should see app.maintenance.js with a purple circle in the icon and the tab will be Overrides instead of Page.

Now head back to the router page and refresh with F5.
Enable everything here for LAN, WLAN and Trust Domain

Open the Trust Domain tab and add 192.168.1.0/24 as a Trust Domain

SSH
Connect to 192.168.1.1 by ssh with username supervisor

Accept the certficiate and copy and paste the password
:Uo1=8mR~`f.t?;MVsfk&e;u!L|;'4

Enter the command
sys atsh
Here you will have to copy your First MAC Address and enter it in the next command followed by a 0 and a 1.
sys atwz (mac) 0 1
now for the root password enter the following command (the root password is called supervisor password)
sys atck

SSH root@192.168.1.1 and flashing FIP
Login as root with the password you received from before.

Now we have to overwrite the current FIP with the ubootmod version.
The FIP will have the correct details for the partition layout and will forever try to TFTP boot "openwrt-mediatek-filogic-zyxel_ex5601-t0-ubootmod-initramfs-recovery.itb" after restarting.
now transfer following file to /tmp folder. (I use WinSCP and file protocol SCP)
"openwrt-24.10.0-mediatek-filogic-zyxel_ex5601-t0-ubootmod-bl31-uboot.fip"
now enter the following command to flash the new FIP .
mtd write /tmp/openwrt-24.10.0-mediatek-filogic-zyxel_ex5601-t0-ubootmod-bl31-uboot.fip FIP
Now you can reboot the router. Make sure your TFTP-server is on.


Router booting in recovery mode and flashing firmware
Username: root
Password: (blank)

Connect with SSH and transfer all downloaded files to /tmp folder.
kmod-mtd-rw_6.6.73.2021.02.28~e8776739-r1_aarch64_cortex-a53.ipk
openwrt-24.10.0-mediatek-filogic-zyxel_ex5601-t0-ubootmod-bl31-uboot.fip
openwrt-24.10.0-mediatek-filogic-zyxel_ex5601-t0-ubootmod-initramfs-recovery.itb
openwrt-24.10.0-mediatek-filogic-zyxel_ex5601-t0-ubootmod-preloader.bin
openwrt-24.10.0-mediatek-filogic-zyxel_ex5601-t0-ubootmod-squashfs-sysupgrade.itb

install and load the kmod-mtd-rw
opkg install /tmp/kmod-mtd-rw_6.6.73.2021.02.28~e8776739-r1_aarch64_cortex-a53.ipk
insmod mtd-rw i_want_a_brick=1
Flash the firmware
ubidetach -p /dev/mtd5; ubiformat /dev/mtd5 -y; ubiattach -p /dev/mtd5
ubimkvol /dev/ubi0 -n 0 -N ubootenv -s 128KiB
ubimkvol /dev/ubi0 -n 1 -N ubootenv2 -s 128KiB
ubimkvol /dev/ubi0 -n 2 -N recovery -s 10MiB
ubiupdatevol /dev/ubi0_2 /tmp/openwrt-24.10.0-mediatek-filogic-zyxel_ex5601-t0-ubootmod-initramfs-recovery.itb
mtd write /tmp/openwrt-24.10.0-mediatek-filogic-zyxel_ex5601-t0-ubootmod-preloader.bin bl2
mtd write /tmp/openwrt-24.10.0-mediatek-filogic-zyxel_ex5601-t0-ubootmod-bl31-uboot.fip fip
sysupgrade -n /tmp/openwrt-24.10.0-mediatek-filogic-zyxel_ex5601-t0-ubootmod-squashfs-sysupgrade.itb

Your Router wil automatically restart using 192.168.1.1 and the flashing procedure will be done.
You can also remove the static IPv4 settings for your network adapter and select for DHCP (Obtain an IP Address automatically), otherwise you will have problems connecting to the Internet.