I have this router laying around and decided to make a flash upgrade for better use with OpenWRT.
The original flash is an EON EN25Q32(A/B) 4096 kB SPI, replaced to a Winbond W25Q128.V 16384 kB, SPI.
A Raspberry Pi with a SOIC/SOP8 test clip, basic soldering skills and flashrom are needed (https://github.com/stefanct/flashrom.git).
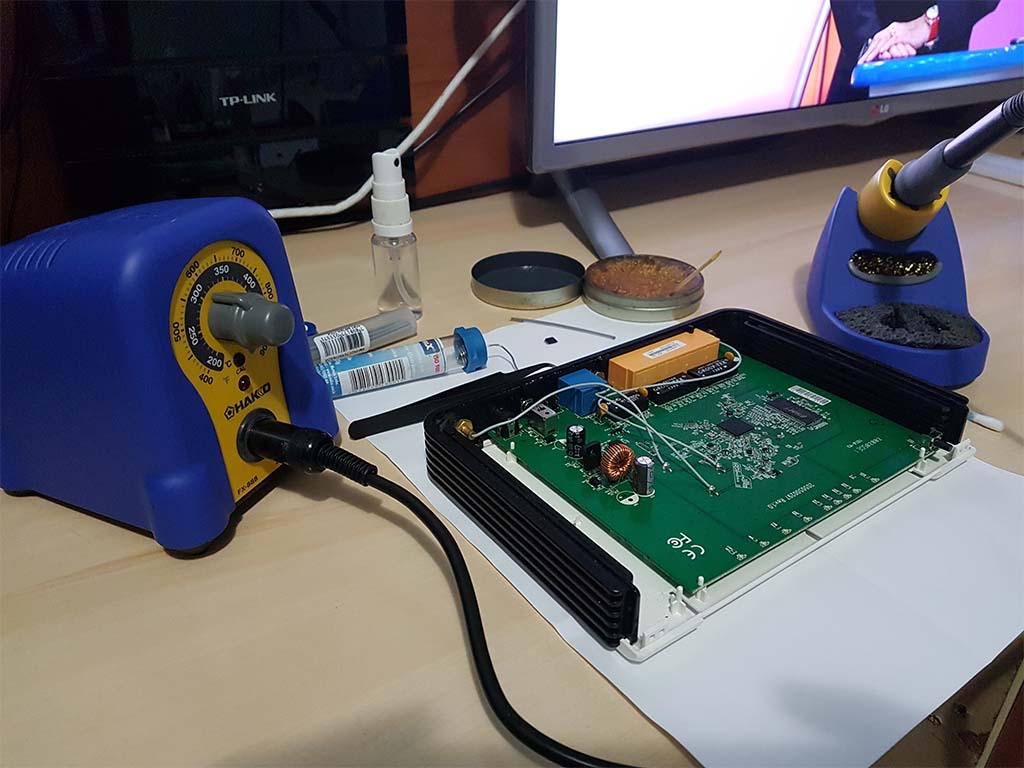
The first step is to desolder the original flash chip from the board and fit it into the test clip. I find it's much easier to deal with it already desoldered from the board. The pinout diagrams for both SPI and Raspberry Pi GPIO are avaiable in this page https://wiki.gentoo.org/wiki/Sakaki's_EFI_Install_Guide/Disabling_the_Intel_Management_Engine, note that /WP and /HOLD pins are not needed in our case.
It's a good advise to make two full dumps and make a md5sum to play safe. If something goes wrong, you can always flash it back to the original state.
flashrom -r fulldump.bin -c "EN25Q32(A/B)" -p linux_spi:dev=/dev/spidev0.0,spispeed=8000
flashrom -r fulldump2.bin -c "EN25Q32(A/B)" -p linux_spi:dev=/dev/spidev0.0,spispeed=8000
md5sum fulldump*
If both hashes are identical you are fine to continue, if not, check your connections until you get two identical hashes.
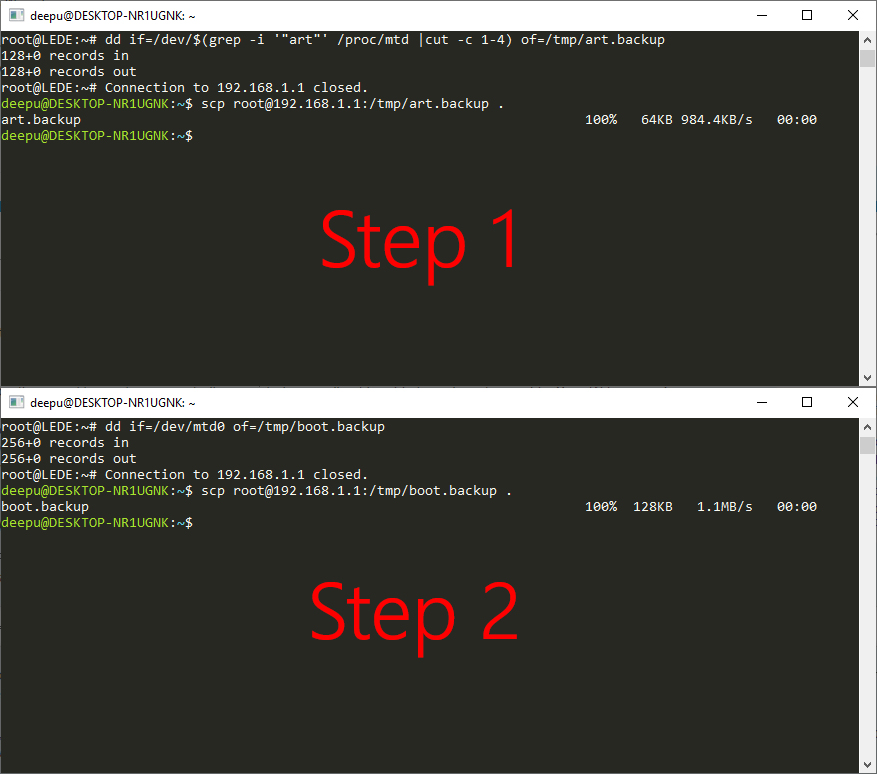
Very important: two partitions from the original dump are needed, original u-boot and art. Their addresses are described in the spi.layout file.
echo -e "000000:01FFFF u-boot\n020000:16940B kernel\n16940C:3EFFFF rootfs\n3A0000:3EFFFF rootfs_data\n020000:3EFFFF firmware\n3F0000:3FFFFF art" > spi.layout
flashrom -r u-boot.bin -c "EN25Q32(A/B)" -l spi.layout -i u-boot -p linux_spi:dev=/dev/spidev0.0,spispeed=8000
flashrom -r art.bin -c "EN25Q32(A/B)" -l spi.layout -i art -p linux_spi:dev=/dev/spidev0.0,spispeed=8000
Download the modified u-boot for the WR841N V8 model, it's compatible with WR941ND V5 and have many advantages over the original u-boot, such as DHCP, u-boot and art upgrade from the recovery mode web server, and support many flash models.
Github page can be found here: https://github.com/pepe2k/u-boot_mod
Download file here: http://projects.dymacz.pl/?dir=u-boot_mod, search for u-boot_mod__tp-link_tl-wr841n_v8__20180223__git_master-7a540a78.bin file.
I'm not going deep into why the next procedures are needed, they are all explained in the the github page shown above, in a nutsheel, they are needed to copy router info from the original u-boot partition such as MAC and model number, and fit in a new 16MB image.
Create a blank 16MB image:
dd if=/dev/zero bs=1M count=16 of=padded.bin
Merge the original and modified u-boot into it:
dd if=u-boot.bin conv=notrunc of=padded.bin
dd if=u-boot_mod__tp-link_tl-wr841n_v8__20180223__git_master-7a540a78.bin conv=notrunc of=padded.bin
Flash it into the new 16MB SPI:
flashrom -w padded.bin -c "W25Q128.V" -p linux_spi:dev=/dev/spidev0.0,spispeed=8000
Now solder it back to the router board.
DHCP should work automatically and router recovery mode web server is now accesible from the gateway address, but if it's not working, set your machine to static IP 192.168.1.2 and gateway 192.168.1.1.
First go to http://192.168.1.1/art.html and send art.bin previously backed up, this procedure is fast and takes just a few seconds, router will automatically reboot again in recovery mode (page is not updated automatically or any message is shown). Now you can send OpenWRT firmware (squashfs sysupgrade) from http://192.168.1.1/ (https://downloads.openwrt.org/releases/18.06.1/targets/ar71xx/tiny/, file openwrt-18.06.1-ar71xx-tiny-tl-wr941nd-v5-squashfs-sysupgrade.bin).
Router now have 11.84mb free memory instead of the few kbs before.
Next steps are RAM upgrade when I find a chip donor and build a proper 16MB image, the latter one is probably more complicated to me.