This HOWTO is intended for the relatively new users who have some experience with general computing and system administration but are not (yet) comfortable with flashing firmware and need some friendly handholding to get through the process. Some potentially necessary general education will be provided along the way.
This HOWTO heavily draws on commit notes by David Bauer and Christian Lamparter. The valid technical details all come from them; the errors, should any be found, are all mine.
Introduction
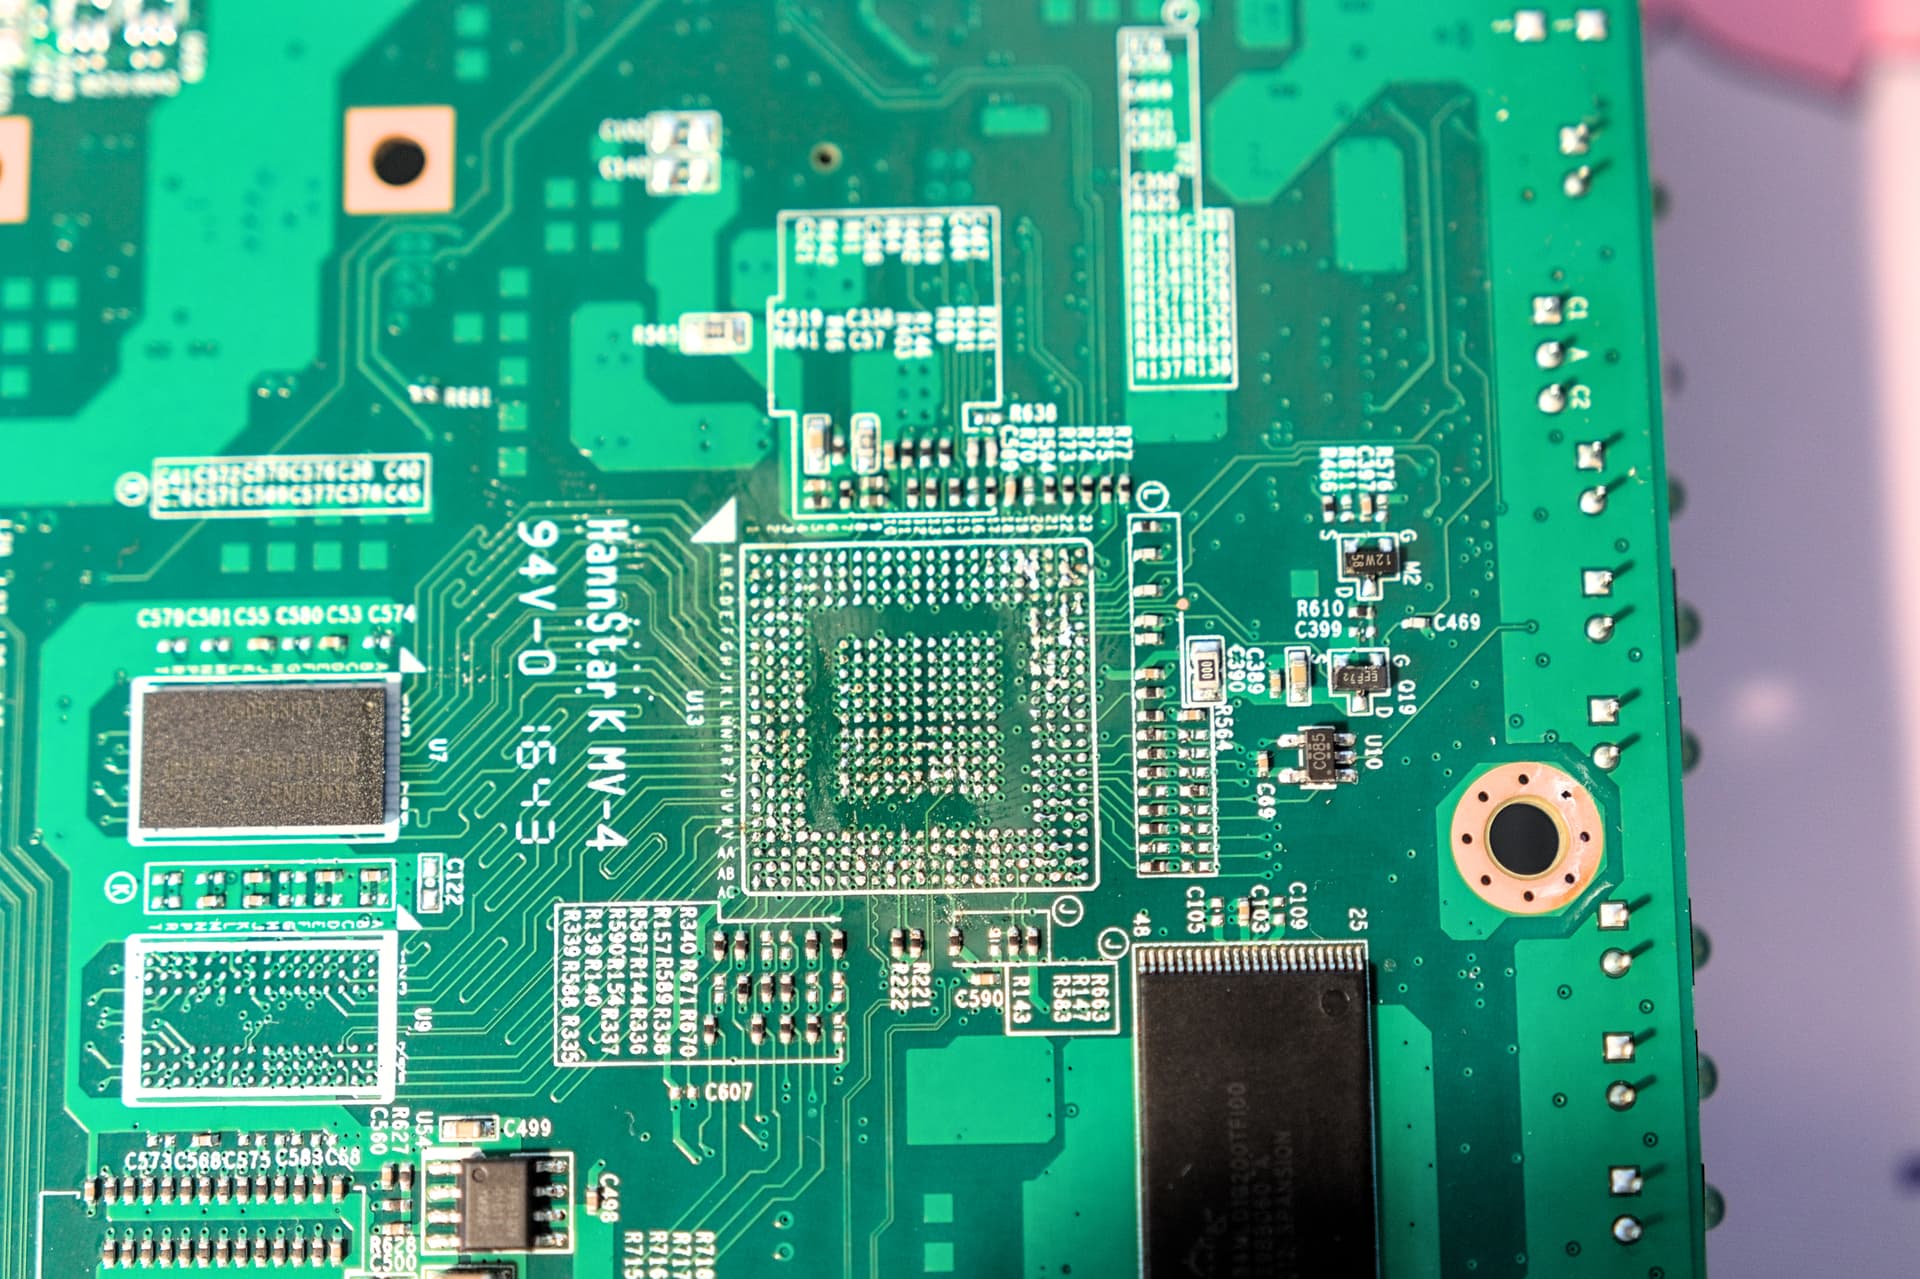
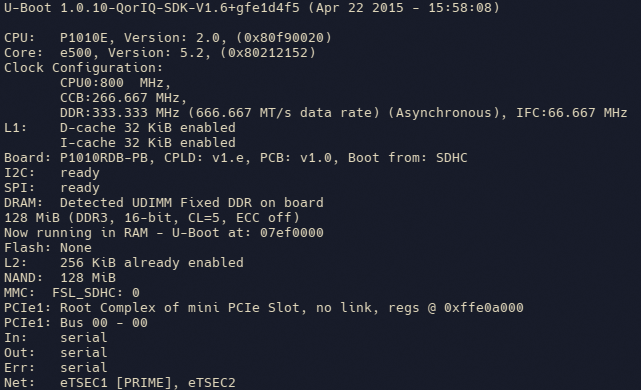
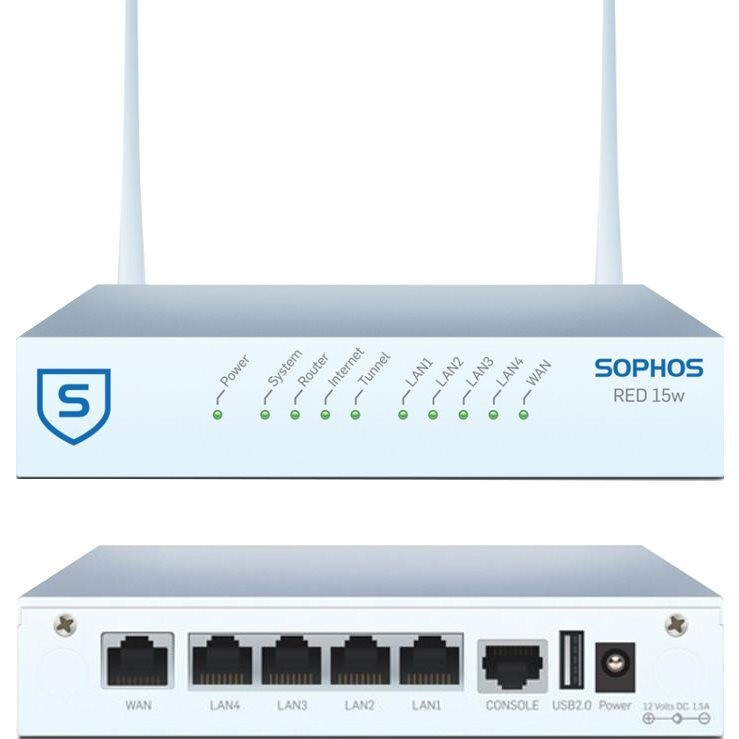
Sophos RED 15w is a compact (6.50 x 5.25 in / 165 x 135 mm) and good-looking legacy device. It runs on a Freescale P1010 processor with 128 MB RAM, 128 MB NAND storage, and Qualcomm Atheros 93xx Wi-Fi card (Wireless-N standard). The passively-cooled device is powered via a 5.5-mm barrel plug and requires a 12V/1.5A power source. The case is stamped steel and appears to be exceptionally sturdy.
In addition to the RED 15w model covered here, there is also the wired-only RED 15 model, for which the installation procedure should be identical.
In the initial performance test with OpenWrt using iperf3, the device clocked in at a modest 450 Mbps. However, with offloading enabled, the throughput increased to the more respectable 750 Mbps.
The device appears to contain a switch that is not transparent to OpenWrt. As a result, OpenWrt detects only two wired ports, eth0 (LAN) and eth1 (WAN). But fear not, all LAN ports are usable. Essentially, OpenWrt operates as if the device had one LAN port with a dumb switch attached to it.
Preparations
To install OpenWrt on a RED 15w, you will need:
- A computer with software capable of console connection (I used
screenon Linux, but you can use Putty on Linux or Windows and probably many other terminal emulation programs), which we will call "administrator's workstation" - A console cable (I used the kind that connects the RJ-45 console port on the device to a USB port on the administrator's workstation)
- An Ethernet cable
- A TFTP server (I used a separate computer, but you can deploy the TFTP server software on your administrator's workstation)
Begin by setting up the TFTP server. Incidentally, TFTP stands for Trivial File Transfer Protocol. It is a simple, no-frills (and no-security) way for one machine to share files with another. A typical use case for TFTP is network boot, often used by thin clients and, occasionally, by fat servers. We'll use TFTP to boot our device into OpenWrt.
On most Linux flavors, spinning up a TFTP server involves a one-line command to the package manager and a glance at the newly created configuration file. My designated TFTP server is an Ubuntu Server 22.04, so I elevated to root and installed the TFTP server software:
apt install tftpd-hpa
When installation is complete, you can check how your new TFTP server is doing:
systemctl status tftpd-hpa
Next, take a look at your TFTP configuration file. Use your favorite text editor to open it; the example below uses nano:
nano /etc/default/tftpd-hpa
Find the line that starts with TFTP_DIRECTORY; this is where you will need to put files that you want to be accessible via TFTP. (In my case, it was /srv/tftp.) Write it down for future reference.
Next, change your network settings so that the Ethernet port servicing the TFTP server has a fixed IP address, 192.168.1.2. Your device will look for files to use at boot at this IP address. In my case, this was accomplished by editing the Netplan configuration file, which resides at:
/etc/netplan/00-installer-config.yaml
In your case... check your OS documentation.
Next, change to the TFTP files directory you identified earlier and wrote down for future reference:
cd /srv/tftp
and download the initial boot file for the RED 15w. To download current firmware, go to the OpenWrt downloads site:
https://downloads.openwrt.org/
Click on the link in the Stable Release section (as of this writing, it is 23.05.2). This will take you to the targets page (in the OpenWrt parlance, a "target" is a type of hardware for which firmware is intended; OpenWrt is available for dozens of targets). Today, we are interested in the mpc85xx target, so click on the mpc85xx link, then on the p1010 link. Find the file sophos_red-15w-rev1-initramfs-kernel.bin and download it to your TFTP server. The easiest way to do that is to copy its URL to clipboard and then paste it into the terminal accessing the TFTP server after manually typing wget. In my case, I ended up with
wget https://downloads.openwrt.org/releases/23.05.2/targets/mpc85xx/p1010/openwrt-23.05.2-mpc85xx-p1010-sophos_red-15w-rev1-initramfs-kernel.bin
When you have the file downloaded, give it a shorter name. I used red15w.bin.
Leave the browser window open; you will need another URL from it fairly soon.
Before booting the device
Make sure you have the following in place:
- The device is off (there's no power switch on it, so plug the power supply into the wall, but don't plug it into the device yet)
- The device's WAN port is connected to the TFTP server
- The device's Console port is connected to the administrator's workstation
Next, start a console connection at 115200 bps on the administrator's workstation. In my case, this was done on the command line:
sudo screen /dev/ttyUSB0 115200
Now plug the device in. Be sure to start watching the console output immediately.
First boot
A few seconds after the device turns on, there will be a message telling you that you can press any key to stop the boot. Press Enter when you see the message.
Initially, I had a problem at this stage; the device appeared to ignore my efforts to stop the boot. What saved the day was patience. I let the device start up all the way with stock firmware. After the boot completed, the device, not finding itself in the surroundings it expected (those were defined by the prior owner using centralized management), restarted. Only after that restart was I able to stop the boot process. Somehow, it appeared that the device was more willing to listen to keyboard inputs on a warm reboot than it did on the cold boot...
When you successfully interrupted the boot process, you will see a command prompt that looks like this:
>
Time to push some keys... First, change a few environment variables:
setenv bootargs_owrt "setenv bootargs console=ttyS0,115200"
setenv bootcmd "run bootargs_owrt;
  nand read 0x1000000 0x300000 0x800000;
  bootm 0x1000000;"
saveenv
Now boot OpenWrt initial image:
run bootargs_owrt; tftpboot 0x1000000 192.168.1.2:red15w.bin; bootm 0x1000000;
At this point, you have the option of backing up the stock firmware. But since the device is out of support with the manufacturer and I was not the original owner, I saw no value in that (OpenWrt or bust!) and proceeded straight to the next step.
Reformat the storage device for use by OpenWrt:
ubiformat /dev/mtd4 -y
At this point, you can disconnect your device's WAN port from the TFTP server and connect it to an upstream device; your device should be able to access the Internet now. So switch the cables around and check your connectivity:
ping -c 3 goo.gl
If you have the Internet connection, perform system upgrade. Remember we left a browser window open on the OpenWrt download site? Go there and find an upgrade file (sophos_red-15w-rev1-squashfs-sysupgrade.bin). Copy its full URL to the clipboard, return to the command line, type sysupgrade, and paste the URL:
sysupgrade https://downloads.openwrt.org/releases/23.05.2/targets/mpc85xx/p1010/openwrt-23.05.2-mpc85xx-p1010-sophos_red-15w-rev1-squashfs-sysupgrade.bin
The device will download the full firmware, install it, and reboot.
Second boot
Now you have OpenWrt firmware installed on your device. Set the password (use the passwd command), connect your computer to one of the LAN ports, and try logging in at https://192.168.1.1/ using login name root and the password you just set.
Note that at this stage, your device does not have any configuration information for its wireless subsystem, so navigate to Network >> Wireless and set up wireless networking as you would on any other device running OpenWrt. The wireless configuration process is not specific to RED 15w; numerous online tutorials on this topic are available.
Also, as mentioned earlier, I suggest enabling offloading to improve the device's performance. To do that, navigate to Network >> Firewall. Check the Software flow offloading checkbox. After you do that, the Hardware flow offloading checkbox will appear; check that as well. Then, scroll to the bottom of the page and click Save & Apply.