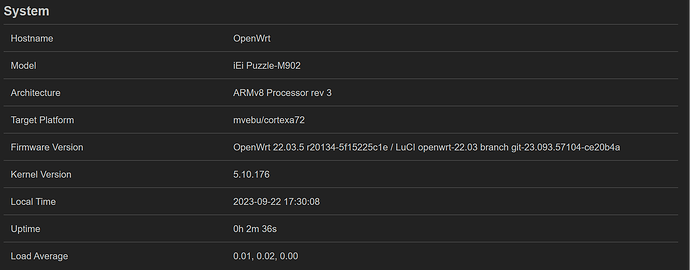
Hello everyone! ![]()
I have successfully managed to install OpenWrt on my Qnap QHora-322 and would like to share a guide on how to do it with the community.
0. Prerequisites
- PC with some Linux OS (I used a Laptop with Debian 12)
- USB flash drive
- USB to TTL adapter
- JST PH 2.0 4-pin connector with wires
- RJ45 ethernet cable
- Phillips 2 screwdriver
1. Open the case
Remove all 7 Phillips 2 screws on the underside of the case. There are 4 screws hidden under each rubber foot and 1 under the “warranty void if removed”-sticker.
2. Establish a connection to the serial console
Find the serial console 4-pin socket, named “DBG_CONSOLE”. It is located next to the buzzer.
Plug the JST PH 2.0 4-pin connector into the socket and connect the other ends of the wires to the USB to TTL adapter as follows:
- Pin 1 ----> RX
- Pin 2 --/--> 3.3 V - Do not connect!
- Pin 3 ----> TX
- Pin 4 ----> Ground
Note: Pin 1 is the pin closest to the buzzer, pin 4 is the pin furthest away from the buzzer.
On your PC running Linux, open a terminal and enter the following command:
ls /dev/
Plug the USB to TTL adapter into your PC and execute the command above again to see if a new device appears. For me it was /dev/ttyUSB0.
Enter the following command as root to connect to the serial console:
screen -L /dev/ttyUSB0 115200
Power up the Qnap QHora-322. You should see some output on your screen, that looks something like this:
BootROM - 2.03

Starting CP-0 IOROM 1.07

Booting from SPI NOR flash 1 (0x32)

Found valid image at boot postion 0x000

lNOTICE:  Starting binary extension
NOTICE:  SVC: DEV ID: CN913x, FREQ Mode: 0x6
NOTICE:  SVC: AVS work point changed from 0x2da to 0x2da
mv_ddr: Marvell-devel (release) (Jun 08 2022 - 17:52:54)
SSCG_EN
Synopsys DDR43 PHY Firmware version: A-2017.11
SNPS DDR: 1D training passed
SNPS DDR: 2D training passed
SNPS DDR: training completed
dma memcmp pass
mv_ddr: completed successfully
NOTICE:  Cold boot
[...]
If your output is completely garbled, then try swapping the RX and TX pins. If your output is partially garbled, then verify the wires are firmly connected.
When you reach the line "Hit any key to stop autoboot:", then press the enter key on your keyboard a couple of times to prevent the OS from booting. You will know that it worked, when your prompt looks like this:
Marvell>>
3. Install and prepare a TFTP server
On your PC, open a new terminal and execute the following commands as root, to install a tftp-server:
apt update
apt install tftpd-hpa
Go to https://downloads.openwrt.org/releases/22.03.5/targets/mvebu/cortexa72/ (Replace “22.03.5” with your desired OpenWrt version) and download the iei_puzzle-m902-initramfs-kernel.bin file. Move the file into your TFTP server directory by executing the following commands as root:
cd $your_download_directory
cp openwrt-*-mvebu-cortexa72-iei_puzzle-m902-initramfs-kernel.bin /srv/tftp/.
Connect your PC to RJ45 port number 2 of your Qnap QHora-322 and change the IP address of your PC’s ethernet interface to 192.168.1.2 (netmask 255.255.255.0).
In the serial console enter the following commands:
setenv ipaddr 192.168.1.1
setenv serverip 192.168.1.2
setenv ethact mvpp2-1
ping 192.168.1.2
The last command should give you the following output:
Using mvpp2-1 device
host 192.168.1.2 is alive
4. Boot OpenWrt via tftp
In the serial console enter the following command:
tftpboot 0x6500000 openwrt-22.03.5-mvebu-cortexa72-iei_puzzle-m902-initramfs-kernel.bin
(Replace 22.03.5 with the OpenWrt version you downloaded.)
This should give you the following output:
Using mvpp2-1 device
TFTP from server 192.168.1.2; our IP address is 192.168.1.1
Filename 'openwrt-22.03.5-mvebu-cortexa72-iei_puzzle-m902-initramfs-kernel.bin'.
Load address: 0x6500000
Loading: *#################################################################
	 #################################################################
	 #################################################################
	 #################################################################
	 #################################################################
	 #################################################################
	 #################################################################
	 #################################################################
	 #################################################################
	 #################################################################
	 #################################################################
	 #################################################################
	 #################################################################
	 #################################################################
	 #################################################################
	 #################################################################
	 #################################################################
	 #################################################################
	 #################################################################
	 #################################################################
	 #################################################################
	 #################################################################
	 #################################################################
	 ###############################################
	 3 MiB/s
done
Bytes transferred = 22626312 (1594008 hex)
Now enter the following commands to boot OpenWrt:
ext4load mmc 0:2 0x6000000 cn9132-db-A.dtb
booti 0x6500000 - 0x6000000
The output after the last command should look something like this:
## Flattened Device Tree blob at 06000000
   Booting using the fdt blob at 0x6000000
   Using Device Tree in place at 0000000006000000, end 000000000600db4e

Starting kernel ...

[    0.000000] Booting Linux on physical CPU 0x0000000000 [0x410fd083]
[    0.000000] Linux version 5.10.176 (builder@buildhost) (aarch64-openwrt-linux-musl-gcc (OpenWrt GCC 11.2.0 r20134-5f15225c1e) 11.2.0, GNU ld (GNU Binutils) 2.37) #0 SMP Thu Apr 27 20:28:15 2023
[    0.000000] Machine model: QHora-322
[    0.000000] Zone ranges:
[    0.000000]   DMA      [mem 0x0000000000000000-0x00000000ffffffff]
[    0.000000]   DMA32    empty
[    0.000000]   Normal   [mem 0x0000000100000000-0x000000013fffffff]
[    0.000000] Movable zone start for each node
[...]
When the boot process is finished, you need to press the enter key to activate the console. When you press the enter key, you should get the following output:
BusyBox v1.35.0 (2023-04-27 20:28:15 UTC) built-in shell (ash)

  _______                     ________        __
 |       |.-----.-----.-----.|  |  |  |.----.|  |_
 |   -   ||  _  |  -__|     ||  |  |  ||   _||   _|
 |_______||   __|_____|__|__||________||__|  |____|
          |__| W I R E L E S S   F R E E D O M
 -----------------------------------------------------
 OpenWrt 22.03.5, r20134-5f15225c1e
 -----------------------------------------------------
=== WARNING! =====================================
There is no root password defined on this device!
Use the "passwd" command to set up a new password
in order to prevent unauthorized SSH logins.
--------------------------------------------------
root@OpenWrt:/#
5. Download, extract and write OpenWrt to persistent storage
Go to https://downloads.openwrt.org/releases/22.03.5/targets/mvebu/cortexa72/ (Replace “22.03.5” with your desired OpenWrt version) and download the iei_puzzle-m902-squashfs-sdcard.img.gz file.
Extract the kernel and the root filesystem from the image by executing the following commands on your PC as root:
gzip -d openwrt-*-mvebu-cortexa72-iei_puzzle-m902-squashfs-sdcard.img.gz
newloop=$(losetup -f)
losetup -P $newloop openwrt-*-mvebu-cortexa72-iei_puzzle-m902-squashfs-sdcard.img
dd if=${newloop}p1 of=0.img
dd if=${newloop}p2 of=1.img
losetup -d $newloop
This should put two additional files in your download directory:
- 0.img (This is the kernel)
- 1.img (This is the root filesystem)
Format a USB flash drive with the F2FS file system and copy the two files (0.img and 1.img) onto it.
Unplug the USB flash drive from your PC and plug it into the Qnap QHora-322. On the serial console you should see that OpenWrt detected the USB flash drive:
[ 1428.007066] usb 2-1: new SuperSpeed Gen 1 USB device number 3 using xhci-hcd
[ 1428.037697] usb-storage 2-1:1.0: USB Mass Storage device detected
[ 1428.043944] scsi host0: usb-storage 2-1:1.0
[ 1429.127231] scsi 0:0:0:0: Direct-Access     Kingston DT HyperX 3.0    PMAP PQ: 0 ANSI: 6
[ 1429.135713] sd 0:0:0:0: [sda] 123600896 512-byte logical blocks: (63.3 GB/58.9 GiB)
[ 1429.143497] sd 0:0:0:0: [sda] Write Protect is off
[ 1429.148422] sd 0:0:0:0: [sda] Write cache: disabled, read cache: enabled, doesn't support DPO or FUA
[ 1429.365915]  sda: sda1
[ 1429.368773] sd 0:0:0:0: [sda] Attached SCSI removable disk
Mount the USB flash-drive’s F2FS partition by executing the following commands on the serial console:
mkdir /mnt/USB
mount /dev/sda1 /mnt/USB/
cd /mnt/USB/
Write the images to persistent storage by executing the following commands:
dd if=0.img of=/dev/mmcblk0p1
dd if=1.img of=/dev/mmcblk0p3
6. Adjust bootloader to autoboot OpenWrt
Reboot the router by executing the reboot command in the serial console.
When you reach the line "Hit any key to stop autoboot:", then press the enter key on your keyboard a couple of times to prevent the OS from booting. You will know that it worked, when your prompt looks like this:
Marvell>>
Enter the following commands to change the behavior of the bootloader:
setenv bootcmd 'ext4load mmc 0:1 0x6500000 Image; ext4load mmc 0:1 0x6000000 cn9132-puzzle-m902.dtb; setenv bootargs $console cpuidle.off=1 root=/dev/mmcblk0p3; booti 0x6500000 - 0x6000000'
setenv current_entry 0
saveenv
The last command should give you the following output:
Saving Environment to SPI Flash... SF: Detected mx25l3205d with page size 256 Bytes, erase size 4 KiB, total 4 MiB
Erasing SPI flash...Writing to SPI flash...done
OK
Unplug the Qnap QHora-322 from the power source and plug it back in to check, if OpenWrt is booting automatically.
Done!
If you have any questions, suggestions or corrections, please let me know.
Have a great day! ![]()


