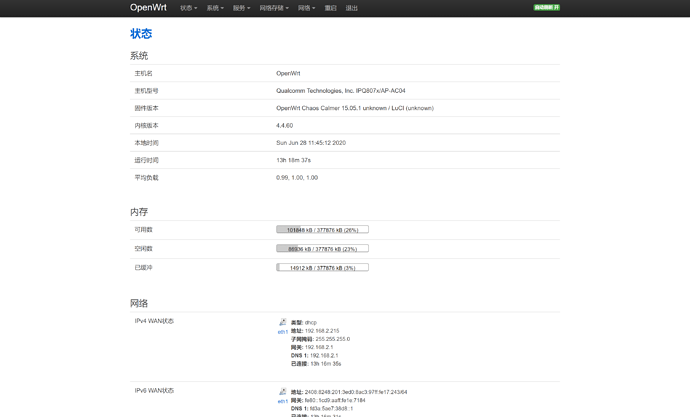
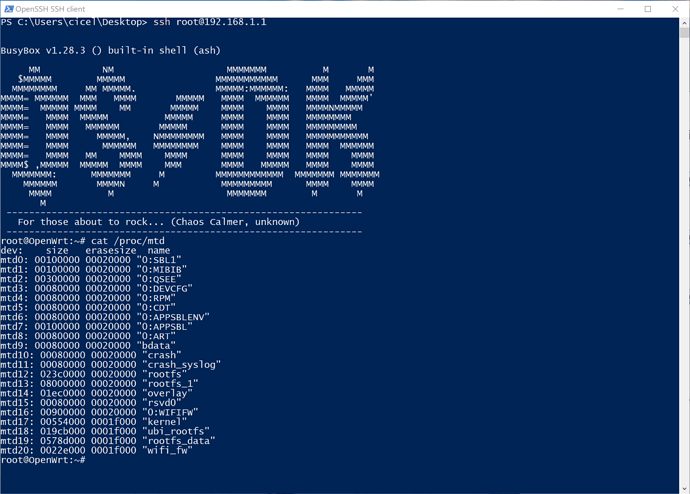
I bought it today. It seems very powerful device. I hope we can start "modding" it soon.
Thank you so much for everyone's brilliant work. Just got mine today, and managed to get into ssh. Had a bit of trouble with some of the instruction above, so thought I'd lay it all out in one post to make it easy for everyone:
First some notes:
- You must download firmware 1.0.17 from here and downgrade your router to it (mine came with 1.0.20 installed).
- To install the firmware you will have to get past the first boot wizard. Use Chrome and the Google Translate extension to interpret everything. You don;t need it plugged into the internet, just pluggin one of the LAN (not WAN) ports into your computer should be sufficient.
-
<PASSWORD>is the password you want to use to log into the with, remember to replace this with a value - The password must be 8+ characters long, and can't contain the words admin or password (eg admin123 won't work). This is because passwd thinks they are too weak.
-
<STOK>replace this with the alphanumeric code that comes up in the address bar after 'stok=' once you've logged in to the router. Note this changed with each log in. - The sed above I couldn't get to work for some reason, so I simplified them a bit to (DO NOT USE IT YET, IT NEEDS ENCODING):
sed -i '/flg_ssh.*release/ { :a; N; /fi/! ba };/return 0/d' /etc/init.d/dropbear
- I used the url encoder here to create all the commands
- The values for
bssid=anduser_id=can be anything, due to using the-has the first command, the command lua wants to run never gets executed
Copy these following urls into notepad or something, and use find and replace to replace <STOK> with the value from your address bar (one of mine was 57784feec2264522e77a5624c5af16e8 to give you an idea on what they look like (remember they change on every login to the router), and replace <PASSWORD> with the password you want to use (this does not need to be the one you gave the router during setup). The command the urls' represent are in BOLD:
nvram set ssh_en=1
http://192.168.31.1/cgi-bin/luci/;stok=<STOK>/api/misystem/set_config_iotdev?bssid=gallifrey&user_id=doctor&ssid=-h%0Anvram%20set%20ssh%5Fen%3D1%0A
nvram commit
http://192.168.31.1/cgi-bin/luci/;stok=<STOK>/api/misystem/set_config_iotdev?bssid=gallifrey&user_id=doctor&ssid=-h%0Anvram%20commit%0A
cp /etc/init.d/dropbear /etc/init.d/dropbear_backup
http://192.168.31.1/cgi-bin/luci/;stok=<STOK>/api/misystem/set_config_iotdev?bssid=gallifrey&user_id=doctor&ssid=-h%0Acp%20%2Fetc%2Finit.d%2Fdropbear%20%2Fetc%2Finit.d%2Fdropbear_backup%0A
sed -i '/flg_ssh.*release/ { :a; N; /fi/! ba };/return 0/d' /etc/init.d/dropbear
http://192.168.31.1/cgi-bin/luci/;stok=<STOK>/api/misystem/set_config_iotdev?bssid=gallifrey&user_id=doctor&ssid=-h%0Ased%20-i%20'%2Fflg_ssh.*release%2F%20%7B%20%3Aa%3B%20N%3B%20%2Ffi%2F!%20ba%20%7D%3B%2Freturn%200%2Fd'%20%2Fetc%2Finit.d%2Fdropbear%0A
echo -e "<PASSWORD>/n<PASSWORD>" | passwd root
http://192.168.31.1/cgi-bin/luci/;stok=<STOK>/api/misystem/set_config_iotdev?bssid=gallifrey&user_id=doctor&ssid=-h%0Aecho%20-e%20%27<PASSWORD>%5Cn<PASSWORD>%27%20%7C%20passwd%20root%0A
/etc/init.d/dropbear enable
http://192.168.31.1/cgi-bin/luci/;stok=<STOK>/api/misystem/set_config_iotdev?bssid=gallifrey&user_id=doctor&ssid=-h%0A%2Fetc%2Finit.d%2Fdropbear%20enable%0A
/etc/init.d/dropbear start
http://192.168.31.1/cgi-bin/luci/;stok=<STOK>/api/misystem/set_config_iotdev?bssid=doctor&user_id=doctor&ssid=-h%0A%2Fetc%2Finit.d%2Fdropbear%20start%0A
Now you should be able to login using ssh root@192.168.31.1 on linux, or using putty on windows.
Hope this all help someone.
Alex
Just for people wanting to install stuff to the router, there isn't much rw space (most things mounted read/write have access to ~ 20.8 MB in total of shared space). But luckily the ever reliable /tmp is naturally read/write, but will not persist across reboots. You could download the files to your PC and use scp to upload them to the router, or just wget files directly to /tmp if your router is connected to the internet. Luckily /etc/opkg.conf already defines /tmp as an installation destination (named ram). The packages to install and their dependencies can be downloaded from https://downloads.openwrt.org/snapshots/packages/aarch64_cortex-a53/ or compiled yourself (using the Qualcomm Atheros IPQ807x target). If it uses a linked library that requires a specific version, the version of OpenWRT installed on the router is 18.06-snapshot, so you may be lucky downloading the package and it's dependencies from https://downloads.openwrt.org/releases/18.06.8/packages/aarch64_cortex-a53/. Although I've not tested kernel modules. For instance to install nano i did:
On PC (as AX3600 is not connected to internet)
wget https://downloads.openwrt.org/snapshots/packages/aarch64_cortex-a53/base/libncurses6_6.2-1_aarch64_cortex-a53.ipk
scp libncurses6_6.2-1_aarch64_cortex-a53.ipk root@192.168.31.1:/tmp/
wget https://downloads.openwrt.org/snapshots/packages/aarch64_cortex-a53/packages/nano_4.9.3-1_aarch64_cortex-a53.ipk
scp nano_4.9.3-1_aarch64_cortex-a53.ipk root@192.168.31.1:/tmp/
ssh root@192.168.31.1
On AX3600
opkg install --dest ram /tmp/libncurses6_6.2-1_aarch64_cortex-a53.ipk
rm /tmp/libncurses6_6.2-1_aarch64_cortex-a53.ipk
opkg install --dest ram /tmp/nano_4.9.3-1_aarch64_cortex-a53.ipk
rm /tmp/nano_4.9.3-1_aarch64_cortex-a53.ipk
then just type:
TERM=xterm-256 /tmp/usr/bin/nano <name of file>
to execute
If your router is connected to the internet, you can just edit /etc/opkg/distfeeds.conf and change all ocurrances of -SNAPSHOT with .8. Do an opkg update, and install using the --dest ram option above (so no need to download the package first, or delete it after, although I would delete opkg cache).
Hope this helps.
Sorry, I'll digress a bit. Thinking about ordering AX3600 and using it as dumb AP until at least snapshot image of OpenWrt is available. Is anyone doing the same? How easy is it to configure WiFi SSIDs without fluency in Chinese?
PS. Kudos to @ajw107 providing the list of encoded commands. I was thinking of hosting a shell script to do all of that and feeding it to ash on the router. If anyone wants to test it, let me know.
I'm looking to test out this unit as my primary router but I want to make sure to sinkhole all the phone home links. So far I've identified the below hostnames and changed the hostnames in uci to an invalid hostname to prevent all the cross-site URL's Xiaomi appears to be using to phone home activity just by browsing the admin site. Any additional thoughts here besides just using /etc/hosts (besides using a FW or Pihole - my Pi is off in a K8s cluster right now).
root@XiaoQiang:~# cat /etc/hosts
127.0.0.1 localhost

::1     localhost ip6-localhost ip6-loopback
ff02::1 ip6-allnodes
ff02::2 ip6-allrouters

0.0.0.0 baidu.com taobao.com xiaomi.cn xiaomi.com
0.0.0.0 www.baidu.com www.taobao.com www.xiaomi.cn www.xiaomi.com
::1     baidu.com taobao.com xiaomi.cn xiaomi.com
::1     www.baidu.com www.taobao.com www.xiaomi.cn www.xiaomi.com
0.0.0.0 miwifi.com log.miwifi.com s.miwifi.com app.miwifi.com stun.miwifi.com broker.miwifi.com
::1     miwifi.com log.miwifi.com s.miwifi.com app.miwifi.com stun.miwifi.com broker.miwifi.com
0.0.0.0 bbs.xiaomi.cn bbs.xiaomi.com
::1     bbs.xiaomi.cn bbs.xiaomi.com
Hello everyone, does anyone know how to add support for vlan2 and ieee 802.1q protocol via ssh on mi openwrt firmware (1.0.17) of our ax3600? thank you I'm waiting for someone more capable than me.
FYI @efsg just posted on how to load the OpenWRT QSDK on the AX3600 over here: Xiaomi AX3600 install guide
Would be more interesting how to build this for the AX3600 because i wouldn't trust this prebuilt image.
Is there any device configuration yet to start building for this ?, I should have mine next week (will be unused for a while) as it will eventually replace my WRT3200ACM.
I would love to help out getting this thing building now we have access to flash images. Also it looks like the NSS driver for the other IPQ devices seems to be progressing.
Build from qsdk11
QCA-WIFI NSS works
does the @efsg g guide also add support for 802.1q and vlan2 835?
I have a few questions on the specifics
- What QSDK tag is used here ?
- What (if any files) needed to be extracted from the original OS (QCA firmware ect)
- What modifications where needed to the QSDK 807X target DTS and board configs ?
anyone find the bootstrap resistors to force SPI as boot media instead?
Hi every one, im flowing enable SSH TUT by @LonGDikE and was success! but now i want to install another libs but fail because "root /" was locked. any one know to unlock it pls help.
im tried
mtd unlock ubi_rootfs and mount -o rw / but nothing effect.
I now have serial access to mine shell & uboot
IPQ807x# printenv
CountryCode=CN
Router_unconfigured=0
SN=266##/E0P51####
boot_wait=on
bootcmd=bootmiwifi
bootdelay=5
color=101
eth1addr=8c:53:c3:b2:8a:2e
eth2addr=8c:53:c3:d6:db:3a
eth3addr=8c:53:c3:d6:db:3a
eth4addr=8c:53:c3:d6:db:3a
ethact=eth0
ethaddr=8c:53:c3:d6:db:3a
fdt_high=0x4A400000
fdtcontroladdr=4a979e10
flag_boot_rootfs=0
flag_boot_success=1
flag_boot_type=2
flag_last_success=0
flag_ota_reboot=0
flag_try_sys1_failed=0
flag_try_sys2_failed=0
flash_type=2
ipaddr=192.168.31.1
machid=8010010
miot_did=331152123
miot_key=Znnp0KAIRNGCWGce
mode=Router
model=R3600
no_wifi_dev_times=0
nv_sys_pwd=7428394ddb9de74cb1cc8197f570e4838b278300
nv_wan_type=dhcp
nv_wifi_enc=mixed-psk
nv_wifi_enc1=mixed-psk
nv_wifi_pwd=test
nv_wifi_pwd1=test
nv_wifi_ssid=Xiaomi_8A2E
nv_wifi_ssid1=Xiaomi_8A2E_5G
restore_defaults=0
serverip=192.168.31.100
soc_version_major=2
soc_version_minor=0
ssh_en=1
stderr=serial@78B3000
stdin=serial@78B3000
stdout=serial@78B3000
telnet_en=0
uart_en=1
wl0_radio=1
wl0_ssid=Xiaomi_8A2E_75D1_5G
wl1_radio=1
wl1_ssid=Xiaomi_8A2E_75D1
wl2_ssid=Xiaomi_8A2E

Environment size: 1174/65532 bytes
Is that to repartition the NAND to allow for a bigger rootfs / ubi?
Thanks for your help. I'll try this 

