Meraki18 using Raspberry and Openocd

Hi everyone
I am trying flash my meraki18 using raspberry pi and openocd.
I have used tutorial from this link:
https://openwrt.org/toh/meraki/mr18/jtag
Currently I managed to connect to meraki console and can see boot logs.
Unfortunately I have stuck on Openocd JTAG connection.
I have changed raspberrypi-native.cfg and created new mr18.cfg and
when I use this command:
$ sudo openocd -f raspberrypi-native.cfg -f mr18.cfg -c "init; halt"
I am getting error message

BCM2835 GPIO config: tck = 11, tms = 25, tdi = 10, tdo = 9
BCM2835 GPIO config: trst = 7
trst_only separate trst_push_pull
Info : auto-selecting first available session transport "jtag". To override use 'transport select '.
Warn : Transport "jtag" was already selected
adapter speed: 1000 kHz
Info : BCM2835 GPIO JTAG/SWD bitbang driver
Info : JTAG only mode enabled (specify swclk and swdio gpio to add SWD mode)
Info : clock speed 1006 kHz
Error: JTAG scan chain interrogation failed: all zeroes
Error: Check JTAG interface, timings, target power, etc.
Error: Trying to use configured scan chain anyway...
Error: ar9344.cpu: IR capture error; saw 0x00 not 0x01
Warn : Bypassing JTAG setup events due to errors
Error: Failed to enter Debug Mode!
Info : Halt timed out, wake up GDB.
Error: timed out while waiting for target halted

Have you got any ideas what may go wrong??
Thank you for your support

You need to issue the openocd command immediately as you power on the MR18.

Then also the telnet commands

Yes I know and I am doing it straight after power on MR18.
Also I have tried to do this at many different points of booting process with no joy.
Any other suggestions??

It's a long time ago i used openocd but it seems to me like a cabling issue or you forgot to configure the rpio pins alt mode. Those kind of things will result in the error you mentioned. I'll take a look at the openwrt manual later too see if it's missing something (or is outdated).

What firmware is currently on the MR18?

Do I have to change all used GPIO to alt4 mode my self?
I am not sure which exactly version I got as odm command does not work on serial connection and I am getting message UNRECOGNIZED COMMAND LOGGED TO CLOUD SERVERS,
so it looks like it is one of the latest versions.

Ok, that looks like a Meraki firmware
No as per the guide no need to change gpio mapping.

What Raspberry Pi are you using?
You have connected serial from the Raspberry Pi?

Send some pictures

I have got rasp pi 3 b+
this is my wiring

Here my screenshots

Showing connection
Note i interrupted the normal bootup before it decompressed boot image

Successful JTAG response

I used a fresh copy Rasbian only enabled SSH not spi

have you done anythig extra which isn't in this manual??
Can I see your wiring a bit closer??
which rasp you got??
My still does not work and not sure what causing problems.

Sorry for my late reply. I hadn't got time to look to the docs. Your problem here is that the Pi model 1 differs from model 2 and 3. And to even more complicated, the model 3B uses a different SOC so even there there could be a difference.

I see you're using the raspberrypi-native.cfg interface script while you're using a RPI3 B+ as the timings are different between the between models. I made a list for you based on the different RPI models.

RPI 1A/A+/B/B+ with 700 MHz base clock

bcm2835gpio_peripheral_base 0x20000000
bcm2835gpio_speed_coeffs 113714 28

RPI 2B with 900 MHz base clock

bcm2835gpio_peripheral_base 0x3E000000
bcm2835gpio_speed_coeffs 146203 36

RPI 3B with 1200 MHz base clock

bcm2835gpio_peripheral_base 0x3E000000
bcm2835gpio_speed_coeffs 194938 48

RPI 3B+ with 1400 MHz base clock (despite the higher clock seems to be the same as RPI 3B)

bcm2835gpio_peripheral_base 0x3E000000
bcm2835gpio_speed_coeffs 194938 48

RPI 4 with 1500 MHz base clock

bcm2835gpio_peripheral_base 0xFE000000
bcm2835gpio_speed_coeffs 236181 60

Also please note that the mentioned pinout from RPI to JTAG header differs between models. Edit is incoming. Edit: Nope I stand corrected, sorry for the confusion about alt modes and pinouts. I was mixing JTAG debugging the RPi itself vs debugging another device using the RPi with JTAG. But for clarity, in your interface configuration you have the following options.

bcm2835gpio_jtag_nums
bcm2835gpio_trst_num

Which corresponds to which GPIO pins are set for jtag debugging another device. bcm2835gpio_jtag_nums defines as sequence of GPIO pins (which are not the same as the RPI header pins).

bcm2835gpio_jtag_nums tck tms tdi tdo
bcm2835gpio_trst_num trst

So the default settings are:

bcm2835gpio_jtag_nums 11 25 10 9
bcm2835gpio_trst_num 7

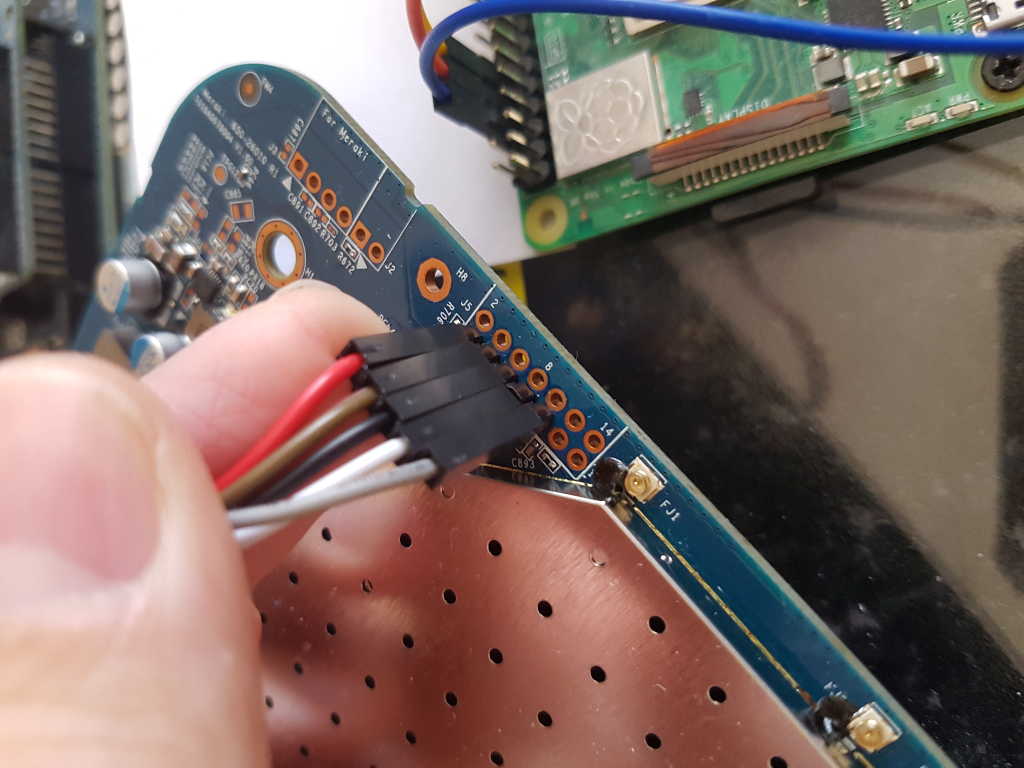
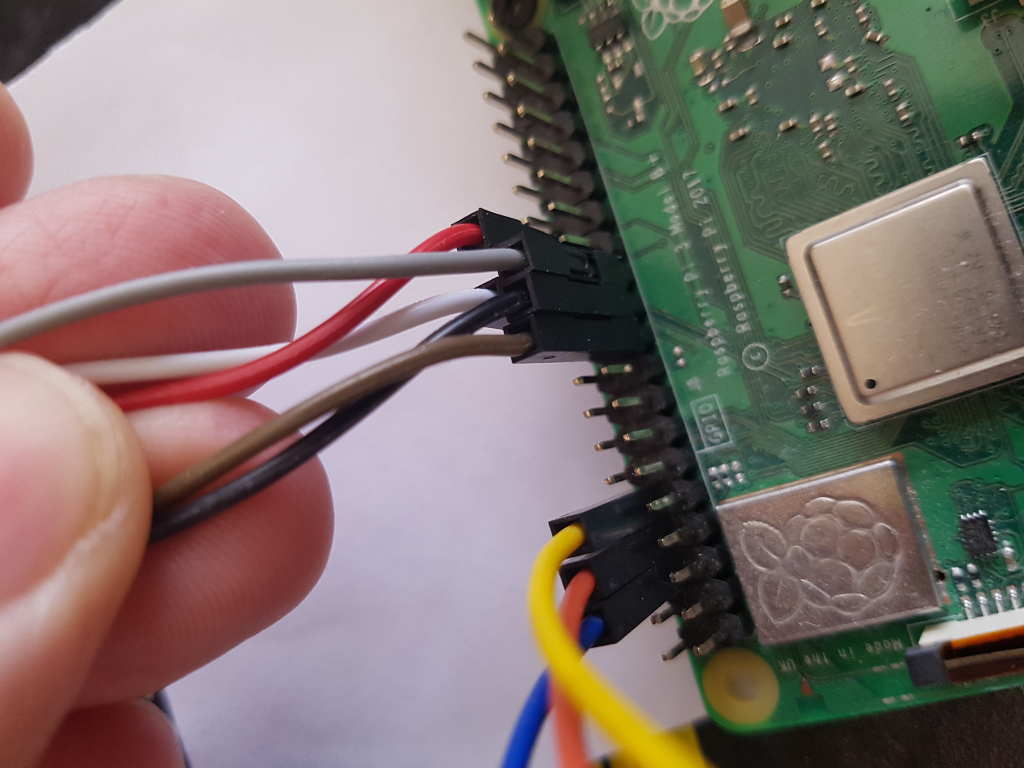
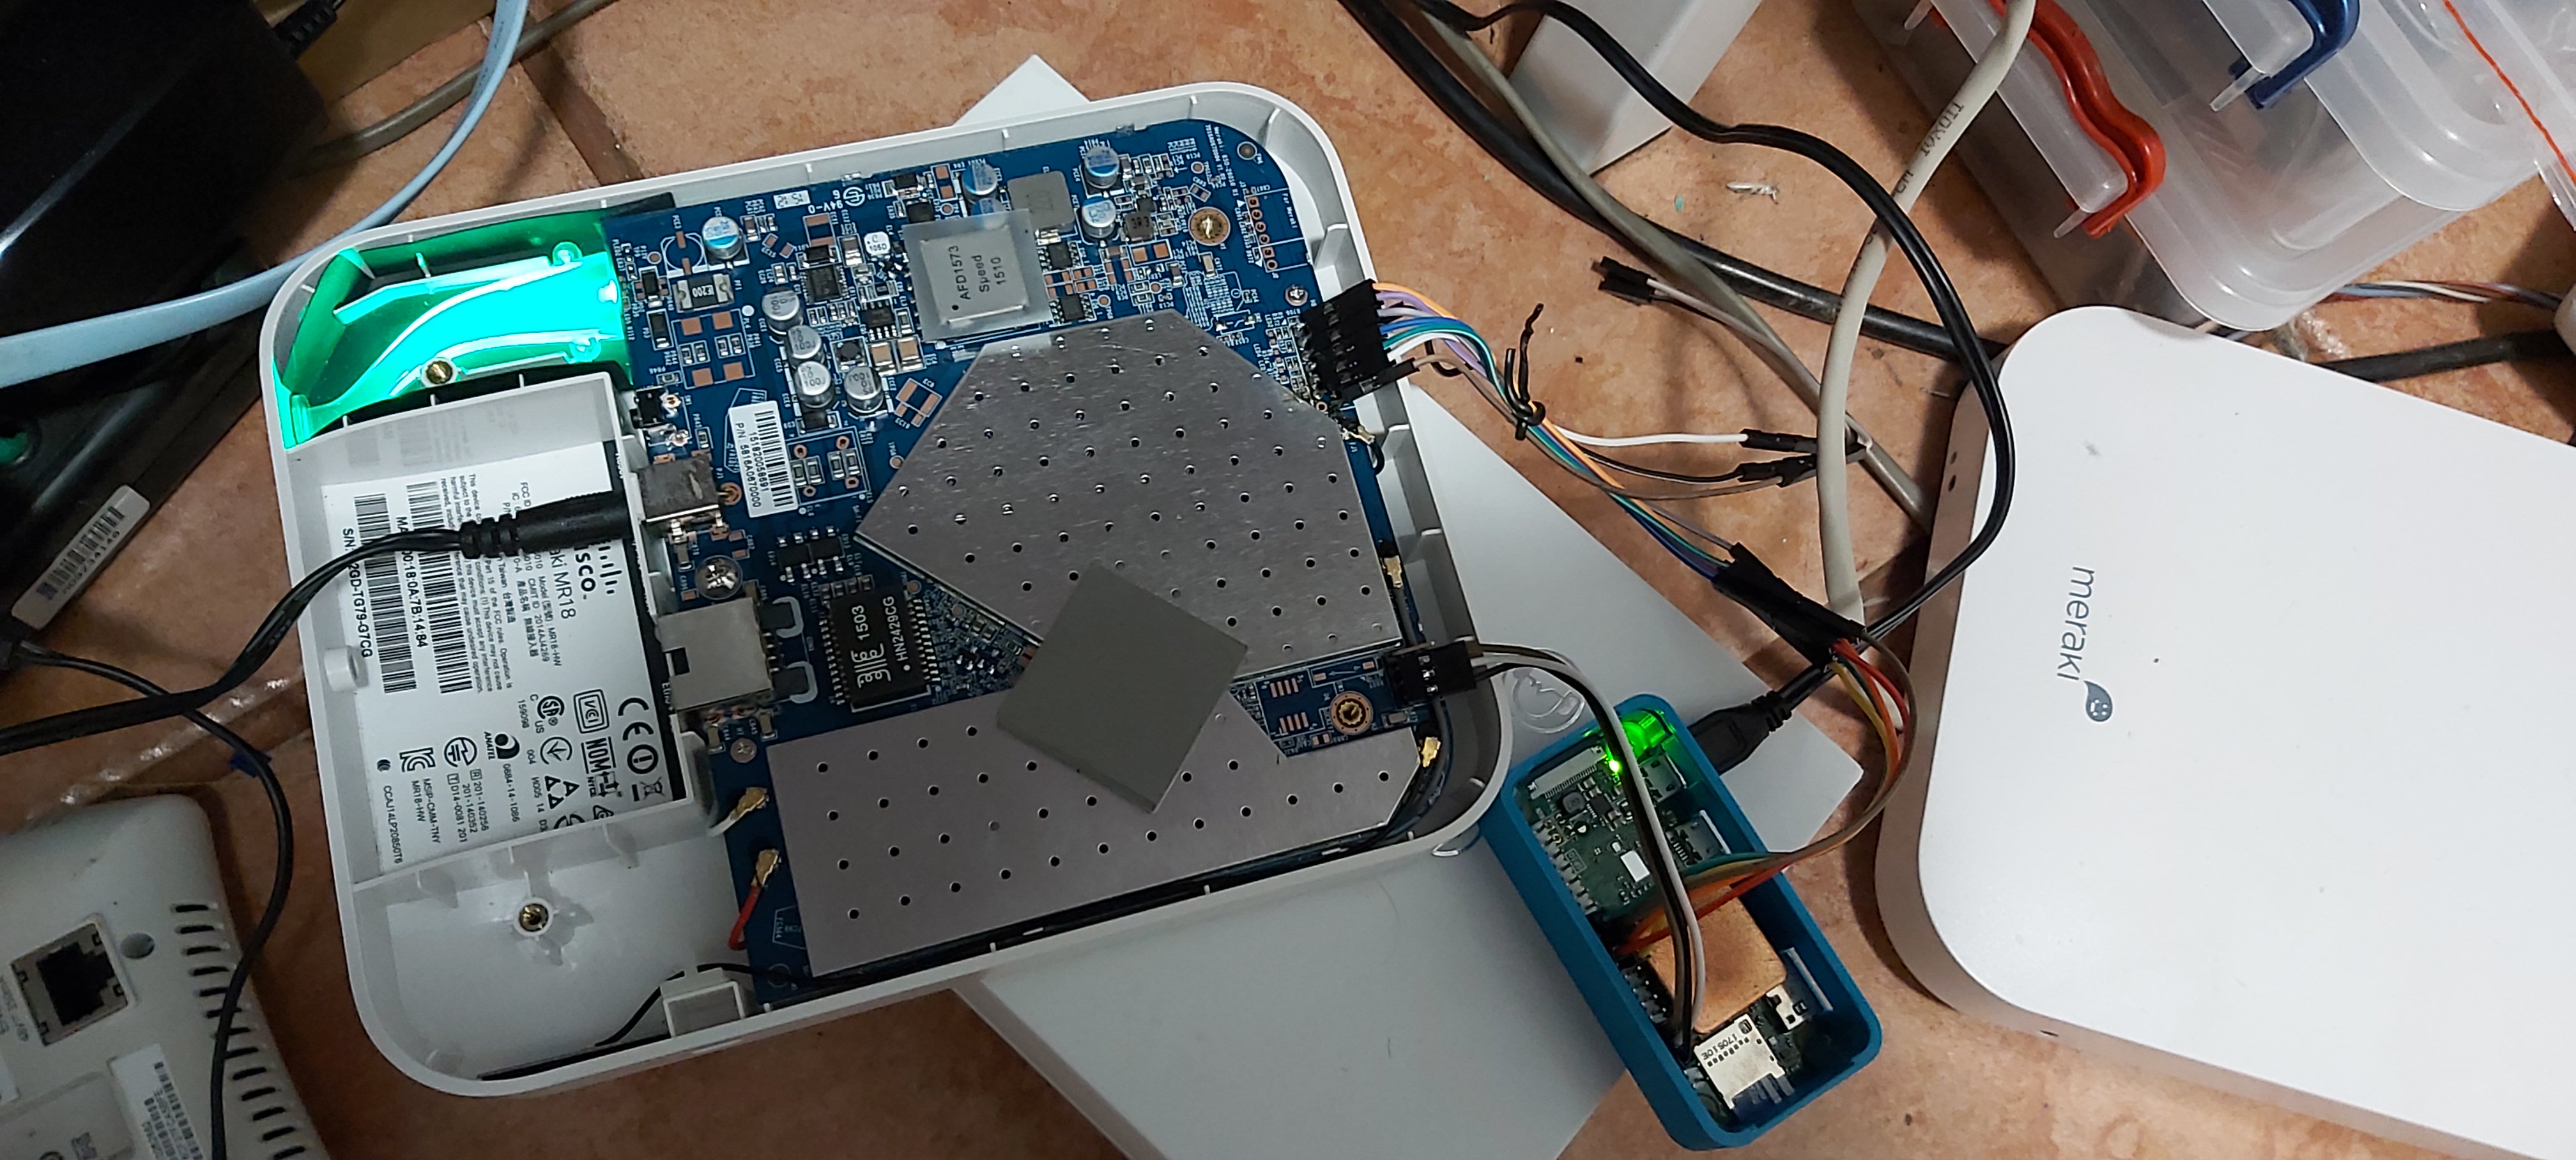
And translating these GPIO pins to header pins means (see also the schematics):

Function RPI GPIO RPIO header Meraki JTAG header
TCK 11 23 9
TMS 25 22 7
TDI 10 19 3
TDO 9 21 5
TRST 7 26 1

Which should be the same as the table in the guide if I did the translation correctly.

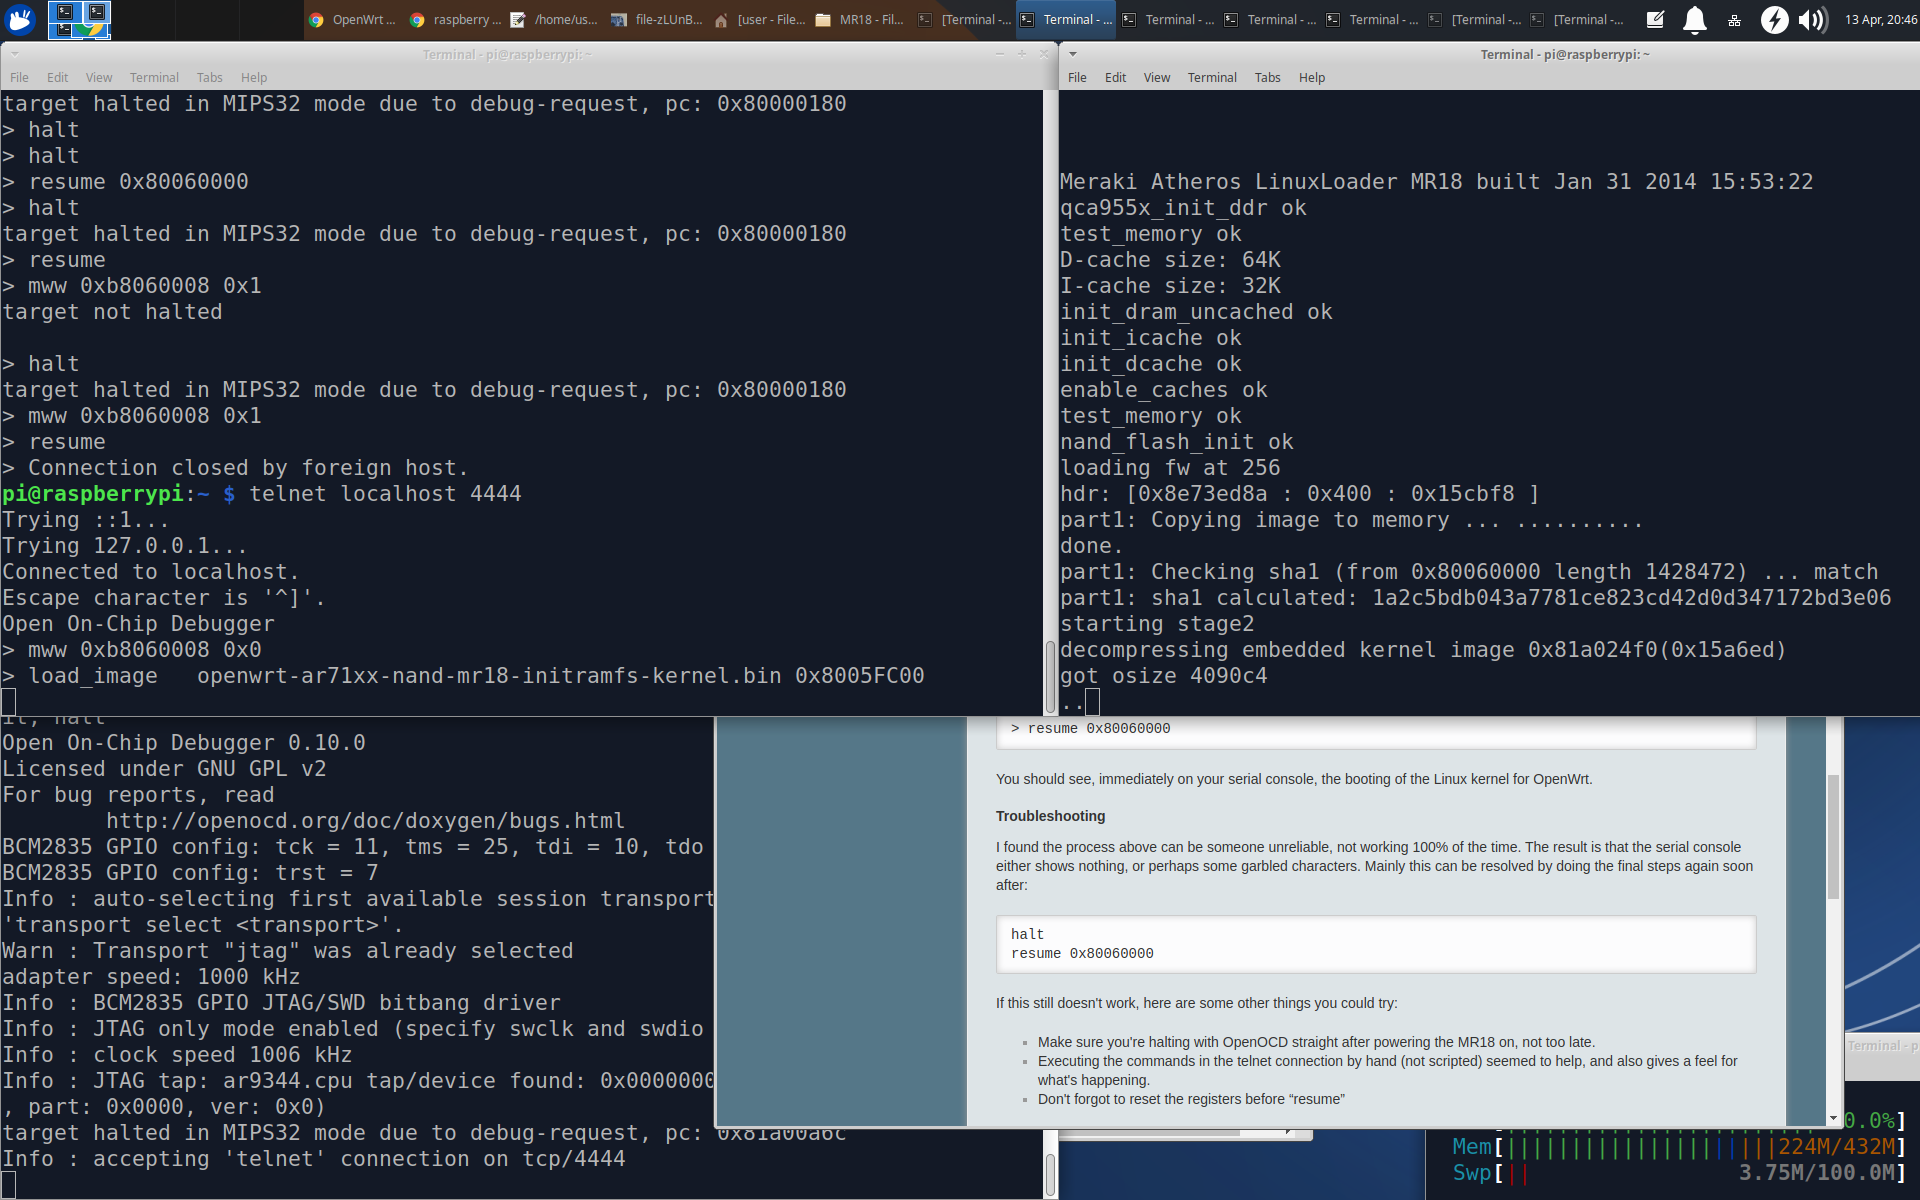
So TLDR: adjust your interface to match the RPI3B+ model. Set bcm2835gpio_peripheral_base 0x3E000000, bcm2835gpio_speed_coeffs 194938 48, bcm2835gpio_jtag_nums 11 25 10 9, and bcm2835gpio_trst_num 7. And match your wiring with the RPIO header to the Meraki JTAG header.

Last edit, I also see a interface/raspberrypi2-native.cfg exists which should theoretically work with your RPI3B+, but also has a few lines commented that we need (and I don't know how it handles the default values). So for completeness sake, just make sure the your interface script contains the following values.

  1. make a new interface configuration in your home folder
$ cd ~
# vi rpi3.cfg
  1. paste the following contents (press i enter insert mode, paste contents, press esc to exit insert mode, issue :wq command to save and quit)
interface bcm2835gpio
bcm2835gpio_peripheral_base 0x3F000000
bcm2835gpio_speed_coeffs 146203 36
bcm2835gpio_jtag_nums 11 25 10 9
bcm2835gpio_trst_num 7
  1. run openocd using the newly created rpi3.cfg and mr18.cfg that you created per the guide.
cd ~
sudo openocd -f rpi3.cfg -f mr18.cfg -c "init; halt"

This should theoretically work.

2 Likes

@vuhuy

The wiki guide was posted using a Raspberry Pi 1 i used a Raspberry Pi ZERO W, i only fixed the wiki since the Raspberry PI Zero W serial port changes to /dev/ttyS0

I used all same instructions from wiki https://openwrt.org/toh/meraki/mr18/jtag

@emem As @vuhuy suggested try the specific Pi 3 timings

But most importantly is the correct pinout matching your config and halting the device within 1 seconds of powering it

And don't forget the peripheral base address. I added the speed coefficients and peripheral addresses for the different RPi models to the wiki.

If you want to be complete on your modification on the serial port, the RPi wireless and BT modules are connected to the PL011 UART interface, and the mini UART interface will have the console on it. Devices without wireless / BT will have use the PL011 UART interface to present the console.

So PL011 = /dev/ttyAMA0, and mini UARD = /dev/ttyS0. In other words, RPI ZeroW / Pi 3 + 4 will use /dev/ttyS0 and all other models without wireless / BT will use /dev/ttyAMA0.

Just note the Raspberry Pi Zero W clock speed is now 1Ghz default, but it still BCM2835 based

Thank you for your help.
Curently I have manage to interrupt boot sequence and establish telnet connection
but can not load image and getting this message:

mww 0xb8060008 0x0
load_image openwrt-ar71xx-nand-mr18-initramfs-kernel.bin 0x8005fc00
Fastdata access Failed
Falling back to non-bulk write
target halted in MIPS32 mode due to debug-request, pc: 0x00000000

Any ideas??
Thank you

Seems fine to me. OpenOCD is still processing it, it's only using the non-bulk write method. Just continue.

Just a little background, bulk transfer works on the set working area. The person that wrote that guide has set the working area to 0x81000000 (defined by work-area-phys 0x81000000). But then he writes the image to 0x8005FC00 (defined by load_image openwrt-ar71xx-nand-mr18-initramfs-kernel.bin 0x8005FC00). The 0x8005FC00 address is outside the set 0x81000000 working area. Therefore, OpenOCD cannot do bulk transfer. It does still executes your request by using a non-bulk transfer writing method.

Thank You guys for your help.
Just flashed my first meraki.

2 Likes

This topic was automatically closed 10 days after the last reply. New replies are no longer allowed.