there's enough to get you started here -->adding_new_elements_to_luci
you'll need some tools.. and you'll probably want to use windows to do the development, winSCP and putty are very beginner friendly.
putty
winSCP
Once you have installed putty and winscp, open putty and start an ssh session to your target device. First thing you'll need to do is installed the luci-compat pkg.
opkg update
opkg install luci-compat
EDIT:
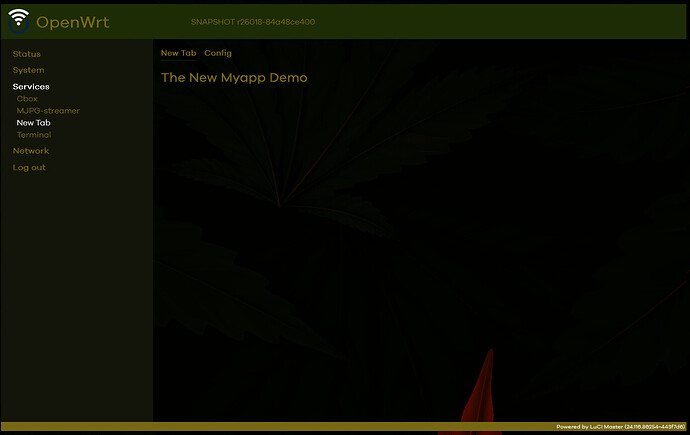
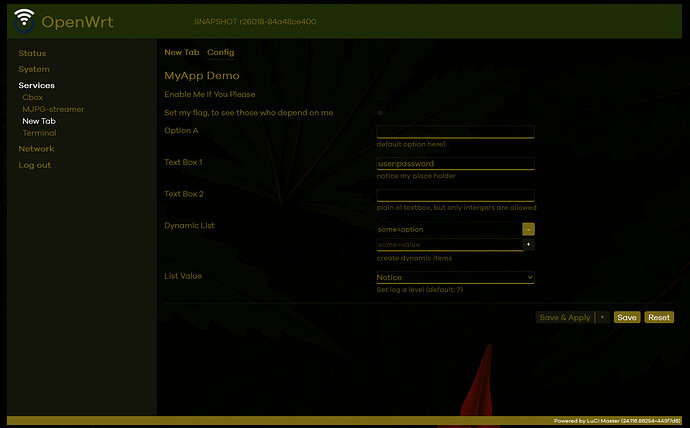
heres a working demo, using both the new and a touch of the old style luci
install files to router
/www/luci-static/resources/view/myapp/config.js
'use strict';
'require view';
'require form';
'require tools.widgets as widgets';

return view.extend({
	render: function() {
		var m, s, o;

		m = new form.Map('myapp');

		s = m.section(form.TypedSection, 'myapp', _('MyApp Demo'));
		s.anonymous   = true;
		s.addremove   = false;

		o = s.option(form.Flag, 'enable', _('Enable Me If You Please'));
		o.default = true;

		s.option(form.Flag, 'dep_flag', _('Set my flag, to see those who depend on me'));

		o = s.option(form.Value, 'port', _('Option B'));
		o.depends('dep_flag', '0');
		o.datatype    = 'port';
		o.placeholder = 12345;

		o = s.option(widgets.DeviceSelect, 'a_interface', _('Pick an Interface'));
		o.depends('dep_flag', '0');
		o.nocreate    = true;

		o = s.option(form.Value, 'def_opt', _('Option A'), _('default option here)'));
		o.depends('dep_flag', '1');
		o.ucioption = 'interface';
		o.retain = true;

		o = s.option(form.Value, 'user_creds', _('Text Box 1'), _('notice my place holder'));
		o.placeholder = 'username:password';

		o = s.option(form.Value, 'uid', _('Text Box 2'), _('plain ol textbox, but only intergers are allowed'));
		o.datatype = 'uinteger';


		o = s.option(form.DynamicList, 'dyna_list', _('Dynamic List'), _('create dynamic items'));
		o.placeholder = 'some=value';

		o = s.option(form.ListValue, 'debug', _('List Value'), _('Set log a level (default: 7)'));
		o.value('1', _('Error'));
		o.value('3', _('Warning'));
		o.value('7', _('Notice'));
		o.value('15', _('Info'));
		o.default = '7';

		return m.render();
	}
});
/usr/share/luci/menu.d/luci-app-myapp.json
{
	"admin/services/myapp": {
		"title": "New Tab",
		"action": {
			"type": "firstchild"
		},
		"depends": {
			"acl": [ "luci-app-myapp" ],
			"uci": { "myapp": true }
		}
	},

	"admin/services/myapp/myapp": {
		"title": "New Tab",
		"order": 1,
		"action": {
			"type": "template",
			"path": "myapp/view_tab"
		}
	},

	"admin/services/myapp/config": {
		"title": "Config",
		"order": 2,
		"action": {
			"type": "view",
			"path": "myapp/config"
		}
	}
}
/usr/share/rpcd/acl.d/luci-app-myapp.json
{
	"luci-app-myapp": {
		"description": "Grant UCI access for luci-app-myapp",
		"read": {
			"uci": [ "myapp" ]
		},
		"write": {
			"uci": [ "myapp" ]
		}
	}
}
/usr/lib/lua/luci/view/myapp/view_tab.htm
<%+header%>
<h1><%:The New Myapp Demo%></h1>
<%+footer%>
/etc/config/myapp
config myapp
	option dep_flag '1'
	option dep_port '22'
	option a_debug '7'
	option a_interface '@lan'
	option user_creds 'user:password'
	option enable '0'
	option text_box1 'text me'
	option text_box2 '1'
	option dyna_list 'some=option'
	option some_int '1'
	option def_opt 'default'
Now your problem still remains, you'll still have to do as dannil suggested. But now you don't need to worry about the default functionality of the save ..or save and apply buttons. And now there is a least a working, albeit basic demo, of whats needed to create a newer style luci application.
a final note.. once the files have been uploaded, you'll need to either reboot the device or erase the luci-indexcache* in the tmp directory and restart rpcd, before the myapp menu option will appear.
cd /tmp
rm luci-indexcache*
/etc/init.d/rpcd restart

