Hardware mod tutorial: Replace wifi cards on Linksys WRT-1900AC v1

This is a hardware mod for Linksys WRT-1900AC v1. Follow this guide at your own risk.

The Linksys WRT-1900AC v1 uses the mwlwifi driver for it's wireless adapters. This driver is not maintained and has become unusable recently.

Fortunately, on this router, the adapters are removable. The two wifi chips sit on a common expansion card that is inserted into two standard mini-PCIe slots.

You need:

  • Hardware knowledge. You must at least be able to replace a computer card.
  • Philips and slot screwdriver.
  • Drill, M2 - M2.5 taps and short screws. It may work without taps, but in this case be prepared with extra screws.
  • At least one replacement wifi card, well supported by OpenWrt and/or Linux kernel, possibly firmware too. Both full-size and half-size mini-PCIe will work. It is preferable to have cards that are single-sided (no components or shield on the back side).
  • If you plan to use double-sided cards, you need to have (or borrow) a single-sided card (any card) of the same lenght to use as a positioning guide.
  • If you plan to use double-sided cards, you also need a Fretsaw and knowledge to use it.
  • OpenWrt knowledge, to install new wifi drivers, possibly by building your own firmware image from source or using the image builder.

Step 1: Open the case.
There are screws inside the feet of the router. (Front and back screws are not the same!) The front part of the case (blue) opens by pulling toward the front of the router, away from the black part of the case.
The black part of the case can be separated into top and bottom part. There are plastic clamps keeping the two parts together. Pull carefully, because they may break.

Step 2: Remove heatsink from the wifi board
Disconnect the antenna cables first.
The part where the antenna cables were connected is the wifi board. It has a separate heatsink with a few tiny screws. Remove it.

After this, it will look like this:

Step 3: Remove the wifi board
There are two screws at the corners of the wifi board, near the antenna connectors. Remove these and pull the wifi card up and toward the front of the router.

After this, the router will look like this:


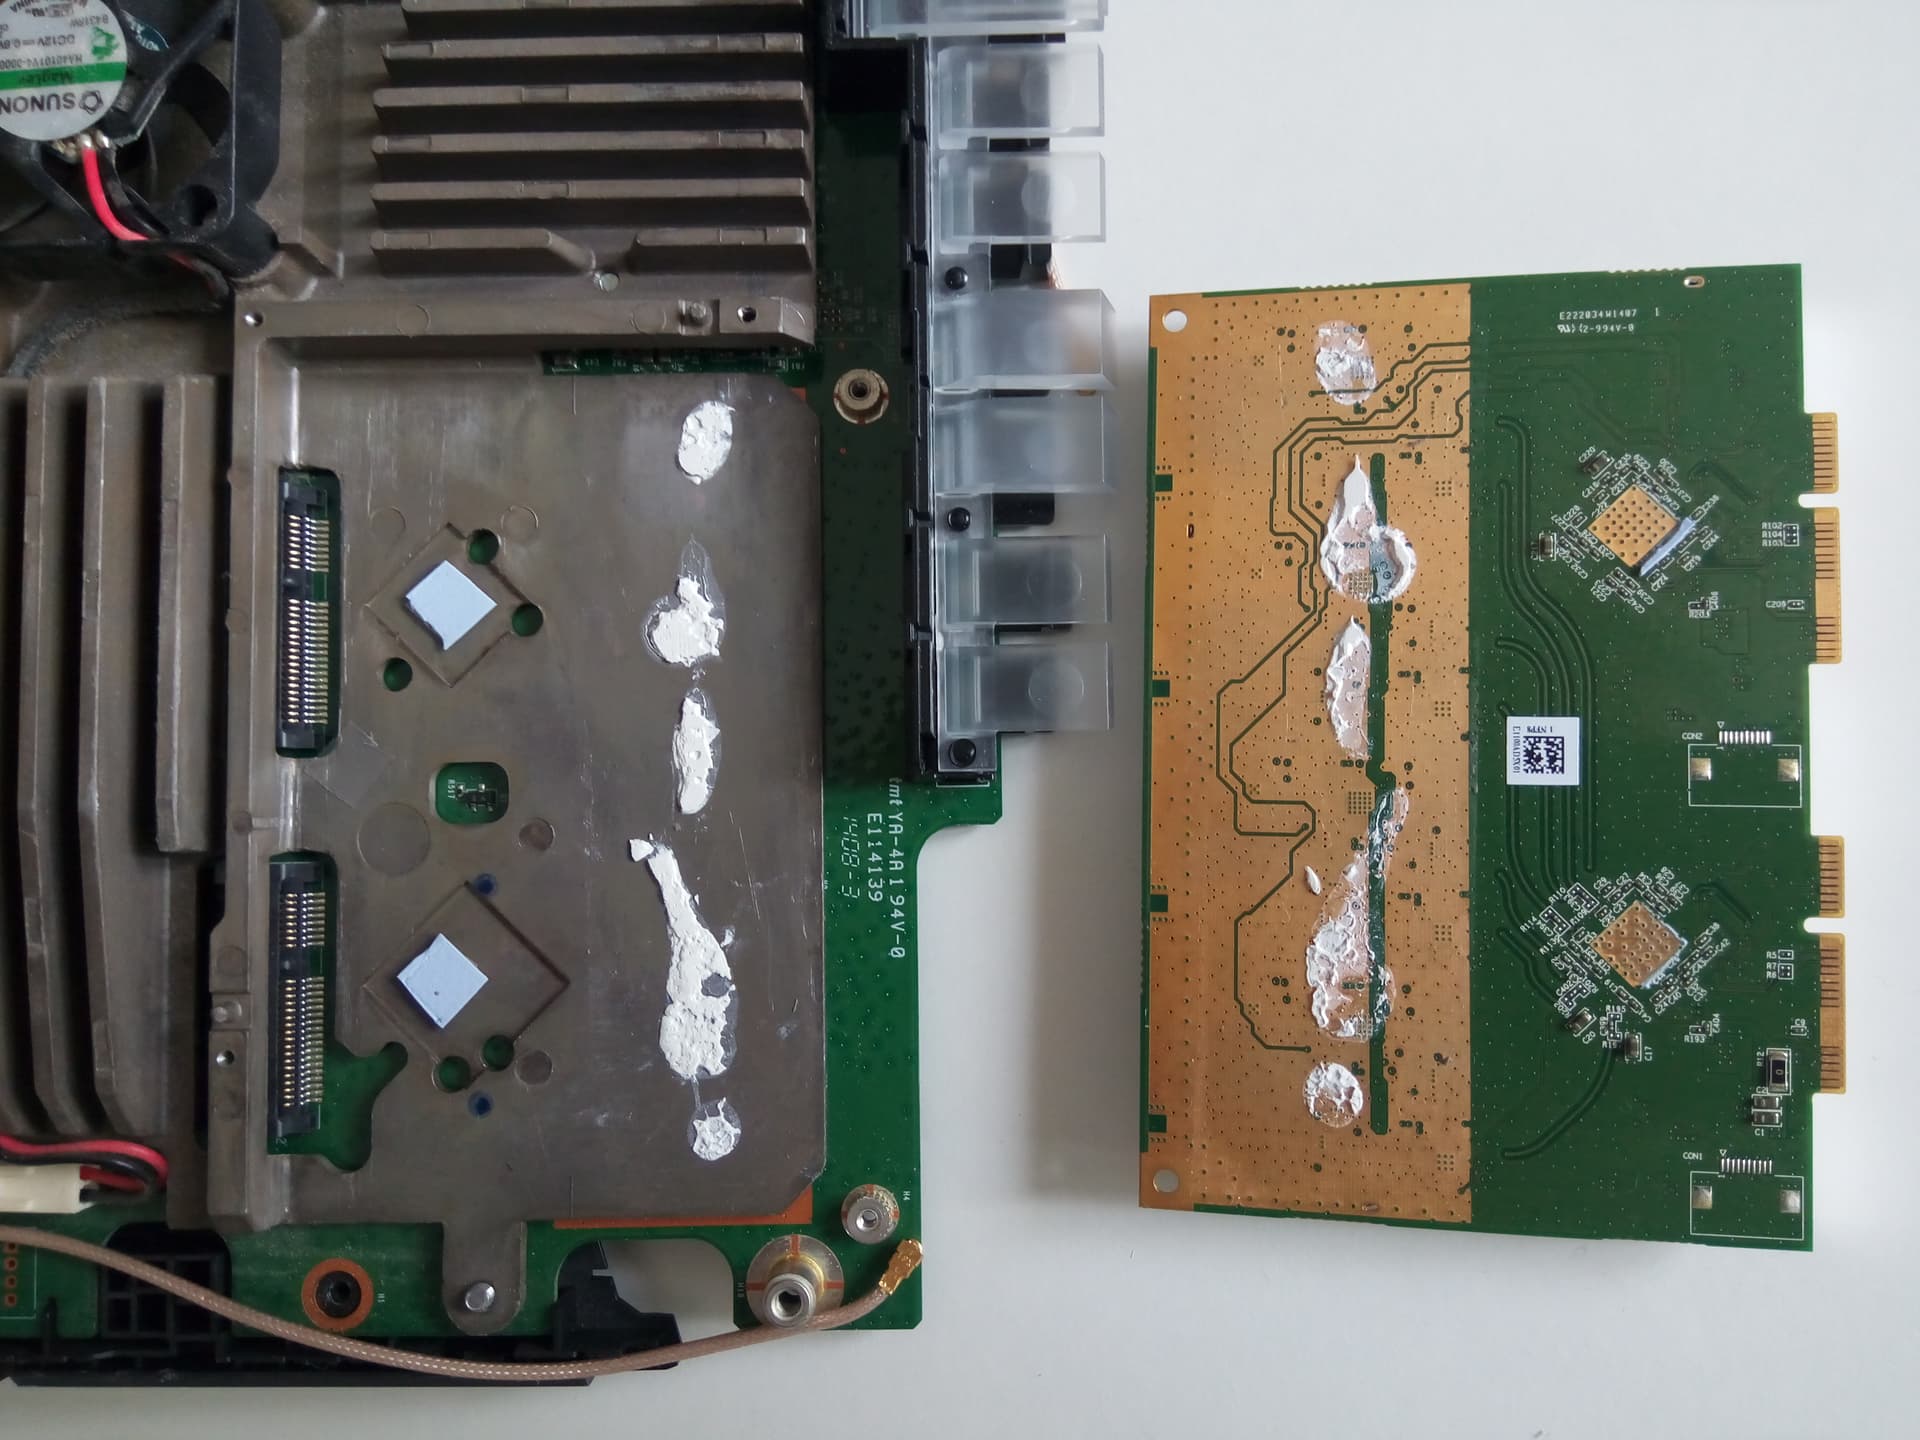
You can see the mini-PCIe connectors.

Step 4: Mark positions for the mPCIe screw holes
Don't remove the heatsink screws!
Insert your cards into the mPCIe connectors and use a pencil to mark the position of the screw holes on the heatsink. I recommend to mark holes for both half-size and full-size cards, in case you need to change them later.

Make sure there are no mistakes here. Be very accurate! Don't do it if you don't have a precise guide for the screw holes! If the holes are miss-aligned even by a fraction of a mm, the card won't sit properly in the connector and intermittent connections will cause kernel panics.

If your cards are double-sided (have components or a shield on the back side), you won't be able to position them properly because the back side components won't have enough space above the heatsink. The heatsink will need to be cut to make room for back-side components on double-sided cards. You must use a single-sided card to mark the holes for the screws.
Also mark the size of the card's components from the back side.
As an alternative, you may try to cut the heatsink first and mark the screw holes after that. Make sure the heatsink is properly installed and all heatsink screws are tight before marking the holes. Mistakes can't be fixed!

Step 5: Separate the main board from the case and remove the main heatsink
The main board of the router is attached to the bottom part of the case with two screws. (In the image above, the screws are already removed.) Remove the screws and pull the board up from the case.
Disconnect the fan.
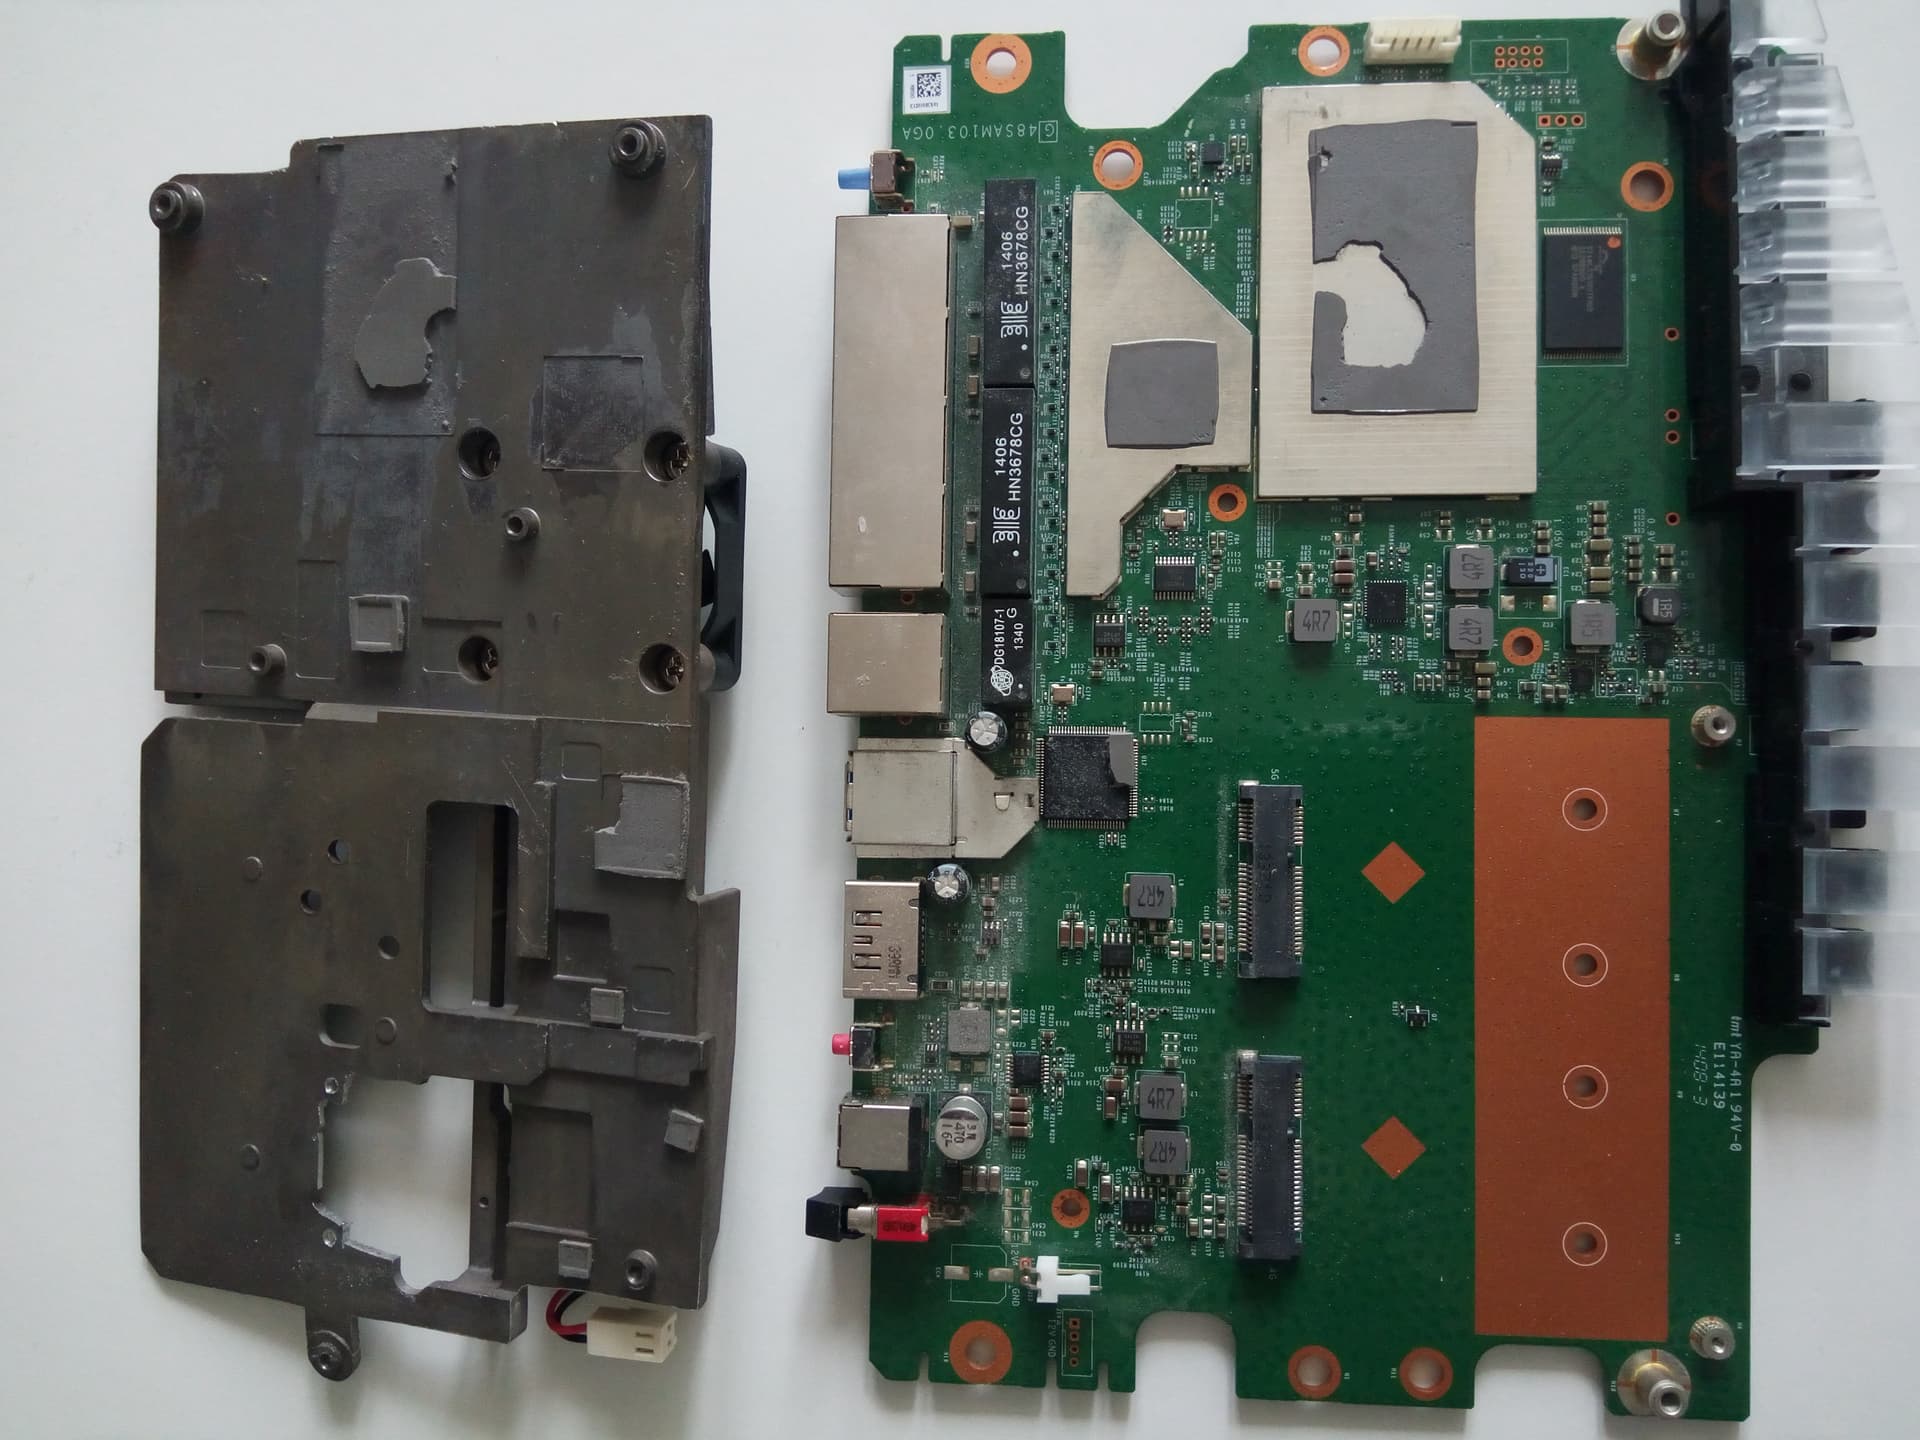
Turn over the board and remove the many screws holding the heatsink.


The heatsink has big thermal pads under it. They tend to act as a glue. Do your best to detach the heatsink without breaking the thermal pads. (I couldn't.)

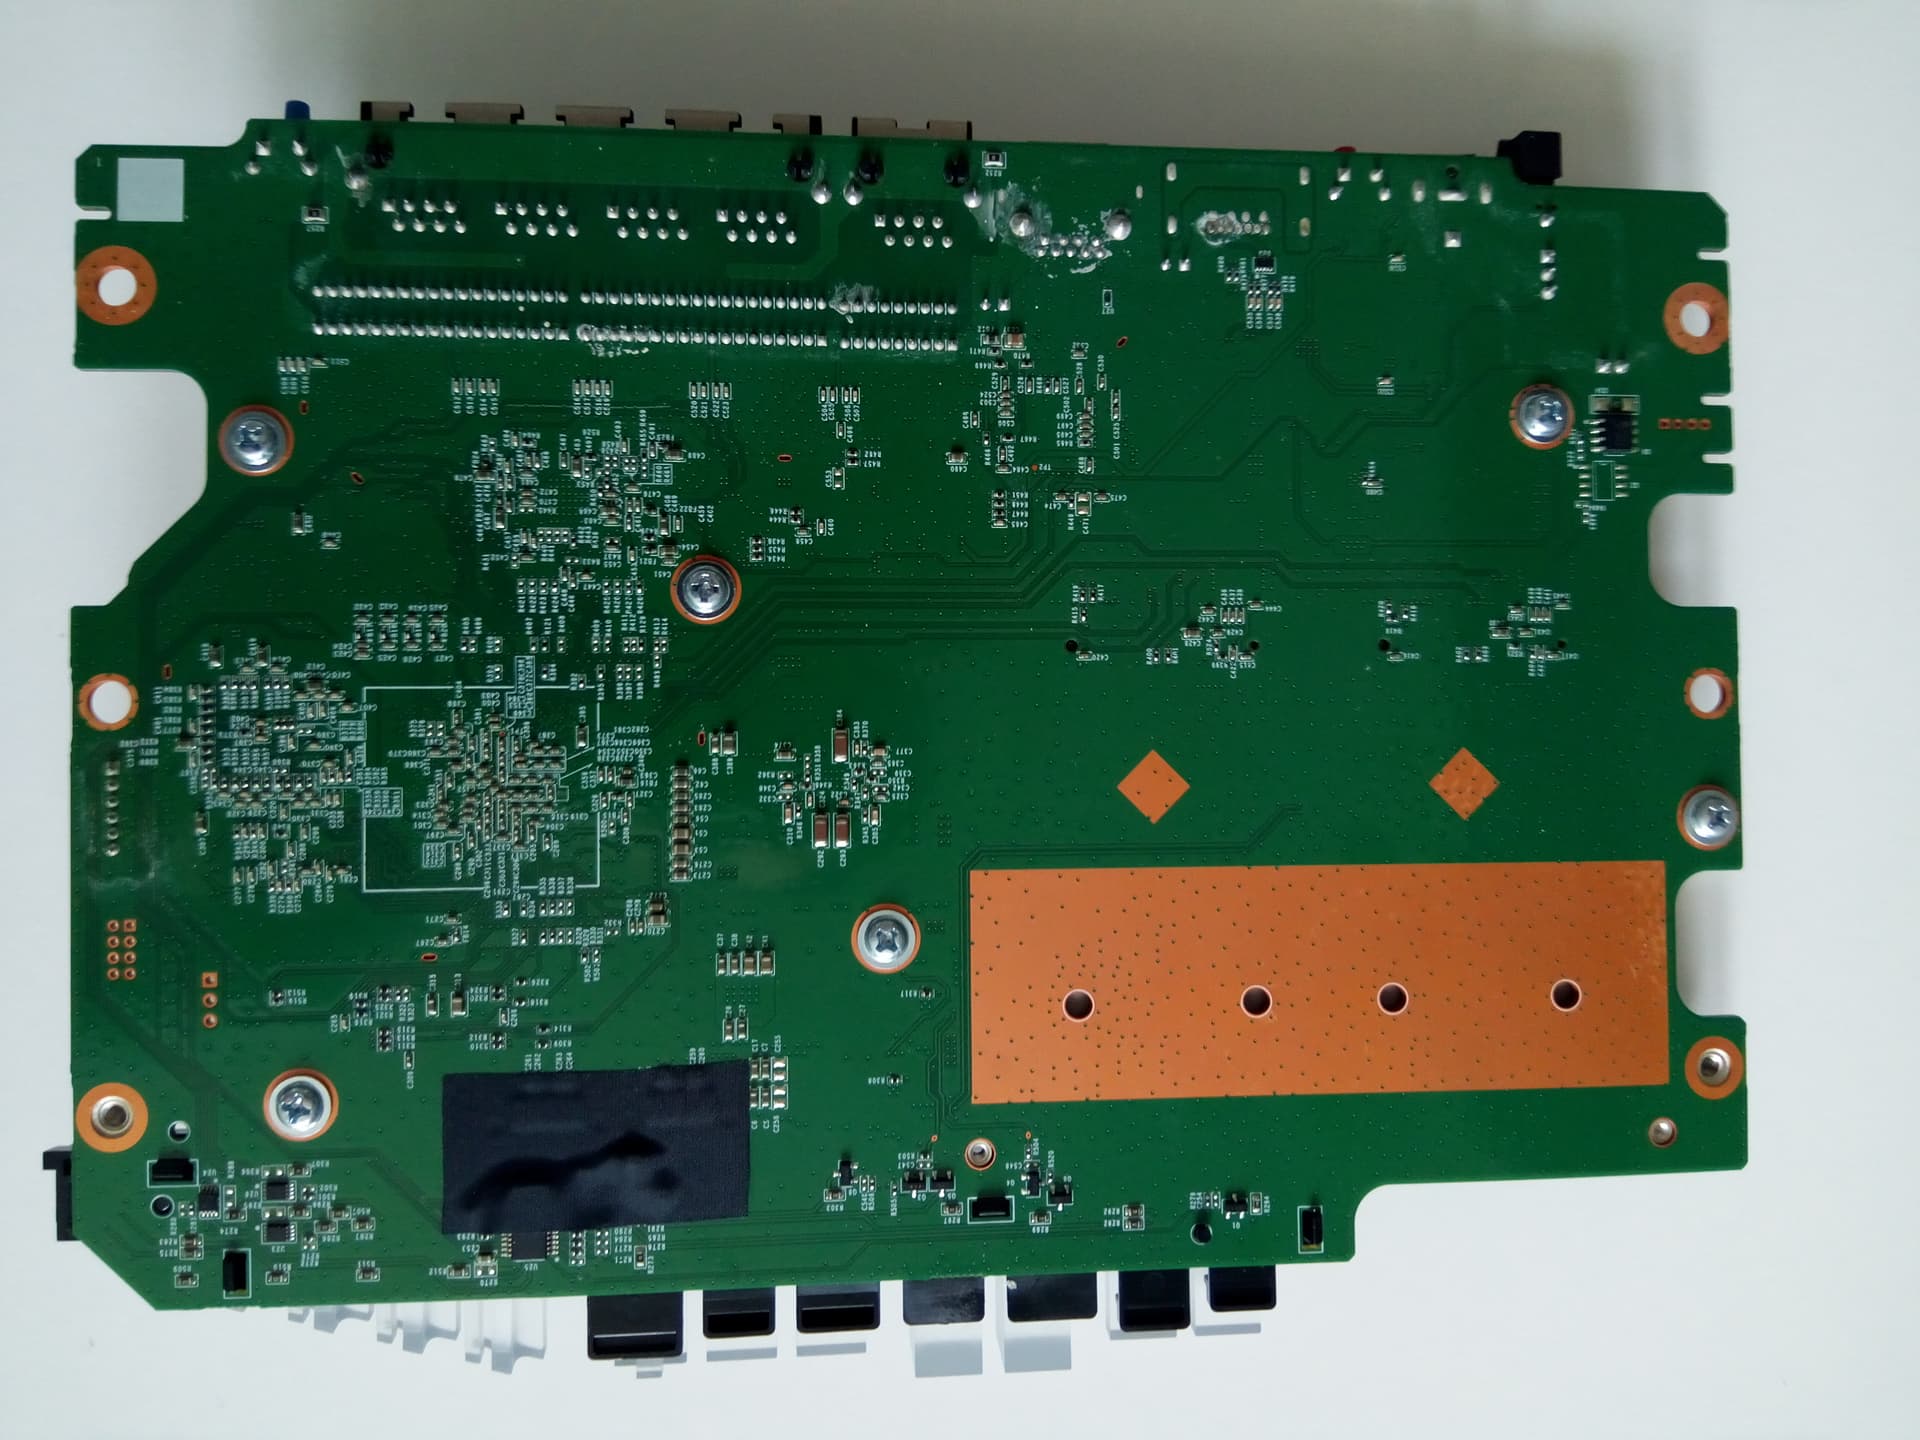
The router will now look like this:


(Note that in the image above, I already did the cutting and drilling from the next step. I had one single-sided card and one double-sided card. I only cut the slot where the double-sided card would be installed.)

Step 6: Cut the heatsink (if needed)
Put away the router board and wifi cards. Very far away! Drilling will produce metal shavings that can cause shorts on electronic components.

If you need to install double-sided cards, cut the heatsink to make space for their back-side components. The heatsink metal is very soft. Use a fretsaw. Make sure you don't cut away the part where the screw holes should be!

Step 7: Drill and thread the mPCIe mounting screw holes
Measure your screws. Drill holes smaller than the screws. Drill and then thread the screw holes. It is VERY important to be precise! Wrong holes can't be corrected. This is the most difficult part of this mod.

Thread the holes. If you don't have taps that small, you can try to drill holes only a tiny bit smaller than the screws and destroy a few screws to make threads by forcing them into the holes.

I recommend to drill holes for both half-size and full-size cards, in case you need to change them later.

CLEAN THE HEATSINK and your workplace! There must be no metal filings left to contaminate the electronic components.

Test-install the new cards on the heatsink BEFORE mounting the heatsink. Make sure the screws are not long enough to protrude on the other side of the heatsink! They will damage the router board if they do. Cut them if too long. Remove the cards.

CLEAN THE HEATSINK AGAIN.

Step 8: Reinstall everything
Install the heatsink on the router board. Pay attention to the broken thermal pads. Replace them if you have thermal pads available. Connect the fan.

Install the new wifi cards. Make sure they sit properly in the slot and they don't move while tightening the screw. I recommend to use only one screw. One of the two holes may be better positioned than the other. If things don't work, or the card is visibly tilted in the slot, try the other screw.
Don't tighten the screws too much. The heatsink metal is weak and threads are easy to strip.

WARNING: Some cards, even if single-sided, have some traces on the back side. In this case, to avoid any shorts with the heatsink, place a thin plastic (or paper) foil under the card.

Install the board in the case. Connect the antenna cables. Don't close case yet.
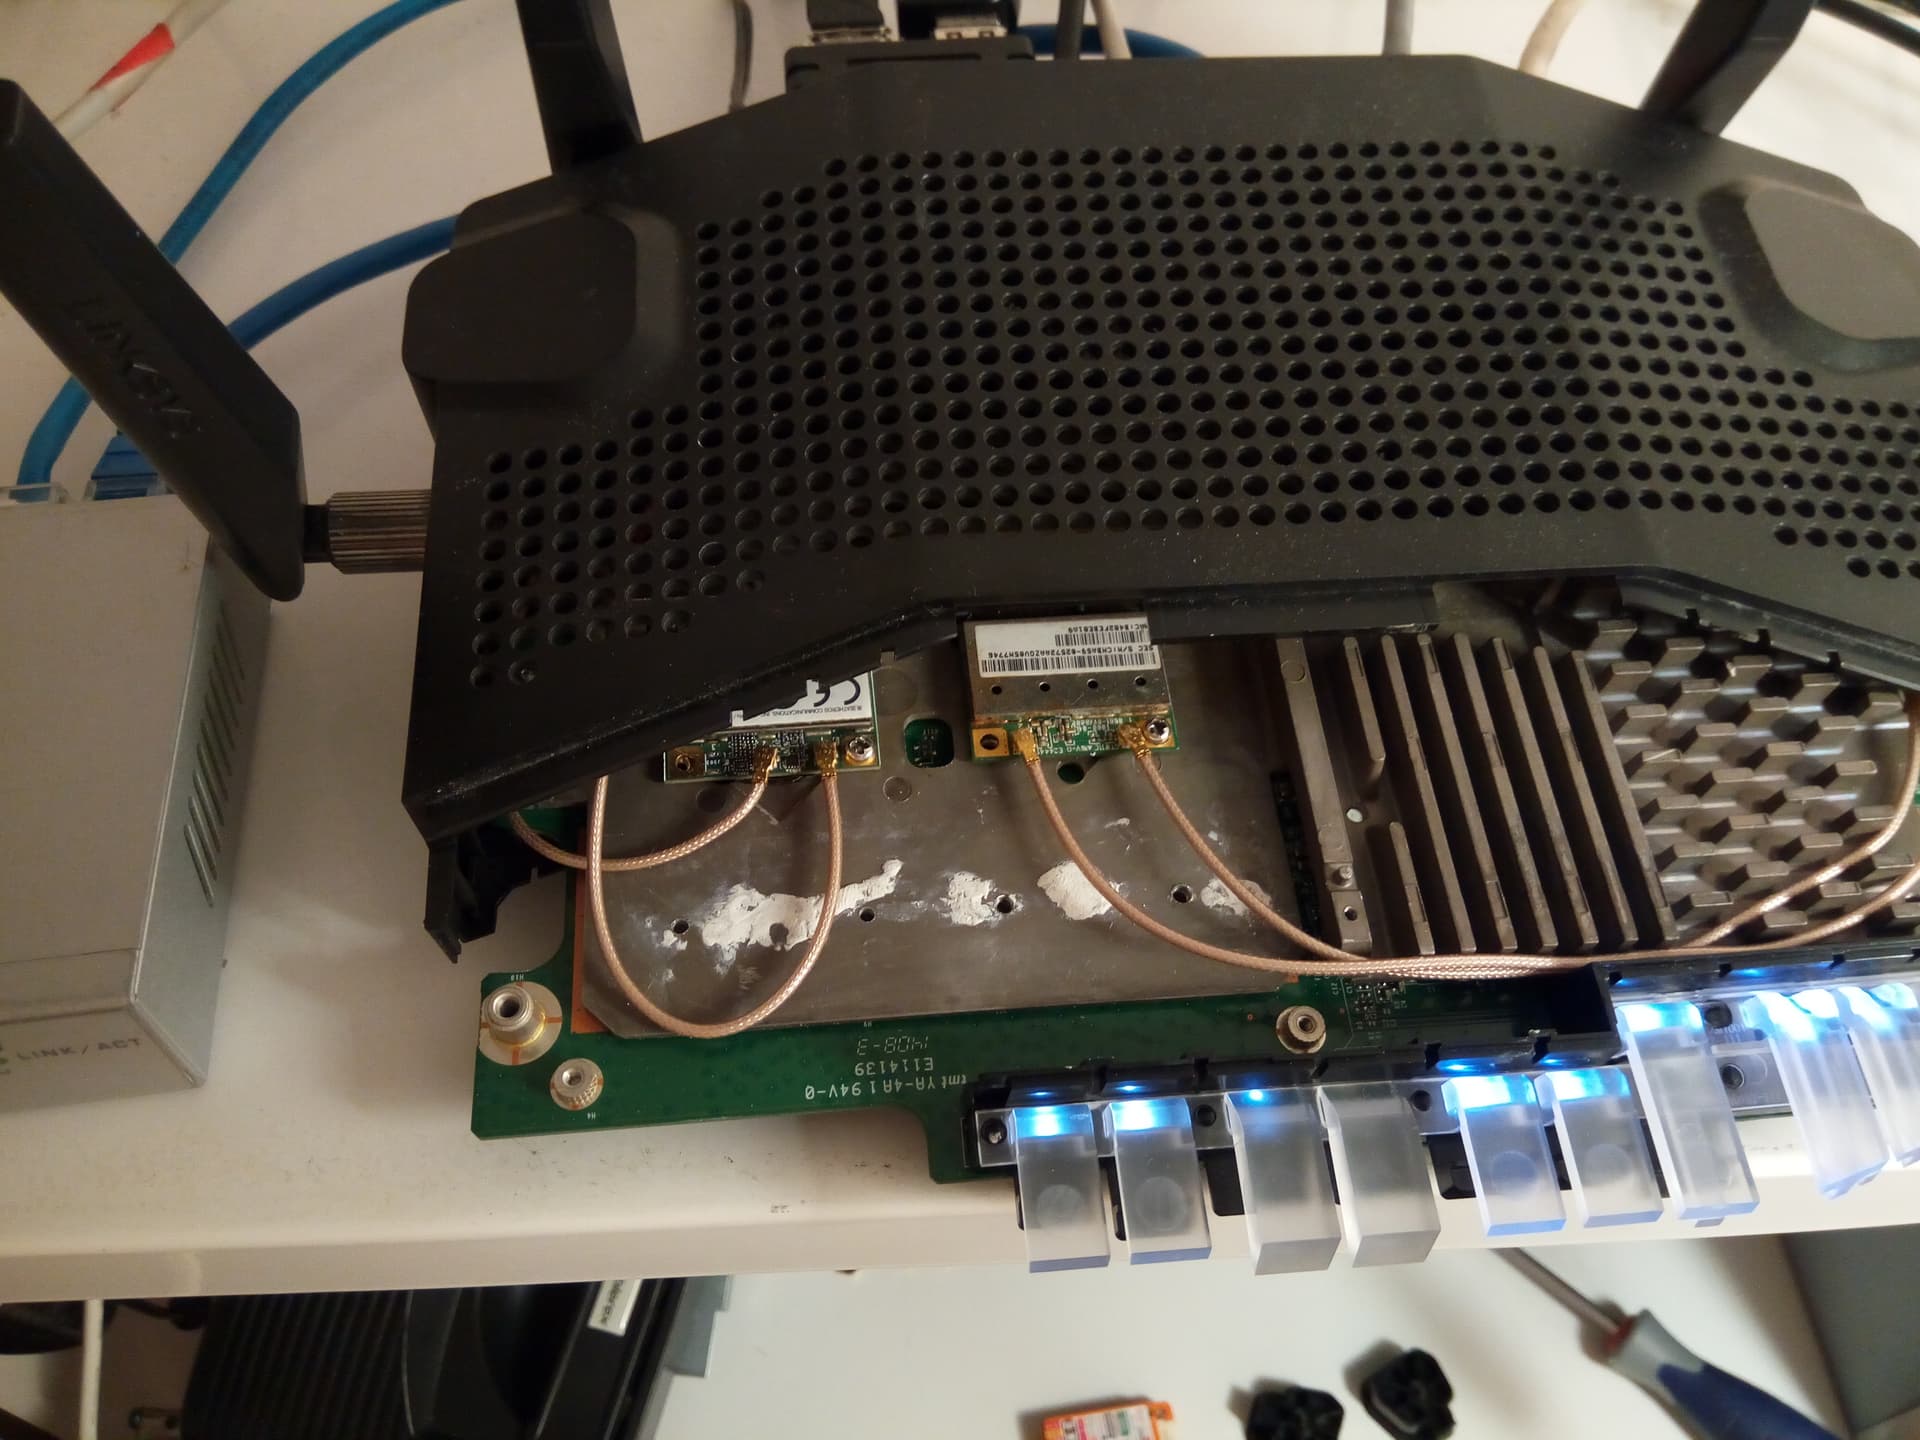
This how it looks with the new cards:

Step 9: Test the new cards, install drivers
Power up the router and check that the new cards are detected, then close the case.

If they are not detected, check that they are properly inserted in the slots. Try to use the other screw instead. You may also try a cardboard or rubber spacer/washer under the card.
I had a card that was detected intermittently, even though it was propery inserted. I suspect that this router's power is noisy and that card didn't like it.

Install the new drivers and firmware.
Configure your wifi networks again. It is recommended to reset OpenWrt to the defaults (all of it). If not, very weird thing may happen.

Step 10: Done!
Enjoy a your new and very stable wifi network!

Note: A possible easier mod
The router's main board has holes to insert mPCIe mounting nuts/spacers. These holes are completely covered by the heatsink and can't be used.
As an alternative to my mod, a very large cut may be made in the heatsink so that these holes become available. In this case only two mini-PCIe nuts/spacers are needed and I expect that they will be perfectly aligned.
The bad part is that the original board won't have any bottom cooling if it is installed back over such a big hole in the heatsink.

This guide is licensed CC-BY-SA.
I would appreciate if someone adds it to WRT-1900AC page. Thanks!

8 Likes

Nice work!
I have a WRT1900ACv1 - wifi works fine on DD-WRT - I assumed it also worked fine on latest OpenWrt.
The real problem child in the Linksys lineup is the WRT3200ACM - wifi on both DD-WRT and OpenWrt has issues.
Can that model also be modded in this way?

Might fix various issues. Somebody fixed pretty big problems. Probably still doesn’t support WPA3.

1 Like

WRT1900ACv1 - supports WPA3 in DD-WRT - I have not tried a recent build of OpenWrt on it, but I suspect a Snaphot build should work.
WRT3200ACM - nothing will get WPA3 working on its wifi chip - just trying to is enough to disable wifi and will require a restore from backup to get wifi working correctly again.

Could try disabling hwaccel.

Which cards did you go with? MediaTek AX ones?

@nickant
I don't know. Open it and see if the wifi is on a separate board.

@neheb
Too little, too late. I did this mod a month ago and it solved all my mwlwifi problems permanently.

@Borromini
No. Atheros AR9380 for 5GHz and AR9285 for 2.4GHz. Both work with ath9k.

Hello,

Attention, I have just taken a wrt1900ac v2 (cobra), I wished to "modder" it with another wifi card.

And surprise, the wifi card is built into the motherboard, so not all models are supported.

Fortunately, I already have the wrt1900ac v1, so I'll be able to check whether this tutorial is true.

Best regards,

Oh the guy that fixed up the driver. Welcome.

Unfortunately, I no longer own my v1 or v2 so I can’t be of help in this thread.

Is there any concurrent Wifi 6 or Wifi 6E cards available that could work in OpenWRT?

I've seen something about 6E working on OpenWRT on Reddit, but not sure in that case what is the best selection of cards for 4 antennas? This could eventually turn WRT1900AC into a fully working Wifi 6(E) router.

Edit: those are examples of such cards:
1.

2.

M.2 cards with mt7916 or qcn9074 would be the only 'generic' alternatives (with mt7916 support probably being further along/ more dependable at this point).

AsiaRF changed their URL structure, so links from above are missing.
Replaced by all Mini-PCIe cards:

Anybody knows can any of those Wifi 6(E) cards work on OpenWRT?
My only concern is that there might not be enough power on the slots or the cards get way too hot.

You may try to find the devices in the official linux wireless list to see if they are supported or not:
https://wireless.wiki.kernel.org/welcome

Not enough power or not enough cooling is a valid concern.
Try using a very low-power card for the 2.4GHz band or remove it completely if you don't need it.
I don't think there's more than one 3.3V power supply for the entire router so you could monitor 3.3V on the serial port pin with an oscilloscope to see if there are any problems.
For cooling, you may try to install back the original heatsink over the new wifi cards, with thermal pads or just grease depending on the remaining space.

I'd suggest to sharpen your pencil and recalculate if something like https://git.openwrt.org/?p=openwrt/openwrt.git;a=commitdiff;h=e7c399bee677e9bac66e1bea697aefb8d828edfe might not be a better choice over all.

The best router is the one you have. :wink:

Correct, as long as it meets your requirements in its current (factory-) state. Once you start investing into an old horse that already smells bad, you might want to reconsider your options.

Look, I've been in your shoes ~15 years ago with the Asus WL-500gP v1… Nice router, but coming from the factory with a defective BCM4318 card (they chose the wrong resistance for one SMD resistor in a batch of devices, resulting in very bad range). Replacing the BCM4318 card with an Atheros (ath5k) card was a common procedure back then (meaning it was known working, there even was a dedicated OpenWrt image for this hardware mod). So I bought the components (ath5k mini-PCI card, a second pigtail and RP-SMA antenna). The procedure went fine, the router was now working better than before - but I didn't use it long beyond that, a TL-WR1043NDv1 was calling and its natural successor. So while my replacement was a roaring success, the investment was still more of less 'wasted', as I didn't continue to use it long beyond that (faster SOC and more flash wanted, let alone 802.11n support).

In your case, you're spending around half the price of what the aforementioned device would cost you on components (self-imported, relatively long lead time). Most cards these days come in the M.2 form factor, you'd need mini-PCIe - so extra care (and a monetary markup) needed while ordering to get a mini-PCIe one (or a mini-PCIe to M.2 riser, which also costs money and might challenge your mounting clearance). Pretty much all wifi6 cards no longer come with the customary I-PEX/ U.FL antenna connector, but ship with a MHF4 connector instead, meaning you'd probably have to replace the pigtails between card and antenna as well (given the case integration of the original antennas, that might result in some case modding and probably needing new antennas as a side effect as well). Just these additional hardware requirements (pigtails and antennas, count on average roughly a fiver each) push your expense already pretty close to what a filogic 830 router would cost you.

Now let's take a look at the risks involved:

  • Mediatek wireless cards are pretty much exclusively used on little-endian devices, but mvebu is big-endian - it wouldn't be the first time that this would cause issues (yes, technically this would be a driver bug in need of fixing anyways, but unless anyone tests it… (yes, cz.nic is offering this for their Turris Omnia, so maybe you're in luck, maybe)).
  • these cards (all wifi6 ones) have serious power requirements, 10 watts over the 3.3V line (this is beyond mini-PCIe/ M.2 specs and might damage your router, if it can't supply that much - maybe immediately, maybe over a few weeks)
  • as a consequence of the above, these cards are running hot, meaning a rather large heatsink is mandatory, depending on the ventilation also an active fan. Your task to make it fit (and cope with the fan noise).
  • DTS changes required, until the end of time - you may also experience side effects from the old mwlwifi integration (calibration data extraction, sysupgrade helpers, etc.) - it's just an 'unsupported' combination, meaning you're your own developer and supporter.

Now let's look at the elephant in the room.
The factory setup of the WRT-1900AC v1 comes with two 4x4 cards on a custom (single) PCB, but only four external antennas - this means the rf signals of one 2.4 GHz chain (card) and one 5 GHz chain (card) are muxed together, leading to each of the antennas transmitting 2.4+5 GHz.
What's your solution to this?

Matching signal muxers are hard to come by (and relatively expensive), so probably not going to happen.

This leaves you with two alternatives:

  • one mt7915 DBDC card, effectively leaving you with 2x2 for 2.4 GHz and 2x2 for 5 GHz, not a very satisfactory solution - as you could get the same result with a 15 EUR dap-x1860/ covr-x1860/ wsm20.
  • two 4x4 mt7915 cards (without DBDC), you now have to mount four additional antennas into the case - and make sure to retain enough distance between them for Mu-MIMO to work.

Is this all possible, yes - is it sensible or economically viable, no. If you take a look at the resale value of stock WRT-1900AC routers on the used markets, this is probably even less sensible.

1 Like

since when is mvebu big endian?

1 Like

@slh I'm not exactly sure who are you replying to. Me, or @deeddy .

I'm not using wifi6 cards and I probably never will. I renovated my apartment 5y ago and I have cat5 ethernet in all rooms. There's really no need for more than .11n for mobiles, as they are used mostly for browsing. The only reason to change my router now would more RAM, in which case I would probably buy a Turris Omnia, or a dual-ethernet SBC and a gigabit switch.

BTW, how is that mwlwifi driver working after the recent patch? I still have a WRT-1900ACS that is not wifi-upgradeable.

There is no need for any devicetree modifications. The wifi is on PCIe. PC buses had plug-and-play detection and autoconfig since ISA.

@neheb mvebu can run in both modes, but it requires both kernel and OpenWrt to be built the same way. I read somewhere that big-endian was supposed to be faster for network applications because TCP/IP is BE. I never tried. I didn't even try thumb mode.