EdgeRouter X to OpenWRT Basic Guide
Required Files/Applications:
Optional: Put all the files and applications into a single working folder (c:\openwrt)
The latest ER v2 stock firmware (v2.0.9 hotfix7)
The latest Putty pack of files (which includes SSH and SCP)
The latest initramfs-factory.tar file from GitHub (v22.03 – look for the download “raw” file link)
The latest OpenWRT kernel image (v23.05.3)
Optional: rename the kernel .bin file to something shorter (openwrt.bin)
Process:
-
Set your network adapter to a static IP of 192.168.1.11 (anything other than .1) and the subnet mask of 255.255.255.0. Gateway IP is optional.
-
Make sure the ER-X is running the latest stock firmware and has been reset to factory defaults.
(Plug into eth0 and connect to https:/192.168.1.1 (default: ubnt/ubnt))
Note: If ER-X is running firmware < 10.1.6, see additional steps at the end of this guide.
-
Login via the GUI and upload/install the initramfs .tar file. Reboot when prompted.
(After reboot, move your cable from eth0 to eth1) -
Use PuttySSH and connect to
root@192.168.1.1
(There is no local password set - set to one of your choosing) -
Use SCP to copy the kernel .bin file to the /tmp directory on the ERX:
pscp -scp <path/to/openwrt.bin file> root@192.168.1.1:/tmp
Example:pscp –scp c:\openwrt\openwrt.bin root@192.168.1.1:/tmp
Note: If you get the FATAL ERROR: Received unexpected end-of-file from server message - make sure you added the "-scp" before the path to force it into scp mode.
- Use PuttySSH to connect back to the router and run the upgrade command:
sysupgrade -n /tmp/openwrt.bin
Note: The connection will automatically close, but it takes a bit for the ER-X to complete this process so wait about 5 minutes (even after the eth1 light illuminates) before attempting the next step.
- Log back in via GUI to https://192.168.1.1 and configure OpenWrt
Don't forget to reset your network adapter to DCHP
Additional Steps:
On older v1.x.x firmware, you will need to update the bootloader before any OpenWrt images are installed. Take extra caution as this section is where most ER-Xs become paperweights. Also, It is very strongly recommended that after each UI firmware install you reboot TWICE before doing anything else.
2a. Start with downloading and installing v1.10.11 via the GUI.
2b. Login, confirm the ER-X is at v1.10.11, and reboot the device.
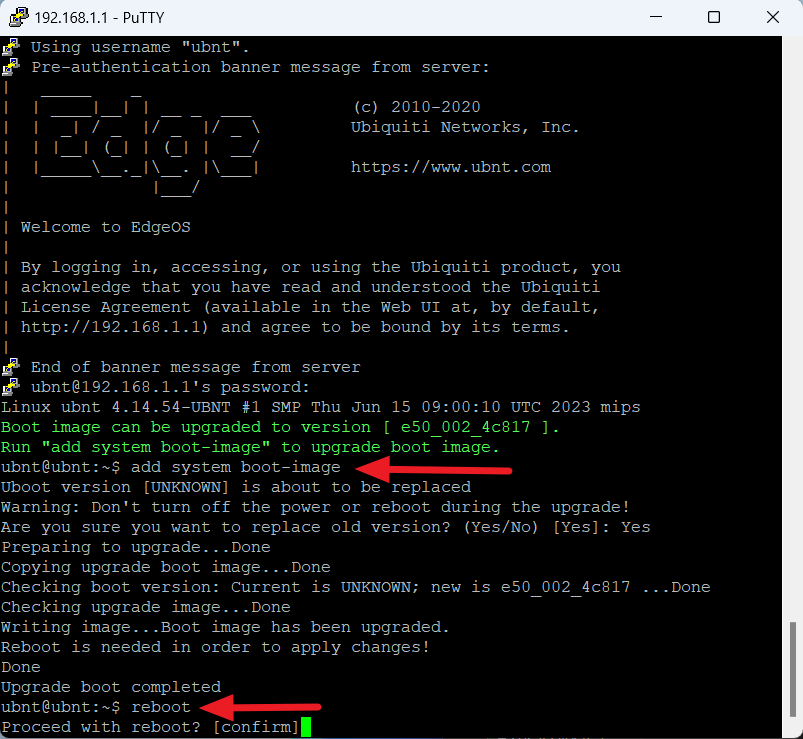
2c. After it comes back up, SSH to the ER-X, and follow the prompts to update the boot-loader (reboot prompt).
2d. After that reboot, SSH again to the ER-X, delete the older firmware so that only v1.10.11 is listed, and reboot again.
Show system image <---(this shows the system images on the system)
Delete system image <---(this deletes the old unused one)
2e. Login to the GUI and update the firmware to the latest v2.x (All ER-X Downloads).
2f. When that's done - log back into the GUI to confirm v2x has been installed, reboot the ER-X one more time, and then continue above with Step 3.

