Create Surfshark wireguard connection on OpenWrt easily

Hello and I hope that you are well RuralRoots - just by way of clarification - you wrote

Run the script a third time using the -g switch. ./gen-wg-config.sh -f

Did you mean

Run the script a third time using the -g switch. ./gen-wg-config.sh -g

Just asking - not trying to bust your chops or show you up - just trying to keep things straight in my mind is all - Thanks for all you do here - contributing your knowledge and expertise - and across The Greater OpenWRT Community

Peace My Brother

1 Like

Hello directnupe

You are indeed correct. I have edited the post accordingly. Thank you.

1 Like

Newbee to openwrt

I am trying to run your script on frindlyarm r2s
this is the config.json
r2s

but when i am trying to run it

sh gen_wg_config.sh -f
parse error: Invalid numeric literal at line 1, column 38

What is my problem?

See post #86.

It looks like you might be running nano for windows. It can contain non-printing characters that can cause this issue. Adding -d rebinddelete ie nano -d config.json can help.

Your best bet is to download a new config.json, and then ssh to your router and run nano from there to edit it.

The problem was that i left

#   example -> /mnt/shared/wgapi
#   example -> your SS account e-mail name@domain.?
 #   example -> I Don't Know

But now i have a new problem i execute the file and this happens
r2s 2

How stupid of me i didnt installed wireguard packages

That will do it.
Perhaps people will find the script found on Post #127 to be efficient. The Git Readme.md explains much of the script's purpose.

Sample output for just extending keys run via a cron job. Example of Cron Job found in documentation.

Just a Sec 'ntpdate' sycning clock
Running at Thu Apr 14 00:05:08  2022
WireGuard keys "/wg/wg.json" already exist
  Using public key: xxXXXlz6nPuI0ITsymy/t7CwkY5qelc6/Ro2amxXXxx=
Token file "/wg/token.json" exists, skipping login
Registering public key...
  Access denied: Expired JWT Token
  Token file corrupted! Deleting if available, and attempting to Login...
Logging in...
  HTTP status OK
Registering public key...
  Already registered
  Renewed! (expires: 2022-04-21T04:05:27+00:00)
  Hello World Wide WireGuard©
  Thanks Jason A. Donenfeld
Done at Thu Apr 14 00:05:28  2022
Enjoy!

Some Testing History

Great minds... So I was checking also. I've been running a new twist to the sswg.sh file ~ no huge change ~ but I added a couple echo comments and a new dependency ntpdate and a new line that kicks off prior to script getting to the job. ntpdate will sync the router first, because wireguard is time sensitive, and with all the testing I was doing, and since the router doesn't have a real time clock (RTC) sometimes I found myself not connected. Being that I run my router strictly on vpn only, if my router doesn't have perfect time, it can't connect to wg; therefore is in limbo internet wise.

I did the same as you checking keys and found that Luci's Pvt key did not match what was in wg.json. My wg.json file is dated 4/5/2022 and has been checked by the script now twice, extended till 4/17/2022. So I plugged in the Pvt key in the Interface page of Luci and then the pub key and pvt keys now match on the router Interface to what is in wg.json.

That said, when things go south either on the router, or in the script (which I doubt will happen) the echo will tell the user:

New Token and wg.json Created!! Your uci/luci Pvt. Key will be outdated. Enter new Pvt.Key in uci/luci. To Repopulate matching Conf folder; Run again w/ -g" ### The meaning behind 201 status

Since I have made a slight update to the script, I was waiting for your answer to the keys matching and my concern of the 201 status.
I'll do a commit to GitHub later this week, after Thursdays run.

For reference on ntpdate

Thanks for your help and Upvote, I'm very privileged to be in that small :+1:%

1 Like

Dear Bill,
I have been using your SSWG script for two weeks now. No disrespect to anyone else - or anyone else's work here - however - this script has taken getting SurfShark WireGuard to work - to a whole other level in its simplicity and efficacy
My reasons for saying this is because Bill's script is an amalgamation of the following as stated on SSWG homepage - SurfShark WireGurard ~ SSWG

Sources
This work is a culmination of scripts.

    Yanzdan
    Patrickm
    RuralRoots

The results are Pure Synergy see below :

synergy

the combined power of a group of things when 
they are working together that is greater than 
the total power achieved by each working separately:

Team work at its best results in a synergy that can be very productive.

'Nuff Said and as they say proverbially - a word to the wise

2 Likes

Dear Community,
As many of you well know - we have been on a long and arduous journey all with the intent of arriving at Yazdan's goal to Create Surfshark wireguard connection on OpenWrt easily. Well - IMHO - we have arrived at that destination. With that being said, I am throwing this entry up here to aid others. Please - no comments about me trying to hijack this thread. My purpose is to KISS for those who come here looking for THE ANSWER. So here we go with SurfShark WireGurard ~ SSWG the latest and greatest will save you hours of potential agita - of this I am certain.

Installation Prerequisites -- Overview of nano's shortcuts

# opkg update ; opkg install kmod-wireguard luci-app-wireguard luci-proto-wireguard wireguard-tools diffutils curl jq ntpdate qrencode
Step 1 -  download zip file from SSWG Homepage  
https://github.com/reIyst/SSWG

direct link to SSWG Script zip file =   
https://codeload.github.com/reIyst/SSWG/zip/refs/heads/main

Extract SSWG-main zip file to directory of 
your choosing on your desktop ( windows )

Linux - you are own your own

You will have SSWG-main folder when done

Step 2 - Create /wg/ Default Folder for SSWG Script
on your device

# mkdir -p /wg/

Step 3 - WINSCP these two files below from location of 
extracted SSWG-main folder directory 
into the default  /wg/  install directory
 on your device 

The two files to transfer  =   sswg.json    and   sswg.sh

 Step 3 -  make script executable  

# chmod 755 /wg/sswg.sh

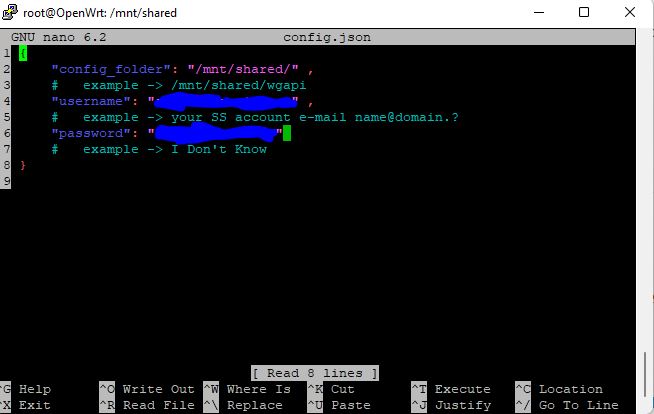
Step 4 - Go into the default install  /wg/ directory on your router
and edit sswg.json with your SurFShark E-mail and Password

# cd /wg/ 

# nano sswg.json  

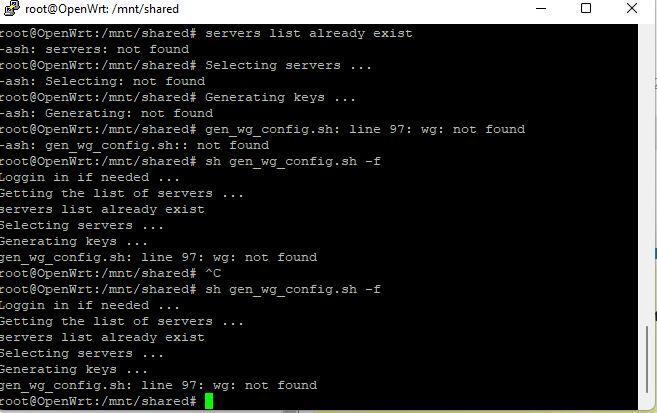
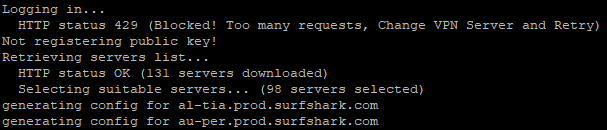
Step 5 -  Run SSWG Script ( you will get server configuration files
and your public key is automatically registered 

run command below while still in the 
default /wg/  install directory  :

# ./sswg.sh -g

go back into root directory # cd /root

Step 6 - Set Up Cron Job -  you will have fully automated public key
renewal from hence forth  - read SSWG HOMEPAGE for details

A - 

cat << "EOF" >> /etc/crontabs/root
# Thursday Key Reinstate ## Sunday conf files download and Key Reinstate
#######################################################
15 00 * * 4 /wg/sswg.sh >>/wg/wg.log 2 >&1 # standard registration and Redirect standard output to file '>' to log midnight+15min Thurs
15 00 * * 0 /wg/sswg.sh -g >>/wg/wg.log 2 >&1 # servers conf files dwl and Append standard output to file '>>' to log midnight+15min Sunday
#######################################################
EOF

B -

# uci set system.@system[0].cronloglevel="5"

C -

# uci commit system

D -

# /etc/init.d/cron restart

Done With That Phase - It's That Simple
No More Public Key Expiration Every 6 Days

Bonus Information

In order to read sswg log files on Sunday and Thursday
or anytime thereafter just enter :

# cat /wg/wg.log

If you want to clear log files weekly ( on Sunday ) -
amend your cron job as shown below :

cat << "EOF" >> /etc/crontabs/root
# Thursday Key Reinstate ## Sunday conf files download and Key Reinstate
#######################################################
15 00 * * 4 /wg/sswg.sh >/wg/wg.log 2 >&1 # standard registration and overwrite '>>' to log midnight+15min Thurs
01 00 * * 0 now=$(date) ; echo "Overwriting Log - wg.log" >/wg/wg.log 2>&1  ## clear wg.log midnight +1 Sunday
15 00 * * 0 /wg/sswg.sh -g >>/wg/wg.log 2 >&1 # servers conf files dwl and amend '>>' to log midnight+15min Sunday
#######################################################
EOF

Remember to enter the other three commands
B C and D for cron - as shown in Step 6 above.

Lastly, to set up your device with
SurfShark WireGuard Configuration Files
refer to post # 97 of this thread - click on link below`

WireGuard Interface and Simple FireWall Setup

As Ron Popeil made famous You Just Set It And Forget It

You Just Set it and Forget It

Don't thank me - this has been a team effort

Peace Be Unto All

3 Likes

First...I appreciate all of your hard work.

Second...I am a nube :slight_smile: And would love to assist in clarifying directions by asking some questions.

On step 4, changing the password; would it be the following?
{
"config_folder": "/wg",
"username": "youremail@email.com",
"password": "ThisIsMyPassword!"
}

On Step 6, I imagine you copy and paste after the hash. for instance you would copy and paste exactly the following
"cat << "EOF" >> /etc/crontabs/root"
then
"# Thursday Key Reinstate ## Sunday conf files download and Key Reinstate
#######################################################
15 00 * * 4 /wg/sswg.sh >>/wg/wg.log 2 >&1 # standard registration and amend '>>' to log midnight+15min Thurs
15 00 * * 0 /wg/sswg.sh -g >>/wg/wg.log 2 >&1 # servers conf files dwl and amend '>>' to log midnight+15min Sunday
#######################################################
EOF"
then
"uci set system.@system[0].cronloglevel="5""
and so on?

On Post 97...I get really lost with the commands on step 3.

Dear Lukeyn,
Hello and I hope that you are well. OK here we go - I will try to help you.
Your e-mail and password for sswg.json are the details which you use to login into your SurfShark account on their website found here below :

Log in to your SurfShark account

these credentials are different from the credentials used when you connect to SurfShark using Manual Method - usually on a router or pfSense where you use OpenVPN Configuration files.

On Step # 6 you enter the entire entry as is into the SSH shell session and hit enter

cat << "EOF" >> /etc/crontabs/root
# Thursday Key Reinstate ## Sunday conf files download and Key Reinstate
#######################################################
15 00 * * 4 /wg/sswg.sh >>/wg/wg.log 2 >&1 # standard registration and Redirect standard output to file '>' to log midnight+15min Thurs
15 00 * * 0 /wg/sswg.sh -g >>/wg/wg.log 2 >&1 # servers conf files dwl and Append standard output to file '>>' to log midnight+15min Sunday
#######################################################
EOF

If you notice there is a hash mark on all the commands - because I believe that BusyBox is structured that way. So basically you are correct - but I hope that I have set you straight - for instance - all you enter to view the log is cat /wg/wg.log

Lastly

On Post 97...I get really lost with the commands on step 3.

Well - you go into the file which configures your router's firewall - which is

/etc/config/firewall 

You have to edit the file and add the WireGuard Network - for the WG interface which was created
in Step # 2
nano /etc/config/network
where you created WG interface with this below

config interface 'wg0'

To do that is very simple and straightforward -
Open firewall configuration file - # nano /etc/config/firewall

Use nano to go down to the WAN Zone - it is indicated by the following as described in post 97

config zone
        option name 'wan'

You see that all the networks in the WAN Zone are listed - you can tell so because - the entries say

    `list network 'wan'`  and so on

You move option input 'REJECT' down a space
in the new blank space you enter the new WireGuard Network - all you have to do is add wg0 interface
as this is the name of the Newtwork as well

    `list network 'wg0'`

You may have to bone up on nano if you have troubles with the commands - they are very easy to learn

Overview of nano's shortcuts

1 Like

It appears you may be using firmware that is not from the official OpenWrt project.

When using forks/offshoots/vendor-specific builds that are "based on OpenWrt", there may be many differences compared to the official versions (hosted by OpenWrt.org). Some of these customizations may fundamentally change the way that OpenWrt works. You might need help from people with specific/specialized knowledge about the firmware you are using, so it is possible that advice you get here may not be useful.

You may find that the best options are:

  1. Install an official version of OpenWrt, if your device is supported (see https://firmware-selector.openwrt.org).
  2. Ask for help from the maintainer(s) or user community of the specific firmware that you are using.
  3. Provide the source code for the firmware so that users on this forum can understand how your firmware works (OpenWrt forum users are volunteers, so somebody might look at the code if they have time and are interested in your issue).

If you believe that this specific issue is common to generic/official OpenWrt and/or the maintainers of your build have indicated as such, please feel free to clarify.

1 Like

image

I am using an official version. I get this error when attempting STEP 5.

Problem with your config.json. Very likely your run directory.
Post the output of:

find / -iname config.json

If you are using sswg.sh, the 429 code is telling you that the peer you have configured on your router has called the surfshark api too many times.

Your options are to disable your vpn and try the script again, configure a different peer and try the script again, or wait it out.

This was reported on post #120 and worked into the sswg.sh scripts echo=messages.

Umm, RFC6585

It seems like I'm so close but yet so far. Please help... :frowning:
I'm trying to make it work for 3 days straight to no avail.
In all fairness, I'm somewhat noob in all this.
But here's what I've got so far.
Installed all the reqs.
I got the list of confs. I chose the one I want and followed Post #97 instructions to setup the interface and firewall.
And it seems to connect to wgs.prod.surfshark.com server and exchange packets. But refuses to connect to a second peer which is a country of my choosing (sto.prod.surfshark.com) with allowed IPs of 0.0.0.0/0
And of course, I don't get any internet either.
Would really appreciate someone's help.
And huge thanks to you guys @Bill @directnupe and all the others great individuals in this post (I can only tag 2 unfortunately) for your amazing work!!!

Welcome aboard.
First I'd like to see the output of your log file. Like this!
Run command from terminal copy/paste/execute

cat /wg/wg.log
root@Dachshund:/wg# ./sswg.sh -g
Just a Sec 'ntpdate' sycning clock
Running at Tue Apr 26 20:08:25 EDT 2022
WireGuard keys "/wg/wg.json" already exist
  Using public key: xxXXXlz6nPuI0ITsymy/t7CwkY5qelc6/Ro2amxXXxx=
Logging in...
  HTTP status OK
Registering public key...
  Already registered
  Renewed! (expires: 2022-05-04T00:08:42+00:00)
  Hello World Wide WireGuard©
  Thanks Jason A. Donenfeld
Retrieving servers list...
  HTTP status OK (131 servers downloaded)
  Selecting suitable servers... (98 servers selected)
  Servers list "/wg/surfshark_servers.json" already exists
  Servers changed! Updating servers file
generating config for al-tia.prod.surfshark.com
generating config for au-bne.prod.surfshark.com
## Truncated ##
generating config for us-ltm.prod.surfshark.com
generating config for us-bos.prod.surfshark.com
Done at Tue Apr 26 20:12:50 EDT 2022
Enjoy!
root@Dachshund:/wg#

Mask your keys with an editor.

How can we verify that outgoing traffic is passing the wireguard-tunnel of surfshark?

A couple of spots

  • In ssh ifconfig Look for your wg interface and you’ll see the RX/TX packets.

  • in LuCI/Network/Interfaces

  • *in LuCI/Status/Wireguard