So to summarize, I did this. Note Huawei inverter is on another subnet that is 192.168.200.0.

- Flash Openwrt on the router
- Setup your router as a dumb AP. https://openwrt.org/docs/guide-user/network/wifi/dumbap
- Connect it to your ISP router via ethernet. This will change the IP to something in the router’s subnet range. e.g if your ISP’s router Ip is 192.168.1.1 then your OpenWrt's router IP will be 192.168.1.24 (anything in between 192.168.1.2 to 192.168.1.100)
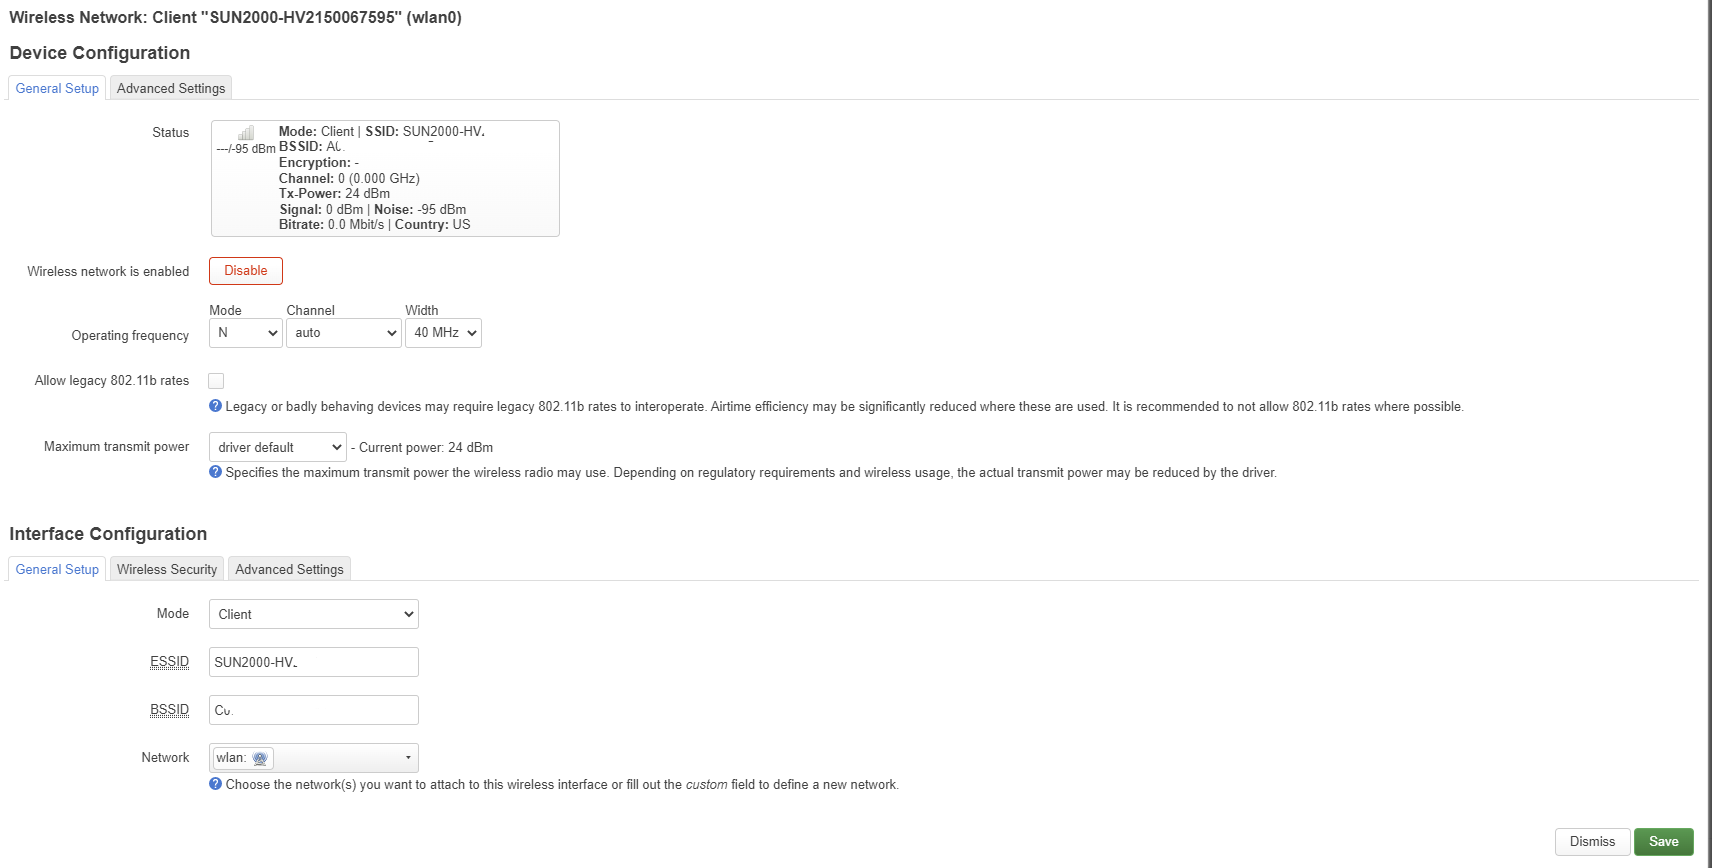
- Connect to your Huwaei Sun2000 inverter’s wifi as a client via 2.4Ghz radio.
-
Network – Wireless
-
click scan
-
connect to SUN2000-HVxxxxxxxx
-
Use password “Changeme”
-
Wireless security WPA2-PSK
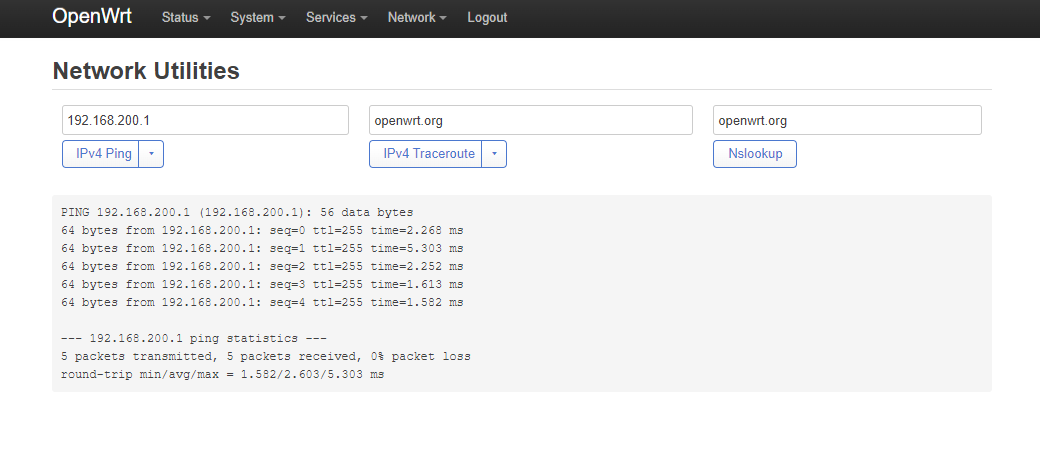
Check the connection between OpenWrt and router by ping 192.168.200.1 (in most cases but in some cases it will be 192.168.199.1) -
Network – Diagnostics

Step 2
This step is unique for each user, depending on your ISP modem/ router.
Set up a static route in ISP router/modem/
e.g
On F@st 5366
- Open 192.168.1.1 (again depending on your Isp router Ip address)
- follow these instructions to open the static route page. Route - SAGEMCOM Swan F5366s User Manual [Page 19] | ManualsLib
- enter the following setting
- IP address 192.168.200.0 (in your case 192.168.199.0)
- Gateway IP address 192.168.1.2 (whatever your OpenWRT router Ip address is)
- Interface IP_BR_LAN (in my case it was br0)
- Subnet mask 255.255.255.0 (if there is a field for subnet mask)
- Save and reboot both your ISP modem/router and OpenWrt router.
This will complete step 2.
Step 3
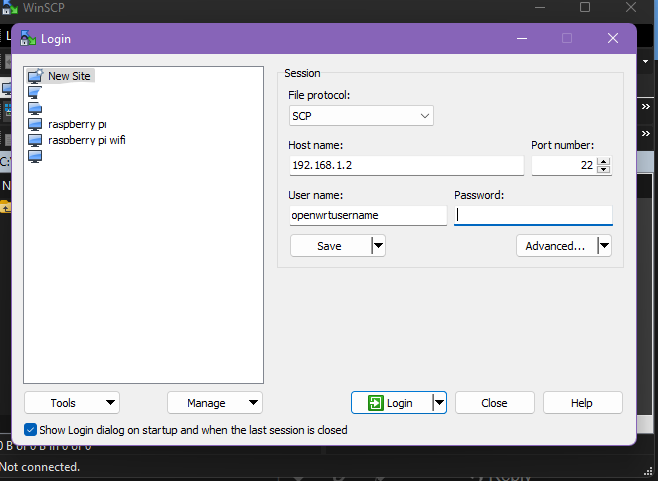
- Download and install the latest Winscp from WinSCP:: Official Site:: Download
- Run WinScp
- select Scp as protocol.
- login with your OpenWrt’s ssh credentials e.g
- accept the terms etc etc
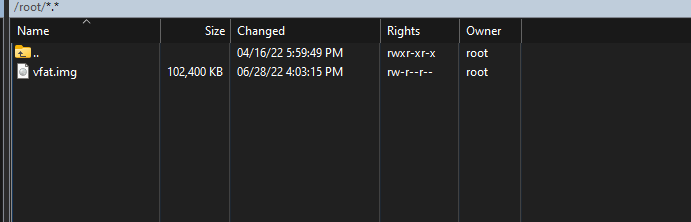
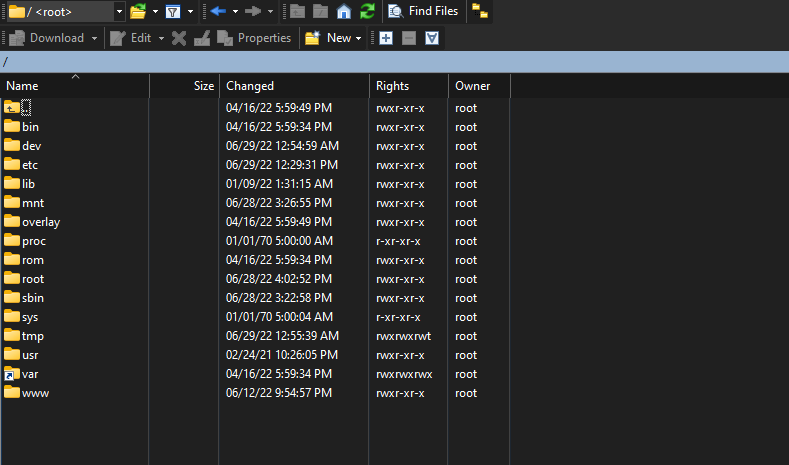
- You will be presented with these windows with OpenWRT folders.double click on three dots icons
you will be presented with
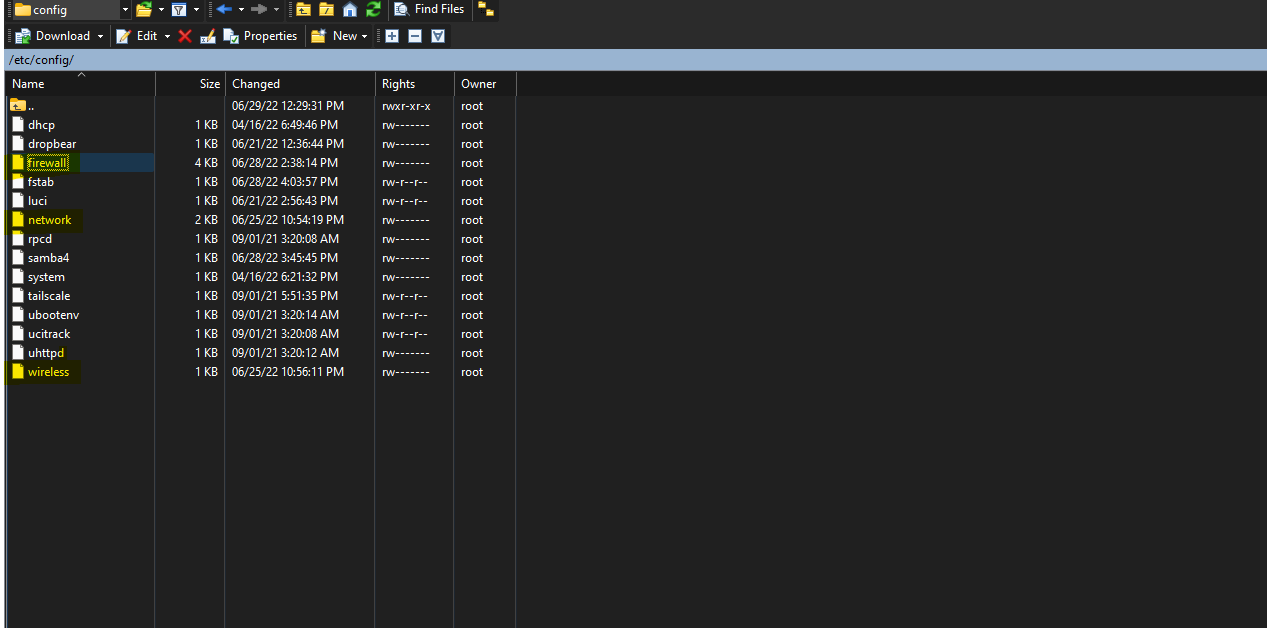
- Navigate to the first file by double-clicking etc and then config. Here you will find all the three files “network” “wireless” and “firewall”
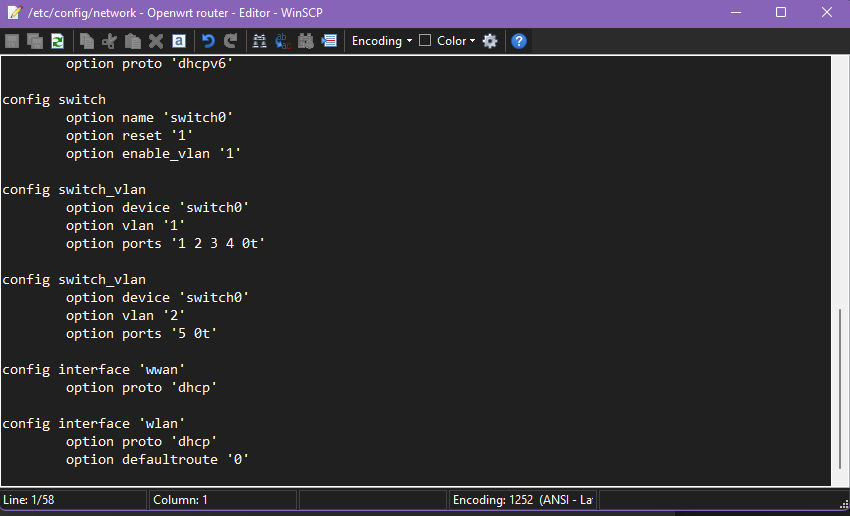
- double click on the “network” and copy-paste the following code at the end of the files. remember to set defaultroute '0" as mentioned in the GitHub wiki.
config interface 'wlan'
        option proto 'dhcp'
        option defaultroute '0'
7. repeat the process with “wireless” files by adding the following code to the end of the wireless file. changing according to your inverter’s AP’s Name and BSSID
config wifi-iface 'wifinet0'
        option key 'Changeme'
        option ssid 'SUN2000-HV0123456789'
        option device 'radio0'
        option mode 'sta'
        option bssid '94:25:33:12:34:56'
        option encryption 'psk2'
        option network 'wlan'
- Add the following code to the “firewall” file.
config zone
        option input 'ACCEPT'
        option name 'sun'
        option output 'ACCEPT'
        option forward 'ACCEPT'
        option masq '1'
        option network 'wlan'

config forwarding
        option dest 'sun'
        option src 'lan'

config forwarding
        option dest 'lan'
        option src 'sun'
- save everything and restart your OpenWrt router.
Step 4
Firewall rules for the port forwarding
- Network -- Firewall -- Port forwarding
- Setup first rules as follows
- Name: Preroute
- Protocol: TCP
- Source zone: Lan
- External port: 6607
- Destination zone : sun(wlan)
- Internal IP: Select from dropdown: 192.168.200.1

-
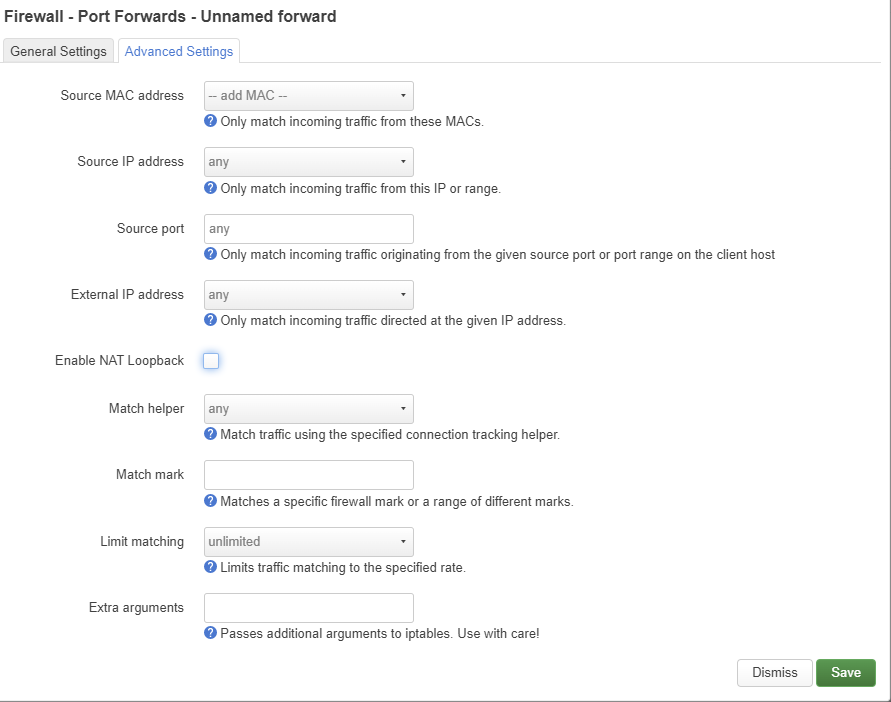
Uncheck NAT loopback from advanced setting tab
-
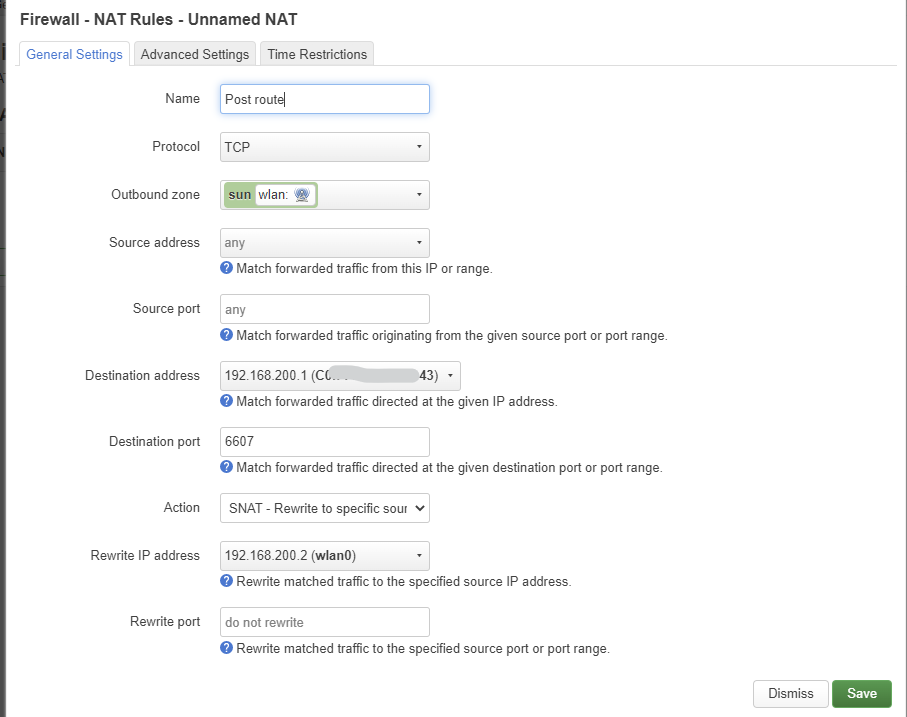
Add second rule as following
- Name : Post route
- Protocol TCP
- Outbound zone Sun(wlan)
- Destination address select from dropdown 192.168.200.1
- Destination port: 6607
- Action: SNAT (there is some debate on this issue but you can use this)
- Rewrite IP address: select from dropdown 192.168.200.2 (OpenWrt router IP in Huwai inverter subnet)
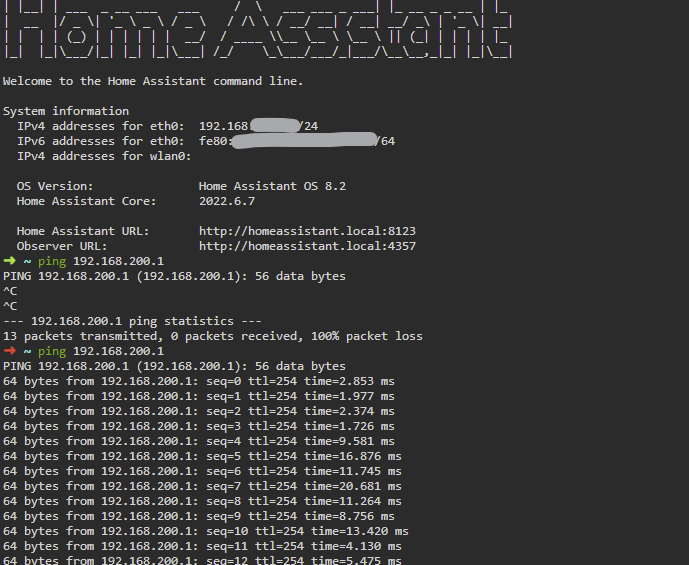
Step five
- Verify connectivity, Before continuing with the setup of the integration, you should test whether you can ping the inverter on
192.168.200.1. You can use one of the SSH/Terminal add-ons of HA, or use a terminal in the VSCode add-on. - successful connection will look like this
Install Wlcrs integration.
- Connect Home Assistant to the WiFi Access Point of your Huawei inverter.
- Install this integration with HACS, or copy the contents of this repository into the
custom_components/huawei_solardirectory - Restart HA
- Start the configuration flow:
- Or: Go to
Configuration->Integrationsand click the+ Add Integration. SelectHuawei Solarfrom the list
-
Choose whether you want to connect via serial or network connection. In this case we will choose
network

-
Enter the IP address of your inverter (192.168.200.1). The slave id is typically 0. You should only check the
Advanced: elevate permissionscheckbox if you intend to dynamically change your battery settings.

-
When using the
elevate permissionsfeature, you might be asked to enter the credentials to theinstalleraccount in the next step. These are the credentials used to connect to the inverter in the "Device Commissioning" section of the FusionSolar App. The default password is 00000a..