Cloudflare Tunnel is a great alternative to a traditional WireGuard setup for remote router access (especially when the remote router is located behind ISP's CGNAT).

- I went through the official OpenWrt wiki documentation for Cloudflare Tunnel and played with it a bit, but the configuration described there does not explain a minimal working setup.
So, basically, the minimal working config for me was:
Cloudflare config:
- Purchase the cheapest domain (for example, the www.spaceship.com registrar sells domain names in formats like
002515.xyzfor only ~0.58 EUR). - Create a free Cloudflare account at https://www.cloudflare.com
- Add the purchased domain to Cloudflare for DNS management (do not transfer it, just add it).
- In Cloudflare, create a tunnel in the Cloudflare dashboard:
https://one.dash.cloudflare.com → Network → Connectors → Create a tunnel → Cloudflared → Next → give a name to the tunnel → click "Save Tunnel".
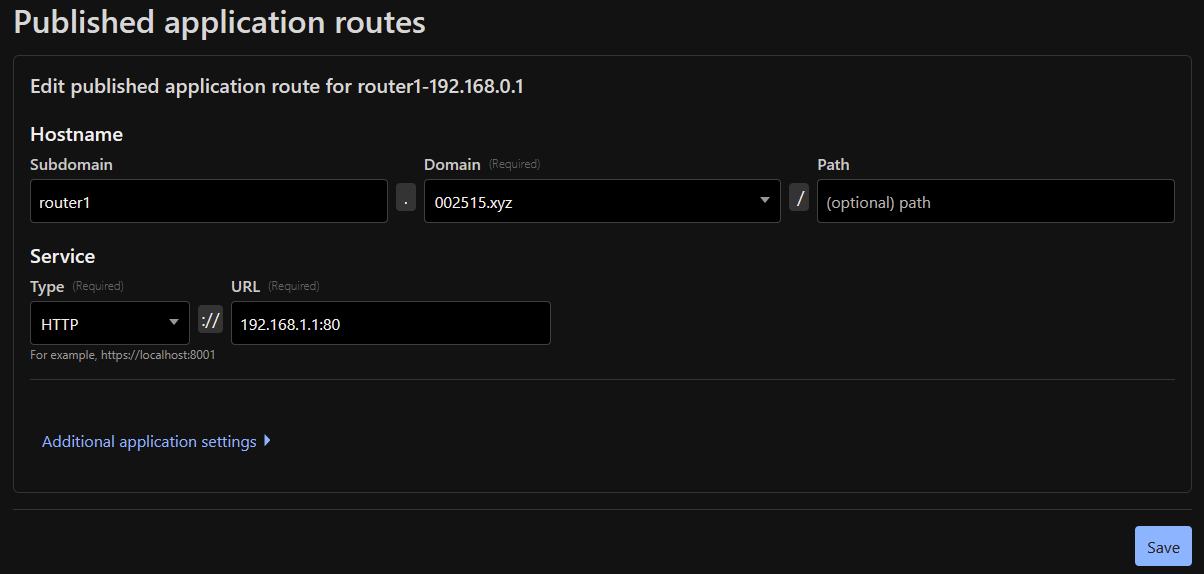
On the opened "Configure" page, copy the token from “4. Run the following command:” and store it somewhere (we will use this token on the OpenWrt router). - Then, while you're still on the "Configure" page, click the "Published Application Routes" tab → click "Add a published application route" → on the opened page, enter a subdomain name you like, select your purchased domain → select "HTTP" as the type and enter your OpenWrt router IP, for example
192.168.1.1:80→ click Save.
OpenWrt router:
- Install
luci-app-cloudflaredpackage ( the main cloudflared package will be installed automatically as a dependency). - Open LuCI → VPN → Cloudflare Zero Trust Tunnel → in the "Token" field, enter the token you copied during the Cloudflare Tunnel configuration in step4 (use only a token, not the
cloudflared.exe service installcommand text) → Save & Apply.
*note: for this minimal OpenWrt configuration, only the /etc/config/cloudflared file containing the stored token is used. So, after a router reset, simply put this file back, and the tunnel will be restored.
That's it!
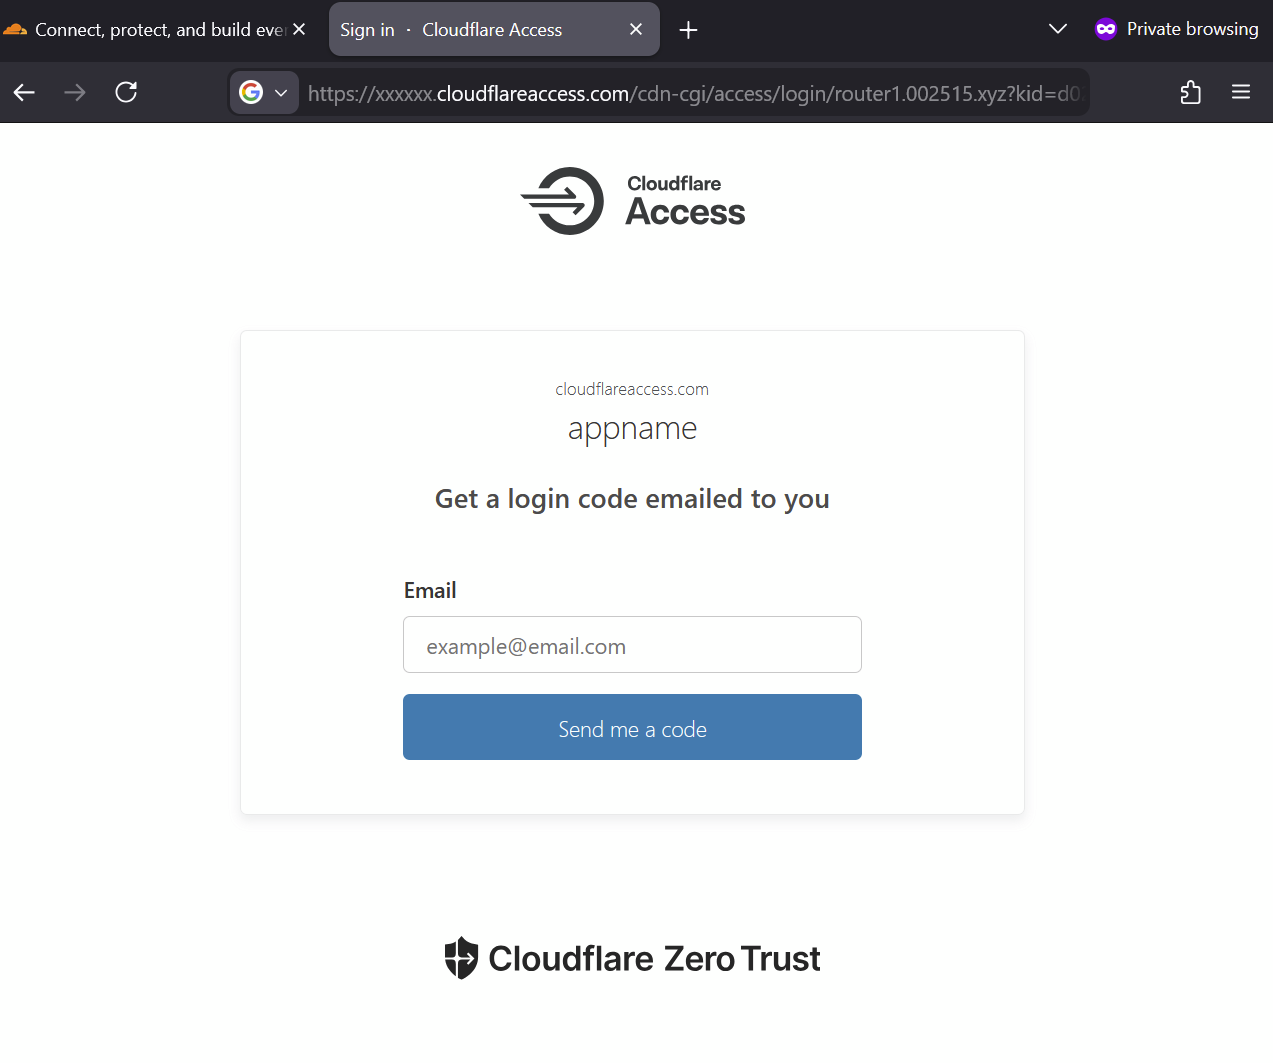
The tunnel should be up and running within a few seconds. Now you can reach your OpenWrt router via a public URL like https://router1.002515.xyz from anywhere in the world.
- Important note:
- At this stage of the configuration, anyone can reach your router, so it is strongly recommended to configure Cloudflare Zero Trust Access control. This way, when
https://router1.002515.xyzis opened in a browser, it will first ask for authentication and only then redirect you to the OpenWrt LuCI page of your router.- note: I found this article that describes configuration of the Cloudflare Zero Trust Access Control quite well (see the "Add a login method" section): https://www.crosstalksolutions.com/cloudflare-tunnel-easy-setup/
- note: I found this article that describes configuration of the Cloudflare Zero Trust Access Control quite well (see the "Add a login method" section): https://www.crosstalksolutions.com/cloudflare-tunnel-easy-setup/
- At this stage of the configuration, anyone can reach your router, so it is strongly recommended to configure Cloudflare Zero Trust Access control. This way, when
I'd appreciate any feedback on this configuration and hope it's helpful to someone. Thanks!