Damn this was complicated, but thanks to your explanations and hints, I managed to flash the device.
The guide from @rogerpueyo and instructions from @araujorm were super helpful and are much better than my description.
Equipment needed:
- the MI router 4A Gigabit Edition (On the board they printed "MI M43 R0101l. This is a MI router 4a with Gigabit, similar to the Mi Router 3G V2 but with "cut corners").
- USB to serial adapter, 3.3volts
- USB ch341a flash programmer with cramp-cable (mine cost <=5$ and was bought at aliexpress)
- Linux and the flashrom-tool and tftpd-hpa
- The images in the google drive mentioned here in this thread must NOT be used, it would overwrite your mac addresses. Instead dump your router's firmware and edit the value of bootdelay.
Hardware preparations:
- open the router
- do NOT connect the power cable to the router
- connect the USB-to-serial adapter to the serial-pin holes. TX router to RX usb-adatper, RX router to TX usb-adapter, GND to GND. Do not connect 3.3V, it stays empty as most usb-serial-adapter do not supply enough power.
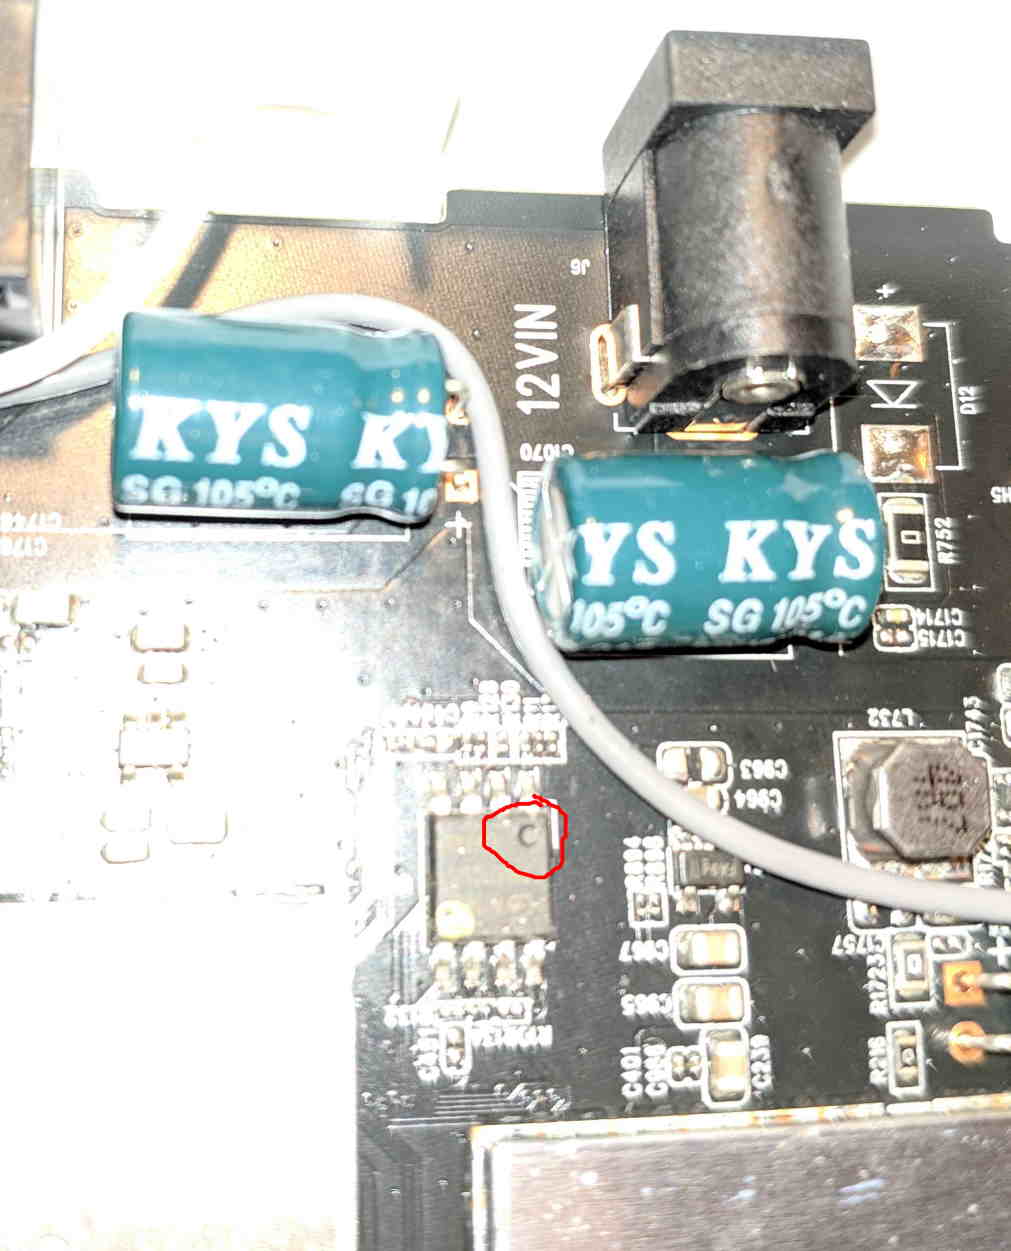
- connect the clamp to the flash-chip. The red wire (=pin1) must be at the upper right side which means close to the antennas. The flash-chip has a round notch that marks pin 1 - do not mix it up with the yellow round marking that is printed on it. I had to position it 5-10 times before I got a connection.
- connect the other end of the the clamp-cable to the ch341a flasher and make sure to put the red wire to the pin1-slot and to use the SPI/BIOS-slot and not the eeprom one.
- There is NO additional 3.3 volt feed from the ch341a-programmer to the router's 3.3v-pinhole next to the serial-pins necessary. You can skip this step. I connected the cable but it would not have been necessary.
Reading from flash:
Runflashrom --programmer ch341a_spi -c "GD25Q128C" --read r4ga-orig.binon your linux pc connected to the programmer.
Then modify the dumped bios as mentioned in this post and change the bootdelay-value.
Do NOT simply use the r3g-edited.bin provided in this thread, as you will overwrite your mac-adresses of eth0, eth1, wlan0 and wlan1.

Writing to flash:
Run flashrom --programmer ch341a_spi -c "GD25Q128C" --write r3gc2-edited.bin on your linux pc connected to the programmer.
It takes about 10 minutes to flash.
If you see the error message "No EEPROM/flash device found." check the cable connection. Both red lights on my ch341a-adapter are lit when there is a proper connection.
I had to use a USB3-HUB to provide enough power to it, the programmer will not work properly on USB2.0. In case the program cannot erase the flash and begins probing different methods for erasing, you did not properly connnect all of the pins. Remove and reattache the clamp and then try again.
After a succesfull flash, disconncet the cramp/ch341a adapter.
The bootloader of router will now accept firmware-images that are not signed by xiaomi.
Prepare the tftp-daemon (apt install tftpd-hpa), but the openwrt-rampis-mt7621-xiaomi_mir3g-v2-squashfs-sysupgrade-01-10-2019.bin in /var/lib/tftpboot
Assign the ip 192.168.31.100/24 to your PC and connect the LAN-cable to the router.
Power the router, hold the reset button and watch the serial console.
You should see a prompt Please choose the operation: 1: Load system code to SDRAM via TFTP. 2: Load system code then write to Flash via TFTP. 3: Boot system code via Flash (default). 4: Entr boot command line interface. 7: Load Boot Loader code then write to Flash via Serial. 9: Load Boot Loader code then write to Flash via TFTP.
choose 2 and press it or hold it.
confirm Y.
Specify the IP of the router and your tftp-server (e.g. 192.138.31.1 = router, 192.168.31.100 = tftp). Enter the filename of the openwrt-sysupgrade-imagefile.
2: System Load Linux Kernel then write to Flash via TFTP.
 Warning!! Erase Linux in Flash then burn new one. Are you sure?(Y/N)
 Please Input new ones /or Ctrl-C to discard
        Input device IP (192.168.31.1) ==:192.168.31.1
        Input server IP (192.168.31.2) ==:192.168.31.100
        Input Linux Kernel filename () ==:openwrt-mir3g-v2.bin

 NetTxPacket = 0x87FE52C0

 KSEG1ADDR(NetTxPacket) = 0xA7FE52C0

 NetLoop,call eth_halt !

 NetLoop,call eth_init !
Trying Eth0 (10/100-M)

 Waitting for RX_DMA_BUSY status Start... done


 ETH_STATE_ACTIVE!!
TFTP from server 192.168.31.100; our IP address is 192.168.31.1
Filename 'openwrt-mir3g-v2.bin'.

 TIMEOUT_COUNT=10,Load address: 0x80100000
Loading: T T  Got ARP REPLY, set server/gtwy eth addr (18:db:f2:38:0a:18)
Got it
checksum bad
#################################################################
         #################################################################
         #####################################checksum bad
############################
         #################################################################
         #################################################################
         #################################################################
         #################################################################
         #################################################################
         #################################################################
         #################################################################
         #################################################################
         #################################################################
         #################################################################
         #################################################################
         #################################################################
         #################################################################
         #################################################################
         #################################################################
         #################################################################
         #################################################################
         #################################################################
         #################################################################
         #################################################################
         #################################################################
         ############################
done
Bytes transferred = 8127244 (7c030c hex)
LoadAddr=80100000 NetBootFileXferSize= 007c030c
 Writing OS1 to 0x180000
raspi_erase_write: offs:180000, count:7c030c
raspi_erase: offs:180000 len:7c0000
........................................................................................................................................................................................................................
............................................................................................................................
raspi_erase: offs:940000 len:10000
.
.
Done!
Erasing SPI Flash...
raspi_erase: offs:30000 len:10000
.
Writing to SPI Flash...
.
done
Booting System 1
Erasing SPI Flash...
raspi_erase: offs:30000 len:10000
.
Writing to SPI Flash...
.
done
## Booting image at bc180000 ...
   Image Name:   MIPS OpenWrt Linux-4.14.146
   Image Type:   MIPS Linux Kernel Image (lzma compressed)
   Data Size:    2015401 Bytes =  1.9 MB
   Load Address: 80001000
   Entry Point:  80001000
   Verifying Checksum ... OK
   Uncompressing Kernel Image ... OK
Erasing SPI Flash...
raspi_erase: offs:30000 len:10000
.
Writing to SPI Flash...
.
done
commandline uart_en=0 factory_mode=0 mem=128m root=/dev/mtdblock9
No initrd
## Transferring control to Linux (at address 80001000) ...
## Giving linux memsize in MB, 128

Starting kernel ...
The router flashes and reboots into openwrt and is reachable on 192.168.1.1.
done.