WRT32X - Unable to upgrade / install firmware

I'm currently using OpenWRT 19.07.0-rc2 r10775-db8345d8e4 on the primary partition of my WRT32X. The primary partition is working fine, I'm just wanting to upgrade to a newer release of OpenWRT. Upon trying to do so (using the factory image) from either the CLI or LUCI, the secondary partition that the firmware was flashed to is unbootable. I'm not entirely sure where else to go from here. The unit will appear to boot up on the secondary partition with the firmware on it, and it even obtains a IP address on the WAN interface, but all I can do is ping the address, the unit doesn't respond to HTTP/SSH requests, and I'm forced to do the 3x power switcheroo to get back to the primary partition..

Does anyone have any ideas why this is going on? I've tried a couple of different builds, OpenWRT and Divested-wrt, both of them are experiencing the same issue.. not sure if any details anyone might need, but here is the output of fw_printenv..

# fw_printenv
CASset=max
MALLOC_len=5
MPmode=SMP
altFwSize=0x7B00000
altKernAddr=0x8400000
altKernSize=0x0600000
altnandboot=setenv bootargs console=ttyS0,115200 root=/dev/mtdblock8;nand read $defaultLoadAddr $altKernAddr $altKernSize; bootz $defaultLoadAddr 
auto_recovery=yes
autoload=no
baudrate=115200
boot_order=hd_scr usb_scr mmc_scr hd_img usb_img mmc_img pxe net_img net_scr
boot_part=1
boot_part_ready=3
bootargs=console=ttyS0,115200 root=/dev/mtdblock6
bootargs_dflt=$console $nandEcc $mtdparts_lgcy $bootargs_root nfsroot=$serverip:$rootpath ip=$ipaddr:$serverip$bootargs_end $mvNetConfig video=dovefb:lcd0:$lcd0_params clcd.lcd0_enable=$lcd0_enable clcd.lcd_panel=$lcd_panel
bootargs_end=:10.4.50.254:255.255.255.0:Armada38x:eth0:none
bootargs_root=root=/dev/nfs rw
bootcmd="run altnandboot"
bootcmd_auto=stage_boot $boot_order
bootcmd_fdt=tftpboot 0x2000000 $image_name;tftpboot $fdtaddr $fdtfile;setenv bootargs $console $nandEcc $mtdparts $bootargs_root nfsroot=$serverip:$rootpath ip=$ipaddr:$serverip$bootargs_end $mvNetConfig video=dovefb:lcd0:$lcd0_params clcd.lcd0_enable=$lcd0_enable clcd.lcd_panel=$lcd_panel; bootz 0x2000000 - $fdtaddr;
bootcmd_fdt_boot=tftpboot 0x2000000 $image_name; setenv bootargs $console $nandEcc $mtdparts $bootargs_root nfsroot=$serverip:$rootpath ip=$ipaddr:$serverip$bootargs_end $mvNetConfig video=dovefb:lcd0:$lcd0_params clcd.lcd0_enable=$lcd0_enable clcd.lcd_panel=$lcd_panel; bootz 0x2000000 - $fdtaddr;
bootcmd_fdt_edit=tftpboot $fdtaddr $fdtfile; fdt addr $fdtaddr; setenv bootcmd $bootcmd_fdt_boot
bootcmd_lgcy=tftpboot 0x2000000 $image_name;setenv bootargs $console $nandEcc $mtdparts_lgcy $bootargs_root nfsroot=$serverip:$rootpath ip=$ipaddr:$serverip$bootargs_end  video=dovefb:lcd0:$lcd0_params clcd.lcd0_enable=$lcd0_enable clcd.lcd_panel=$lcd_panel;  bootm $loadaddr; 
bootdelay=3
cacheShare=no
console=console=ttyS0,115200
defaultLoadAddr=0x2000000
device_partition=0:1
disaMvPnp=no
eeeEnable=no
enaClockGating=no
enaCpuStream=no
enaFPU=yes
enaMonExt=no
enaWrAllo=no
eth1addr=60:38:E0:C8:E9:28
eth1mtu=1500
eth2addr=60:38:E0:C8:E9:28
eth2mtu=1500
eth3addr=60:38:E0:C8:E9:28
eth3mtu=1500
ethact=egiga0
ethaddr=60:38:E0:C8:E9:28
ethmtu=1500
ethprime=egiga0
fdt_addr=2040000
fdt_skip_update=no
fdtaddr=0x1000000
fdtfile=armada-38x-modular.dtb
fileaddr=2000000
filesize=A3E800
firmwareName=/srv/tftp/flat-FW_WRT32X_1.0.180404.58.img
flash_alt_image=tftpboot $defaultLoadAddr $firmwareName && nand erase $altKernAddr $altFwSize && nand write $defaultLoadAddr $altKernAddr $filesize
flash_pri_image=tftpboot $defaultLoadAddr $firmwareName && nand erase $priKernAddr $priFwSize && nand write $defaultLoadAddr $priKernAddr $filesize
ide_path=/
image_name=uImage
initrd_name=uInitrd
ipaddr=192.168.1.1
kernel_addr_r=2080000
lcd0_enable=0
lcd0_params=640x480-16@60
lcd_panel=0
limit_dram_size=yes
loadaddr=0x02000000
loads_echo=0
mtddevname=uboot
mtddevnum=0
mtdids=nand0=armada-nand
mtdparts=mtdparts=armada-nand:2048K(uboot)ro,128K(u_env),256K(s_env),256K@8064K(devinfo),123m@9m(firmware1),123m@132m(firmware2)
mvNetConfig=mv_net_config=4,(00:50:43:11:11:11,0:1:2:3),mtu=1500
mv_pon_addr=00:50:43:07:ec:00
nandEcc=nfcConfig=4bitecc
nandboot=setenv bootargs console=ttyS0,115200 root=/dev/mtdblock6;nand read $defaultLoadAddr $priKernAddr $priKernSize; bootz $defaultLoadAddr 
netbsd_en=no
netmask=255.255.255.0
netretry=no
partition=nand0,0
pcieTune=no
pexMode=RC
priFwSize=0x7B00000
priKernAddr=0x0900000
priKernSize=0x0600000
pxe_files_load=:default.arm-armadaxp-db:default.arm-armadaxp:default.arm
pxefile_addr_r=3100000
ramdisk_addr_r=2880000
rootpath=/srv/nfs/
run_script=no
sata_delay_reset=0
sata_dma_mode=yes
script_addr_r=3000000
script_name=boot.scr
sd_detection_dat3=no
serverip=192.168.1.254
silent=1
standalone=fsload 0x2000000 $image_name;setenv bootargs $console $nandEcc $mtdparts_lgcy root=/dev/mtdblock0 rw ip=$ipaddr:$serverip$bootargs_end; bootm 0x2000000;
stderr=serial
stdin=serial
stdout=serial
update_both_images=tftpboot $defaultLoadAddr $firmwareName && nand erase $priKernAddr $priFwSize && nand erase $altKernAddr $altFwSize && nand write $defaultLoadAddr $priKernAddr $filesize && nand write $defaultLoadAddr $altKernAddr $filesize
usb0Mode=host
usbActive=0
usbType=2
vxworks_en=no
yuk_ethaddr=00:00:00:EE:51:81

EDIT: Some more details might need to be in order, after looking at the output of the command I ran. Some time ago I had to debrick this device, and appears it may have been flashed with the flat image, I'm not sure if this is the cause of the secondary partition being messed up.. but alas, I'm not sure how to recover from it if it is the cause..

I would try:

  • make manual backup of config
  • upgrade to 19.07.9 with sysupgrade image, not migrating config
  • then flash to 22.03.2 with factory image, not migrating config
  • do not restore config, use it as text file hint for manual setting old values only

other alternative

  • flash and boot the vendor firmware
  • then flash 22.03.2 factory image

make sure you have stock firmware on one partition,
flash factory from stock partition.

You have mixed contents of the boot variables.
boot_part points to the first partition, while bootcmd boots the alternative (second) one.

You are likely actually booting from the second/alternative partition.
(which "cat /proc/mtd" would show to you. )

Same issue as in

I thought that looked weird myself.. here's the output of /proc/cmdline though..

console=ttyS0,115200 root=/dev/mtdblock6

Wouldn't this be the primary part?

Sounds like a possible workflow.

But as OpenWrt sysupgrade uses the boot_part to decide where to write, I think that the current firmware would actually be overwritten. (as bootcmd says partition 1, so flash to 2, but OP is actually running altnandboot = 2 = current)

just show cat /proc/mtd

root@OpenWrt:~# cat /proc/mtd 
dev:    size   erasesize  name
mtd0: 00200000 00020000 "u-boot"
mtd1: 00020000 00020000 "u_env"
mtd2: 00040000 00020000 "s_env"
mtd3: 005c0000 00020000 "unused_area"
mtd4: 00040000 00020000 "devinfo"
mtd5: 07b00000 00020000 "kernel1"
mtd6: 07800000 00020000 "ubi"
mtd7: 07b00000 00020000 "kernel2"
mtd8: 07800000 00020000 "rootfs2"
mtd9: 00100000 00020000 "BBT"

The active roofts should be "ubi", so likely you are running from 1.

Sysupgrade (without settings) to 19.07.x might work.
Then you should have those two u-boot variables again in sync.

I suggest that you sysupgrade to 19.07.10, so that you should have 19.07.9 in the current one and 19.07.10 in the other one. Then you should be able to see if you can successfully run from both partitions.

Finally, due to the kernel size change, you need to later use the factory image (without keeping settings) for upgrading to 22.03.2

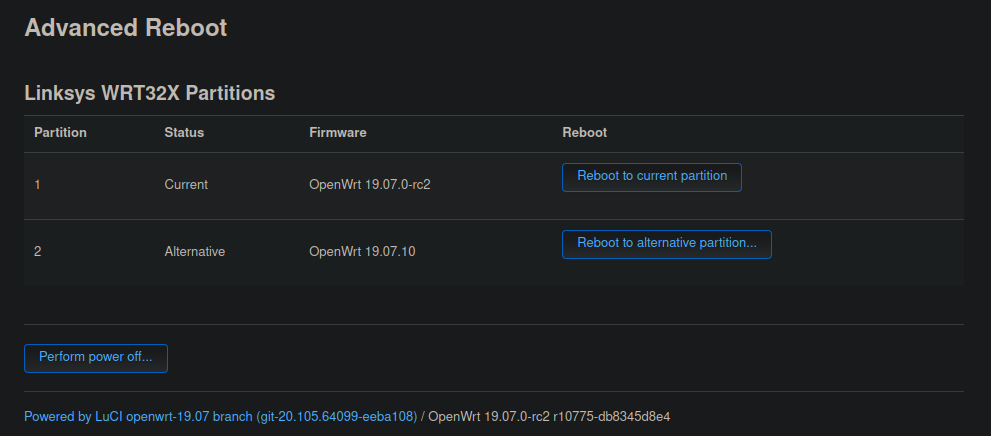
Ps. you might also test luci-app-advanced-reboot to see the versions on the partitions.

Pps.
other option might be to manually aling the bootcmd and boot_part with fw_setenv

Doing a sysupgrade with the factory image of 19.07.10 unfortunately yielded the same results.. The LEDs a show it successfully booting but it's like nothing is installed on the boot partition

Here's what my advanced boot looks like..

Firmware boot details showing the same result as well..

MALLOC_len=5
MPmode=SMP
altFwSize=0x7B00000
altKernAddr=0x8400000
altKernSize=0x0600000
altnandboot=setenv bootargs console=ttyS0,115200 root=/dev/mtdblock8;nand read $defaultLoadAddr $altKernAddr $altKernSize; bootz $defaultLoadAddr 
auto_recovery=yes
autoload=no
baudrate=115200
boot_order=hd_scr usb_scr mmc_scr hd_img usb_img mmc_img pxe net_img net_scr
boot_part=1
boot_part_ready=3
bootargs=console=ttyS0,115200 root=/dev/mtdblock6
bootargs_dflt=$console $nandEcc $mtdparts_lgcy $bootargs_root nfsroot=$serverip:$rootpath ip=$ipaddr:$serverip$bootargs_end $mvNetConfig video=dovefb:lcd0:$lcd0_params clcd.lcd0_enable=$lcd0_enable clcd.lcd_panel=$lcd_panel
bootargs_end=:10.4.50.254:255.255.255.0:Armada38x:eth0:none
bootargs_root=root=/dev/nfs rw
bootcmd="run altnandboot"
bootcmd_auto=stage_boot $boot_order
bootcmd_fdt=tftpboot 0x2000000 $image_name;tftpboot $fdtaddr $fdtfile;setenv bootargs $console $nandEcc $mtdparts $bootargs_root nfsroot=$serverip:$rootpath ip=$ipaddr:$serverip$bootargs_end $mvNetConfig video=dovefb:lcd0:$lcd0_params clcd.lcd0_enable=$lcd0_enable clcd.lcd_panel=$lcd_panel; bootz 0x2000000 - $fdtaddr;
bootcmd_fdt_boot=tftpboot 0x2000000 $image_name; setenv bootargs $console $nandEcc $mtdparts $bootargs_root nfsroot=$serverip:$rootpath ip=$ipaddr:$serverip$bootargs_end $mvNetConfig video=dovefb:lcd0:$lcd0_params clcd.lcd0_enable=$lcd0_enable clcd.lcd_panel=$lcd_panel; bootz 0x2000000 - $fdtaddr;
bootcmd_fdt_edit=tftpboot $fdtaddr $fdtfile; fdt addr $fdtaddr; setenv bootcmd $bootcmd_fdt_boot
bootcmd_lgcy=tftpboot 0x2000000 $image_name;setenv bootargs $console $nandEcc $mtdparts_lgcy $bootargs_root nfsroot=$serverip:$rootpath ip=$ipaddr:$serverip$bootargs_end  video=dovefb:lcd0:$lcd0_params clcd.lcd0_enable=$lcd0_enable clcd.lcd_panel=$lcd_panel;  bootm $loadaddr; 
bootdelay=3
cacheShare=no
console=console=ttyS0,115200
defaultLoadAddr=0x2000000
device_partition=0:1
disaMvPnp=no
eeeEnable=no
enaClockGating=no
enaCpuStream=no
enaFPU=yes
enaMonExt=no
enaWrAllo=no
eth1addr=60:38:E0:C8:E9:28
eth1mtu=1500
eth2addr=60:38:E0:C8:E9:28
eth2mtu=1500
eth3addr=60:38:E0:C8:E9:28
eth3mtu=1500
ethact=egiga0
ethaddr=60:38:E0:C8:E9:28
ethmtu=1500
ethprime=egiga0
fdt_addr=2040000
fdt_skip_update=no
fdtaddr=0x1000000
fdtfile=armada-38x-modular.dtb
fileaddr=2000000
filesize=A3E800
firmwareName=/srv/tftp/flat-FW_WRT32X_1.0.180404.58.img
flash_alt_image=tftpboot $defaultLoadAddr $firmwareName && nand erase $altKernAddr $altFwSize && nand write $defaultLoadAddr $altKernAddr $filesize
flash_pri_image=tftpboot $defaultLoadAddr $firmwareName && nand erase $priKernAddr $priFwSize && nand write $defaultLoadAddr $priKernAddr $filesize
ide_path=/
image_name=uImage
initrd_name=uInitrd
ipaddr=192.168.1.1
kernel_addr_r=2080000
lcd0_enable=0
lcd0_params=640x480-16@60
lcd_panel=0
limit_dram_size=yes
loadaddr=0x02000000
loads_echo=0
mtddevname=uboot
mtddevnum=0
mtdids=nand0=armada-nand
mtdparts=mtdparts=armada-nand:2048K(uboot)ro,128K(u_env),256K(s_env),256K@8064K(devinfo),123m@9m(firmware1),123m@132m(firmware2)
mvNetConfig=mv_net_config=4,(00:50:43:11:11:11,0:1:2:3),mtu=1500
mv_pon_addr=00:50:43:07:ec:00
nandEcc=nfcConfig=4bitecc
nandboot=setenv bootargs console=ttyS0,115200 root=/dev/mtdblock6;nand read $defaultLoadAddr $priKernAddr $priKernSize; bootz $defaultLoadAddr 
netbsd_en=no
netmask=255.255.255.0
netretry=no
partition=nand0,0
pcieTune=no
pexMode=RC
priFwSize=0x7B00000
priKernAddr=0x0900000
priKernSize=0x0600000
pxe_files_load=:default.arm-armadaxp-db:default.arm-armadaxp:default.arm
pxefile_addr_r=3100000
ramdisk_addr_r=2880000
rootpath=/srv/nfs/
run_script=no
sata_delay_reset=0
sata_dma_mode=yes
script_addr_r=3000000
script_name=boot.scr
sd_detection_dat3=no
serverip=192.168.1.254
silent=1
standalone=fsload 0x2000000 $image_name;setenv bootargs $console $nandEcc $mtdparts_lgcy root=/dev/mtdblock0 rw ip=$ipaddr:$serverip$bootargs_end; bootm 0x2000000;
stderr=serial
stdin=serial
stdout=serial
update_both_images=tftpboot $defaultLoadAddr $firmwareName && nand erase $priKernAddr $priFwSize && nand erase $altKernAddr $altFwSize && nand write $defaultLoadAddr $priKernAddr $filesize && nand write $defaultLoadAddr $altKernAddr $filesize
usb0Mode=host
usbActive=0
usbType=2
vxworks_en=no
yuk_ethaddr=00:00:00:EE:51:81
root@OpenWrt:~# cat /proc/mtd 
dev:    size   erasesize  name
mtd0: 00200000 00020000 "u-boot"
mtd1: 00020000 00020000 "u_env"
mtd2: 00040000 00020000 "s_env"
mtd3: 005c0000 00020000 "unused_area"
mtd4: 00040000 00020000 "devinfo"
mtd5: 07b00000 00020000 "kernel1"
mtd6: 07800000 00020000 "ubi"
mtd7: 07b00000 00020000 "kernel2"
mtd8: 07800000 00020000 "rootfs2"
mtd9: 00100000 00020000 "BBT"

flash stock firmware, and then from stock firmware flash the openwrt factory.bin

Ok, I'll give that a shot next and let you know my results.. My intention has sort of been up to this point to keep the 19.07.0-rc2 install around, at least until I can get something stable installed. Would it be ok to flash the stock firmware, boot back into the OpenWRT install that I have, then upgrade from there? Or are we thinking something is just flat out wrong with partition 1 that's causing issues with flashes to partition 2?

from working openwrt firmware flash stock firmware. boot the router with stock firmware, flash openwrt factory.bin. leave one partition on stock firmware, so everytime you ll change openwrt version, you ll flash the new version from stock firmware, always factory.bin

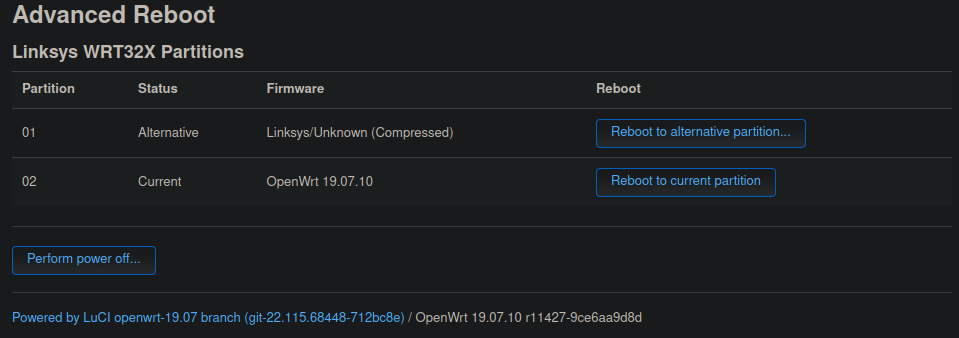
since it shows that 19.7.10 is in the second partition:

when you now try use either luci advanced boot or button powercycle (see w32x wiki, 3x turn off/on), to reboot to partition 2, are you then able, to successfully boot up 19.07.10 ?

1 Like

Ok, so this is kind of embarrassing... for whatever reason when you flash the new firmware on these devices, the wifi interfaces default to disabled. After having hardwired myself to the device and turning them on, everything is fine.. I was able to upgrade to 19.07.10 which is what I'm currently on and is at least a start.. I attempted to upgrade to the latest version with the kernel size update, but it seems to boot loop back to the stock linksys firmware. Haven't done much testing since I was at least able to upgrade to a normal firmware version.. I'll do some more testing to see if I can get on the latest. Thanks all for the assistance with this..

I suppose one last question... when I plan to upgrade to the latest release, am I able to use the upgrade utility in Luci using the factory firmware image of Openwrt? Or should I be flashing the newest release through the stock firmware? Currently my setup is this:

Only ask because it seems to bootloop for me when flashing via the stock firmware..

Thanks again for everyones help

From 19.07.10

in a regular non broken state, flash on any dual partition device starts from the active partition and will overwrite the other inactive partition and will then switch the boot pointer to the other partition.

you can though choose the active partition before you start flashing.

In a regular situation on any device:

  • vendor firmware-> OpenWRT: factory image
  • OpenWRT-> OpenWRT: sysupgrade image, in regular situation
  • OpenWRT-> OpenWRT: factory image, in case where partition changes need to be performed and when the device is supported for this (Linksys WRT* does support, v22 was such are rare case, and you are not supposed to keep setting when doing)

Its more complicated, your case was special, due to the broken boot pointer, this is not the norm.

Basically you had several special challenges:

  • fix the defect partition boot selector pointer, which prevented you to update (that pointer is stored in yet another partition), any combination of 2 successive working flashes on dual boot devices hopefully fixes it.
  • deal with the kernel partition size change, which is a specific task for that device when moving a partition to v22 the first time, mandatory requiring the factory image to be used once per partition
  • deal with DSA switch driver change, this required you not to keep v19-settings (DSA was introduced in v21 for that device)
  • the defect partition pointer was an additional challenge in your case: might have caused the active partition to become flashed in some cases instead of the inactive. So outcome was unpredictable.
  • the alternate partition was in addition likely broken, when you started, so any flash activity was also risking to do changes to the device without having a working fall back partition
  • it was not really clear, how the vendor image would have behaved in that broken pointer situation. You might have ended with 2 broken partitions, then having to deal with a serial connector cable, to revive it.
  • also: coming from 19rc2 probably probably wasnt tested a lot to face the mentioned changes introduced in v21 and v22.

Thats why starting with v19.7.10 was probably the less riskiest activity, to first get the pointer fixed.

Since the pointer is now fixed, dont worry about future updates (unless the pointer gets broken again for reasons unknown to me).

1 Like

Really appreciate your feedback. I'll review and report back.

Thanks all