You don't need an SSD to store few kilobytes of logs and files I'm doing the same for all the network data, collectd, etc... but on a USB3 drive, is more than sufficent.
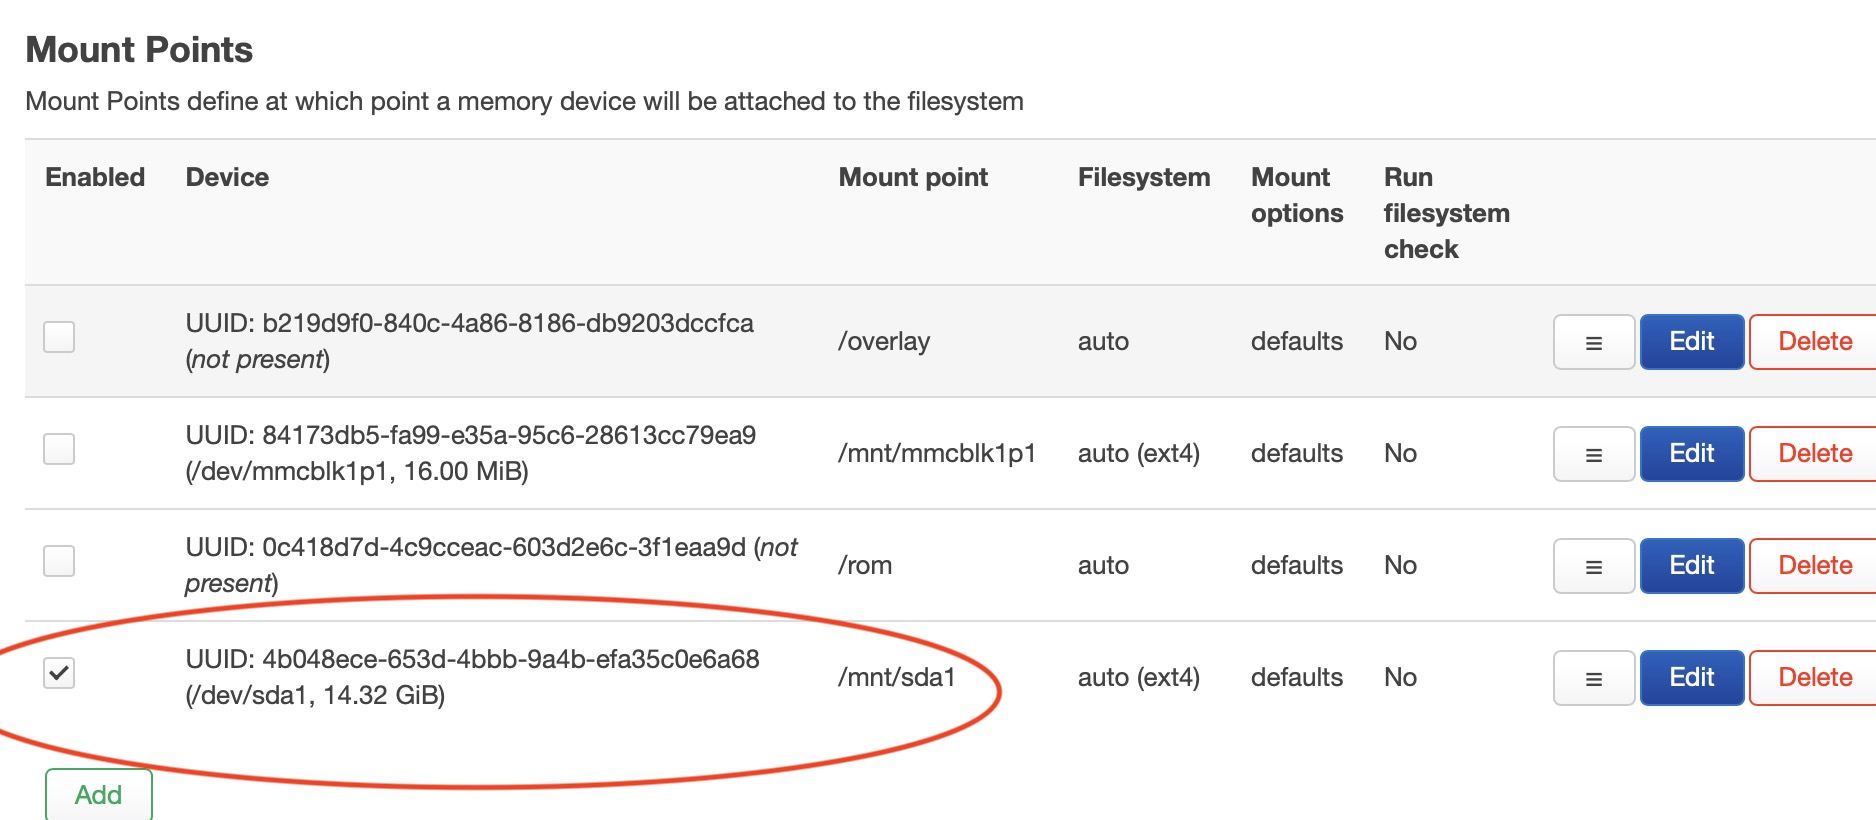
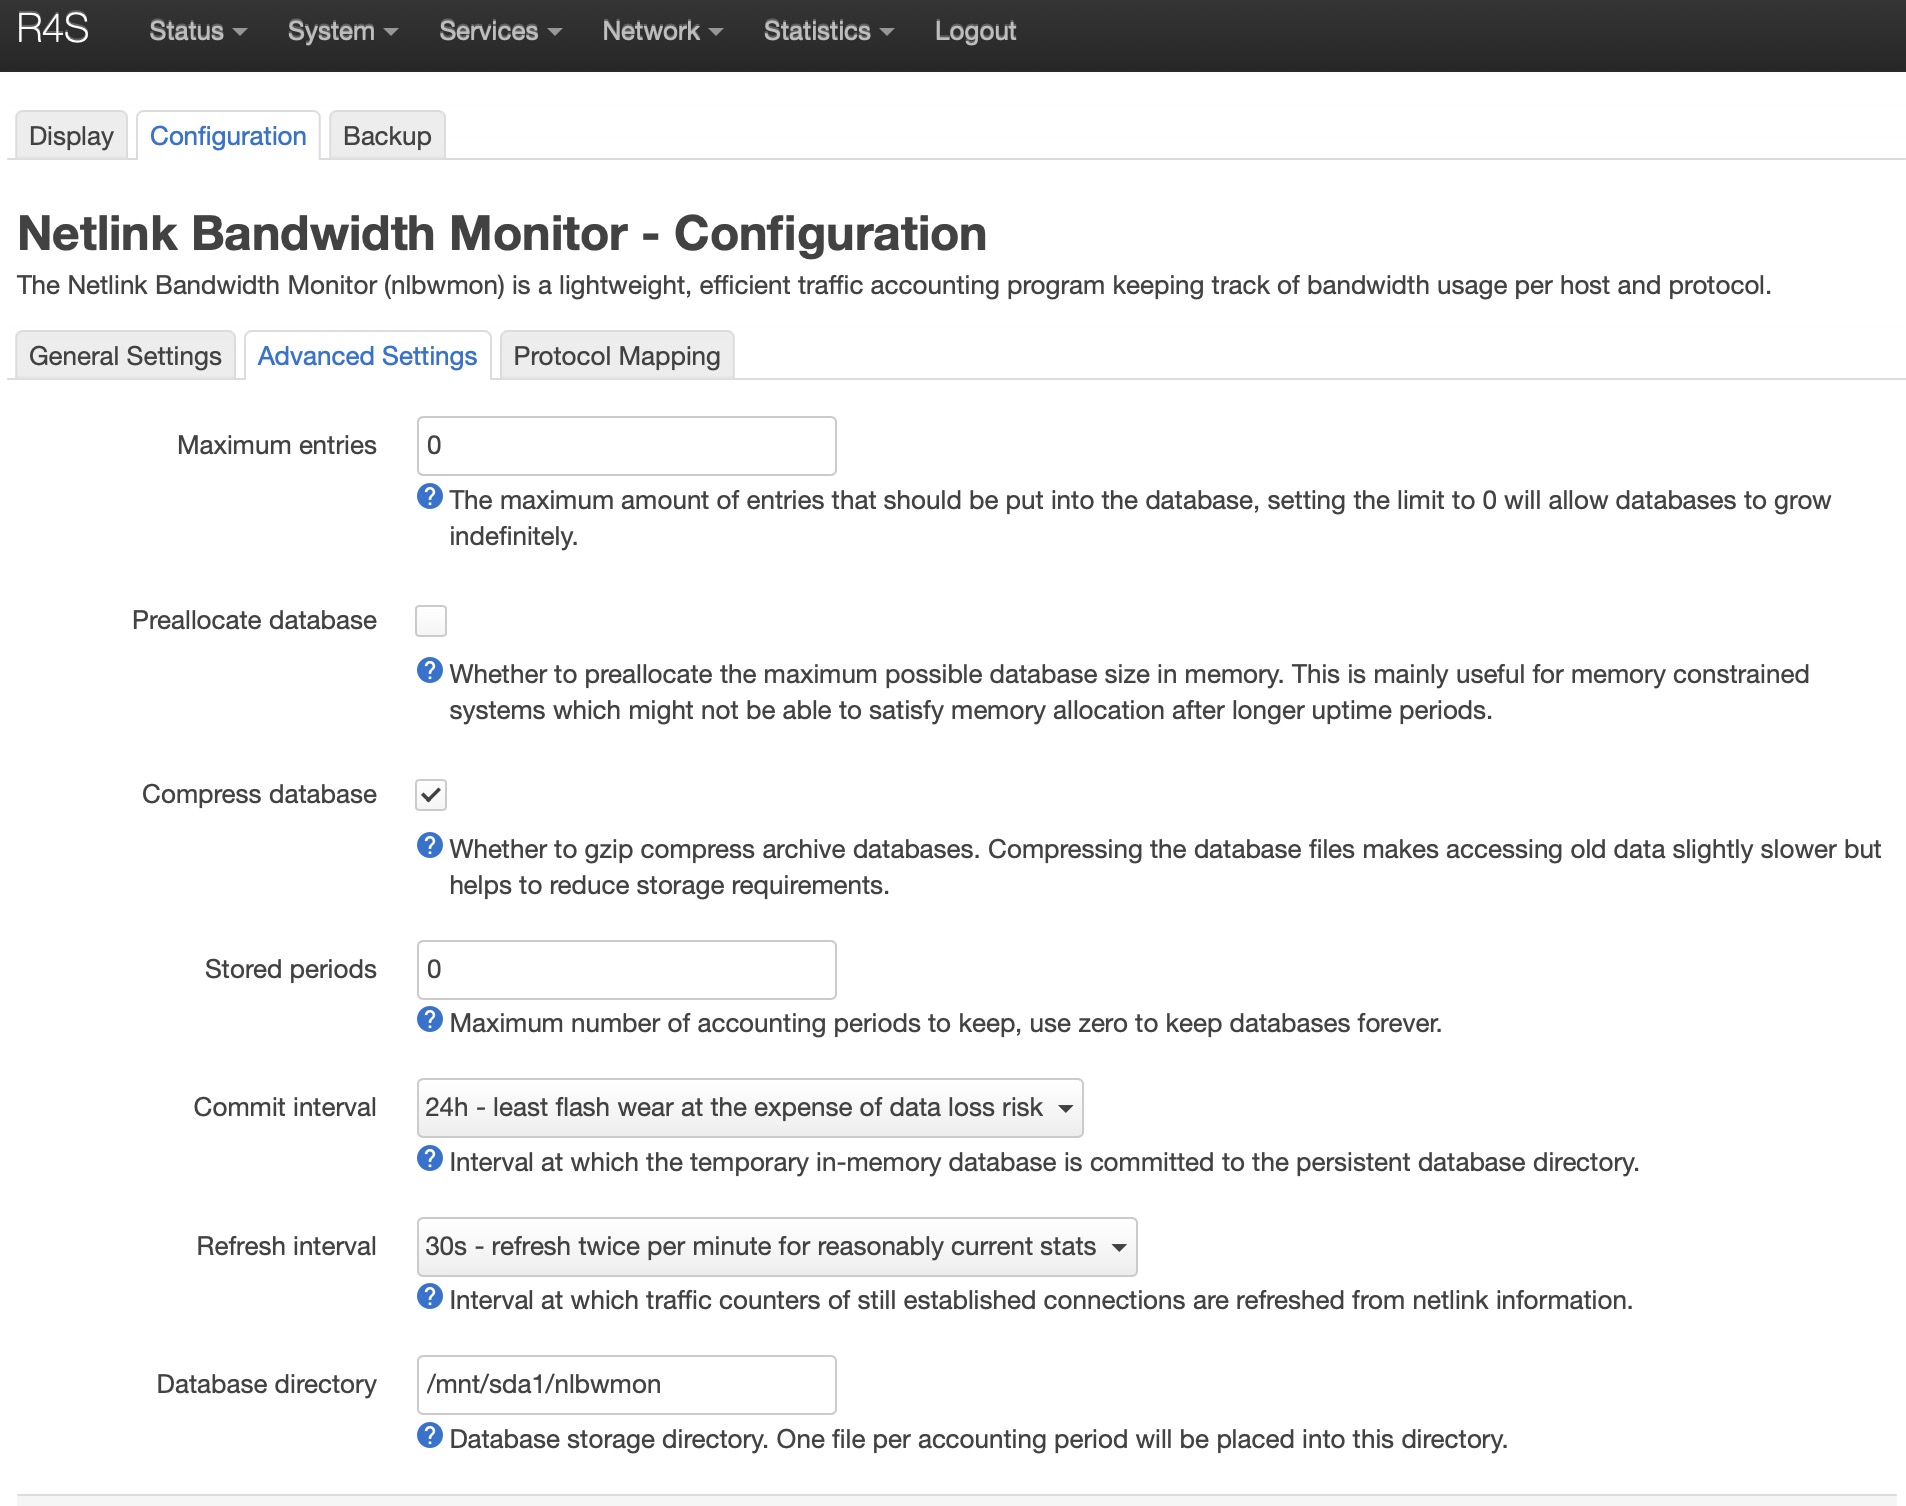
Just use the OpenWrt USB drive tutorial, then check the auto mount of your drive, and configure the collectd, nlbwmon, etc... few clicks from LuCi
Just remember to change the default data period of nlbwmon that reset itself too often, I don't remember which parameter (you know, you make this change one time and then you forgot it, god save the backups)
Yeah, an SSD isn't needed but I have an spare one with 120GB and I'm planning to experiment some heavier things later like docker. And SSDs have wear leveling so it probably will be more reliable than a microSD or USB thumb drive...
Generally speaking is absolutely correct but these logs are really few kb.. (probably 5-10 megabytes per years). these are absolutely not impacting on the wear of the X drive. If you have a spare SSD use it, otherwise any USB drive will be fine
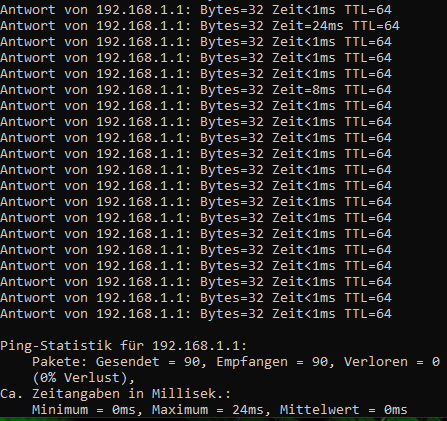
are these ping spikes normal while pinging the r4s ?
Lately i have lags in games maybe thats the problem. Im using OpenWrt 22.03.0 with only qosify installed and my pc is the only device on the internet. I saw THIS POST but i dont know how to set the r4s into high performance mode (with ssh ?).
Hello,
I'm trying to install openspeedtest via docker on the nanopi r4s, however it seems that there is an incompatibility with fw4 nftables, So is anyone using docker on this device with fw4?
Answer: No
Once you update the squashfs firmware, you are back to 100MB space... that's a shame that the firmware, targeted for the 4GB ,doesn't use that space...
I have, in the past, tried to follow this thread and reading that a nanopi r4s 4GB machine is a reasonably good choice for a router I bought 2 (1 for use and a backup).
Now I come to setting up the first one.
I followed
I have the oenwrt-rockchip-armv8-. . . installed on the sd card
How do I get this card so that I can slip it into the sd card slot on the box and then set up my system?
I have a router at 192.168.1.1 already - - - is there an easy way to place this nanopi on something like 192.168.2.1 so there is no conflict?
(I do hope someone out there can help - - - the instructions I have found I followed but I am in limbo and really don't know how to get to home base (a working router).)
Download 22.03.0 squashfs image. Then use something like balena etcher to flash the image to your sd card. Put the sd card into your NanoPi R4S and power it up.
Sure. Disconnect from your router network on 192.168.1.1, then connect the NanoPi Lan port to your computer's ethernet port instead. You should now be able to reach the NanoPi on 192.168.1.1.
Next, change the static IP address of the NanoPi R4S to something on the same subnet (192.168.1.x). For example: 192.168.1.5, but not 192.168.2.x - that is a different subnet. Define your router at 192.168.1.1 as your gateway, and identify a DNS server so your NanoPi can reach the internet. You can do this configuring the network lan interface from a web browser using LuCI, or you can log into your NanoPi via a terminal session (e.g., ssh root@192.168.1.1) and edit the file /etc/config/network on your NanoPi with vi to have the following lines in the lan interface:
option ipaddr '192.168.1.5'
option gateway '192.168.1.1'
list dns '1.1.1.1'
Next power off your Nano Pi. Reconnect to the 192.168.1.1 network on your router. Power on your NanoPi and connect its lan port to a lan port on your router (or computer). Your router will still be 192.168.1.1, and your NanoPi will now be reachable at 192.168.1.5 so it does not conflict with your router at 192.168.1.1. Your NanoPi will also have internet access through your router (the gateway) and via DNS translation provided by Cloudflare (1.1.1.1).
There are other ways to do this, but this should get you started. None of this is NanoPi specific - it's just a matter of learning how to flash OpenWrt to any device that boots from an SD card, and then learning how to configure any OpenWrt device to be reachable through a unique static IP address on your network's lan subnet.
The easiest way is to do a custom build increasing the file system size during the build (option CONFIG_TARGET_ROOTFS_PARTSIZE in .config file, there is also an option for this in make menuconfig UI). I am doing this (squashfs), and the file system increased size is preserved during the upgrade.
I'm using an old 120GB SSD over a USB 3.0 to SATA cable and I couldn't be happier. Not using docker yet but the idea is to have the images stored on the SSD too.
Official image is for general usage. I understand that more specific utilities/roles would be normal to require a little bit more of hands on and manual adjustments. Like the Ubound (recursive DNS) I've included on mine.
You can find more about OpenWRT on SD cards and how to expand the filesystem here:
Because the main target of openwrt ever since it was made, are devices which have very limited storage space and low ram, in other words, all-in-one domestic routers. Routers with a lof of ram and storage space came much later with openwrt support and are not the focus of openwrt.
So if you want to understand how to proper upgrade between openwrt builds(Ex: when there is a new release) without losing settings and etc, and also want to know how to expand the device partitions for more space, then you will need to make an effort to learn on how to do all of that.
One easy way to expand storage space is to use ext4 img instead of squashfs and use gparted to do it, its easy, fast and it works!
Now if you don't have the time or if after a lot of time wasted you still can't understand on how to do all of the above and still wants more storage space, then i suggest that you try friendlywrt! Because friendlywrt uses some scripts that will automatically create another partition on the sd card and will expand said partition on first boot, in other words, you will have the full storage capability of the sd card that you are using available to you automatically and right after the first boot.
In some aspects friendlywrt is more noob friendly than openwrt is.