I have a query I'm new to openwrt I have a litebeam_5ac_gen2 and I want to install openwrt to be able to deactivate the airmax.
but I don't understand these commands, what are they? linux and what tools should I use?
According to the instructions that appear are these:
scp WA.v * .bin root@192.168.1.20: / tmp /
scp openwrt - * - sysupgrade.bin root@192.168.1.20: / tmp /
fwupdate.real -m /tmp/WA.v*.bin & sleep 4; kill $ !; threw out
image = $ (ls /tmp/openwrt-*-sysupgrade.bin)
dd if = $ image of = / dev / mtdblock2 bs = 64K count = 16
dd if = $ image of = / dev / mtdblock3 bs = 64K skip = 16
I can do it in windows and what tools?
Can somebody help me?
You would only need the CLI scp and ssh programs which are included with Windows 10 or any Linux OS.
What those instructions attempt to do (there seem to be a few problems with the details, where did you copy them from?):
Copy an official firmware and an OpenWrt firmware to the devices /tmp directory, which is a RAM disk.
Initiate an official update with the official firmware, but kill it 4 seconds later. This leaves the flash chip unlocked after the fwupdate.real program has checked the signature of the official firmware and started flashing.
Copy the OpenWrt firmware directly to the flash chip in two pieces.
It looks good on the page but there are some steps that have been left out which would not be apparent to the rank beginner. I'm not going to edit the wiki though since I don't have that hardware so have not done the install myself to confirm it works.
After downloading the two firmwares (it would be good to use exactly 8.7 as the stock firmware, rather than trying something untested), disconnect the PC from all wired and wifi networks and connect the Ethernet port to the LiteBeam through the PoE injector. Set the PC port static IP ("Use this IP address") to 192.168.1.10 with a netmask of 255.255.255.0. You can leave gateway and DNS unset.
(Step 2) Log in to the Ubiquiti web interface (http://192.168.1.20) and upgrade the firmware.
Open a Command Prompt (not Administrator) to run scp and ssh in the next steps. Change to your Downloads directory where the firmware files are.
In steps 3 and 4 replace the text containing * with the actual name of the file. You should see a status line with the number of MB transferred by scp.
After finishing step 4, log into the router with SSH (ssh root@192.168.1.20) and execute all the remaining steps on the router CLI via the SSH window.
The second install process with bootloader serial + TFTP is impractical because the unit is glued shut. You would have to crack the case open to reach the internal serial port, and then thoroughly re-glue it if you're going to use the unit outdoors.
However like all Ubiquiti products if you end up with a brick it should be possible to use their standard TFTP recovery.
TFTP recovery only works with stock firmware. It is not possible to install OpenWrt via TFTP recovery.
Configure PC with static IP as above. Open a Command Prompt and change directory to where the stock firmware file is located.
Hold down the reset button while connecting the power to the router. Keep holding until the LEDs blink repeatedly back and forth.
Send file via tftp: tftp -i 192.168.1.20 PUT WA* again replace * with the rest of the real file name.
If you get 'tftp is not recognized as an internal command...' go to the Control Panel, Programs, Add / Remove Windows Features, find TFTP Client in the list, and check the box to activate it.
If transfer fails cut the power off to the router, reset it and try again. Transfer must be started within about 20 seconds after the LEDs start flashing. The LEDs will continue to flash indefinitely but the TFTP server in the router stops.
Thank you very much mike for your great help I performed the procedure but I stay this way and I don't even have web interfaces to access the equipment
What should I do now at this point to access the computer's web interface?
I thank you in advance for your great help.
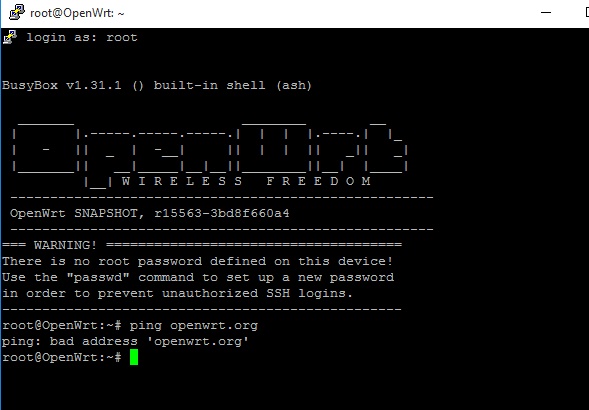
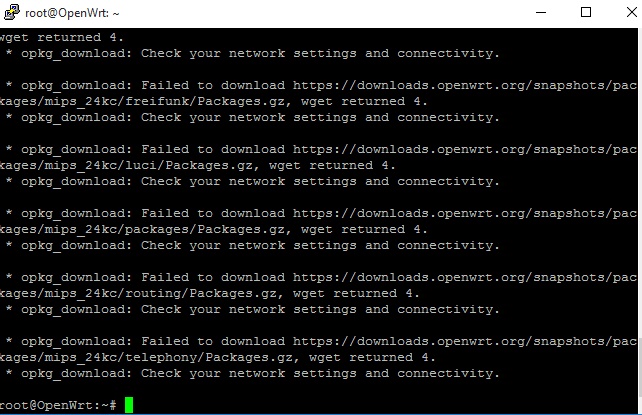
Thanks for your answer but I cannot install web access (LuCI web), the device is already configured and has internet access but when trying to execute: opkg update I have this error Operation Not Permitted
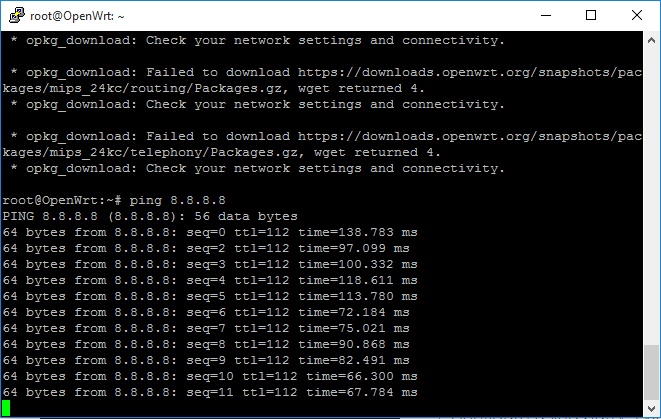
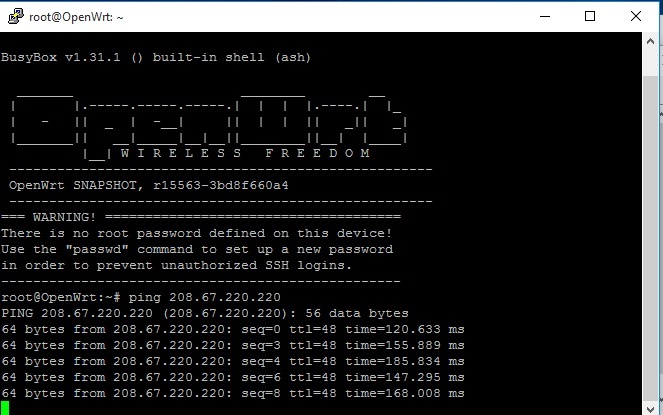
My point was to enter the name of a site instead of a numeric address to confirm that name resolution works.
root@Edgerouter-X:~# ping openwrt.org
PING openwrt.org (139.59.209.225): 56 data bytes
64 bytes from 139.59.209.225: seq=0 ttl=43 time=160.274 ms
64 bytes from 139.59.209.225: seq=1 ttl=43 time=299.124 ms
64 bytes from 139.59.209.225: seq=2 ttl=43 time=210.919 ms
 I use dhcp this is my configuration