I've made a 5 page PDF Guide, mostly photos, on how to get easy serial access - no soldering - to the bthh5a. Flashing OpenWRT (Lede) firmware is greatly simplified. These excellent routers are available in the UK at very low cost and in very large numbers. Open Source support is excellent and performance has improved recently with SMP enabled by default in Trunk. I hope more folk will give it a go. Good Luck!
fwiw, it may be worth mentioning there are quite a lot of capacitors on the PCB.
I've observed on one occasion over a year ago when I tried to flash my first HH5A, when the solder pads labelled C369 (to the right of R77) were covered with a double-sided self-adhesive sticky foam pad, my hub would not boot. It may be because of the chemical composition of the adhesive in the tape caused a short circuit or changed the capacitance.
I had thought about just electrical taping to the pads myself but I figured it could be risky as any slight error during flashing and you potentially bricked the router.
I did rip off a pad on my first attempt, fortunately it was the boot select and I realised you don't even need to solder that anyway as it only needs to be held ground for a second as you turn the power on, touching the ground wire onto the resistor during power on is easy.
@bill888, the soldering solution is very risky. I've trashed a couple of boards over the past 15 months using that method.
I agree it is sensible to use a masking material that is relatively non-stick IF you need to remove the masking material afterwards. Is there any need to do that?
@alexatkinuk, I think you misunderstand the process. There is NO flashing via serial and thus NO risk. The serial connection is use to:
load u-boot from a PC to the bthh5a RAM,
load an initial firmware image to the bthh5a RAM.
The actual flashing is done using sysupgrade when the initial image boots and that involved flashing an image from a USB stick to NAND. You do not need a connection serial to do that.
I was thinking more that if the wires came loose/slipped they could short something out causing a crash in the middle of flashing.
I guess you have to weigh up the chance of messing up the soldering. I have done two and only messed up one pad, despite being absolutely awful at soldering with shaky hands.
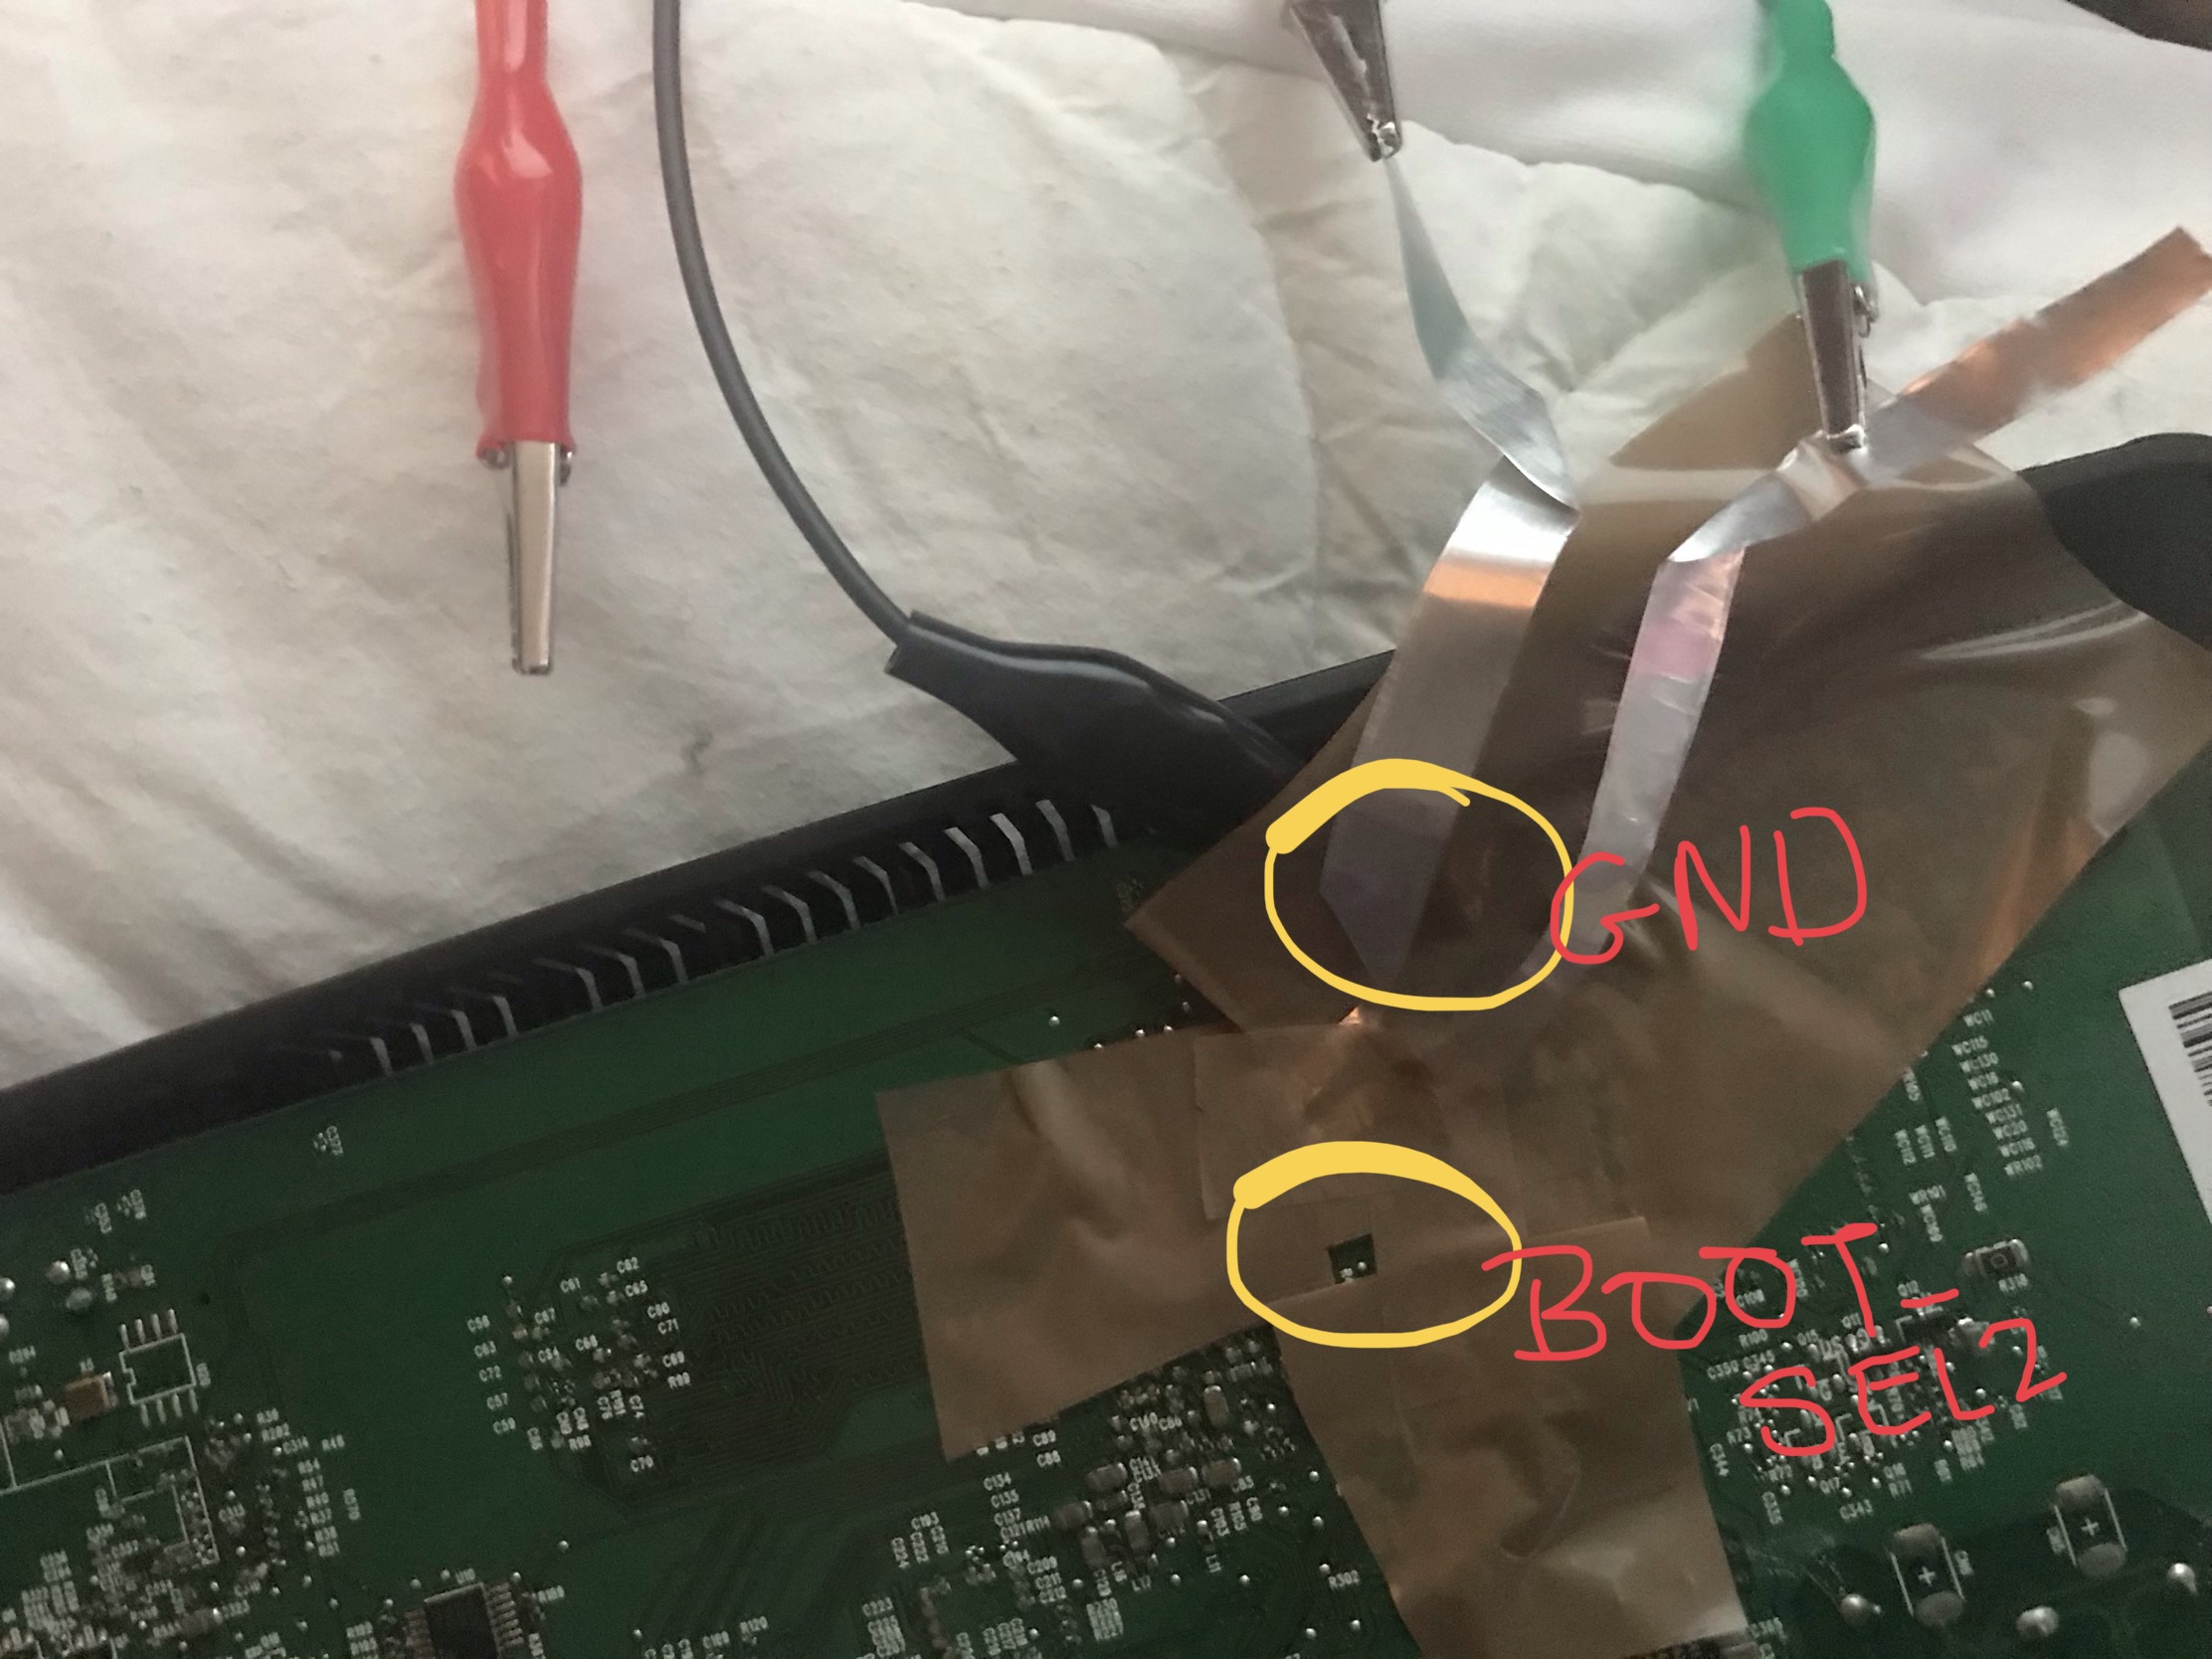
I’m a complete newbie when it comes to electronics, so right after I open the putty session the installation guide it says “ Short the boot-sel2 pin to the Ground” how exactly do you do that? And the power cable should not be connected also to the bthub right?
This is how you connect the boot_sel to the ground:
Keep the router off and connect the ground and boot_sel together
Turn on the router and look for the boot prompt in the putty window. If successful then break the boot_sel connection immediately because it may damage the board if connected for too long.
That's it. You can proceed further as the wiki says.
Ok so would I connect a second crocodile clip to the one that is already attached to the ground or do I disconnect the black clip that’s already connected in the image I’ve posted?
Not worth the effort and risk. I bought a flashed router from ebay for £19 and it works great. I upgraded it to new version of openwrt with LuCI GUI without any problem. The seller also offer very good setup guide and support.
This model is far better comparing to MTK7620/7621A ones and still not out of the date.
I've flashed three hubs, the first twice as it needed reverting to stock for more recent firmware.
Soldered the first, but accidentally broke one of my wires off and was lucky not to peel a track as well so I used a modified keystone jack which worked really well and I since found out is a popular hack to connect to PCBs. Not as good as a custom made jig using pogo pins of course.