Hi, i got mine some days ago.
Just made a way to use the snapshot version, not the 21.02, from BananaPi.
- Download the latest Snapshot version (i made a custom image from some openwrt online services, with Luci, and other tools).
- Burn the SD image - Use the SD image, Burn it to sd using your favorite software. (This will be your emmc firmware).
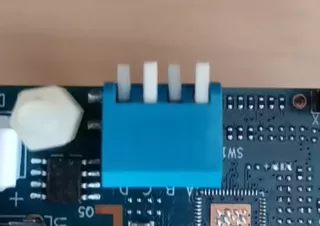
3. Set jumpers to Boot SD - Put sd into BPI-R3. use the Jumpers all HIGH, for booting from sd.
 .
.
4. Copy the SD content to NAND.
After booting go to SSH.
Copy to NAND:
fw_setenv bootcmd "run ubi_init ; env default bootcmd ; saveenv ; reset"
reboot
ATENTION: Change Jumper PINS only after the reboot! The copy will be made on next boot and you still need to be on NAND.
5.BOOT FROM NAND - After the reboot, turn off, and change the JUMPERS to this:
At this time you can remove the SD.
6. Copy from NAND to emmc: After booting From nand, do a SSH login, and use:
fw_setenv bootcmd "run emmc_init ; env default bootcmd ; saveenv ; saveenv ; reset"
reboot
ATENTION: Dont change the jumpers before a new boot, the content will be copied on next boot.
7. Boot from emmc. After the reboot, turn off the BPI-R3, and change the jumpers to boot from emmc:

Done, you have now a fresh SNAPSHOT install, without needing the 21.02 version, wich is opkg broken now.
No need of a console cable.
Credits to Daniel Golle
References:
https://wiki.banana-pi.org/Getting_Started_with_BPI-R3#How_to_burn_image_to_SD_card